How to Reduce Thread Breakage When Quilting?
On this page (9 sections)
- Stopping Thread Breakage in Your Quilting Projects
- The Mighty Needle: Your First Line of Defense
- Mastering Thread Tension: The Balancing Act
- Choosing Quality Quilting Thread
- The Role of Your Presser Foot
- Machine Maintenance and Cleanliness
- Quick Checklist for Preventing Thread Breakage
- Conclusion
- Frequently Asked Questions
Reducing thread breakage when quilting is possible with a few key adjustments. You can significantly minimize frustrating thread snaps by ensuring your sewing machine is properly set up and using the right supplies. We found that focusing on needle sharpness and appropriate thread tension are top priorities.
Thread breakage can halt your creative flow and lead to costly delays. Many quilters experience this issue and search for solutions. Understanding the role of your machine’s presser foot and the quality of your thread can make a big difference. This is about making your quilting journey smoother and more enjoyable.
- Check your sewing machine’s needle.
- Adjust thread tension correctly.
- Use high-quality quilting thread.
- Ensure your presser foot is set right.
Let’s walk through exactly how to tackle thread breakage and keep your quilting projects moving forward smoothly.
Stopping Thread Breakage in Your Quilting Projects
Thread breakage can feel like a tiny, persistent gremlin in your sewing machine. It stops your creative flow and can be incredibly frustrating. Fortunately, you can take steps to prevent thread snaps. We found that focusing on your sewing machine’s setup is key.
Many quilters experience this problem. It’s a common hurdle that can be overcome with a little know-how. Let’s look at what causes thread breaks and how you can fix them. You’ll be quilting smoothly in no time.
The Mighty Needle: Your First Line of Defense
Your sewing machine’s needle plays a starring role in preventing thread breakage. A dull or damaged needle can shred your thread. This leads to frustrating snaps that halt your progress. Think of your needle like a sharp knife; it needs to be pristine to cut through fabric cleanly.
Choosing the Right Needle for Your Fabric
Using the correct needle type is just as important as keeping it sharp. Different fabrics and threads require different needles. For quilting cottons, a universal needle often works well. If you’re working with a denser fabric or specialty thread, you might need a different type. We found that most quilting experts recommend a size 80/12 or 90/14 needle for general quilting cottons.
For finer threads or delicate fabrics, a smaller needle might be better. A needle that is too large can create a bigger hole. This can weaken the fabric and cause friction. Conversely, a needle that’s too small might not handle your thread properly. This can also lead to breakage.
When to Change Your Needle
Needles aren’t meant to last forever. They can become dull or bent over time. Many quilters recommend changing your needle after every 6-8 quilting projects. You might even need to change it more often if you’re quilting dense materials. A quick test is to stitch on a scrap piece of fabric. If you hear a “ticking” sound, the needle might be dull.
A bent needle can also cause issues. It might skip stitches or catch on the fabric. Always visually inspect your needle before you start. A slightly bent needle can lead to the thread getting snagged. This is a common cause of thread breakage, according to sewing machine manuals.
Mastering Thread Tension: The Balancing Act
Thread tension is where many quilters find their biggest challenges. Your sewing machine uses two threads: one from the top spool and one from the bobbin. They need to meet in the middle of the fabric. This creates a balanced stitch. If the tension is off, it can cause problems, including thread breakage.
Understanding Top Tension
The top tension dial controls how tightly the upper thread is pulled. If this tension is too tight, it can pull the bobbin thread too hard. This can cause the upper thread to snap. You’ll often see the bobbin thread showing on the top of your fabric if the top tension is too high.
Conversely, if the top tension is too loose, you might see the upper thread showing on the back of your fabric. We found that many common thread breakages happen when the top tension is set too high. It’s often the first place to check.
Understanding Bobbin Tension
The bobbin tension is usually adjusted less often than the top tension. It controls how easily the bobbin thread unwinds. If the bobbin tension is too tight, the bobbin thread might not feed smoothly. This can cause the top thread to pull too hard and break. You might notice loops or puckering on the underside of your quilt.
Most sewing machines have a small screw on the bobbin case. Adjusting this screw affects the tension. It’s a delicate process. We found that making very small adjustments is best. A quarter turn can make a big difference.
How to Test Your Tension
The best way to test your tension is to do a test stitch on a scrap piece of your quilting fabric. Use your regular quilting thread. Stitch a few lines, varying the stitch length and speed. Check the stitches on both the top and bottom of the fabric. The stitches should look even and neat on both sides.
If the top thread is breaking, try reducing the top tension slightly. If the bobbin thread is breaking, you might need to check the bobbin tension or the path of the top thread. Many sewing machine repair guides suggest checking the entire thread path for snags first.
Choosing Quality Quilting Thread
Not all threads are created equal, especially for quilting. Using cheap or unsuitable thread is a fast track to thread breakage. High-quality quilting thread is designed to withstand the stress of long-arm quilting machines and dense fabrics.
Types of Quilting Thread
Cotton thread is a popular choice for quilters. It has a nice matte finish and good strength. Polyester thread is also strong and can be used. For specific effects, you might use silk or metallic threads, but these often require special needles and careful tension settings.
We found that 100% cotton thread in a medium weight (like 40wt) is often recommended for general quilting. It balances strength with a good look. If you are quilting with a very fine needle, you might use a finer thread (like 50wt or 60wt).
What to Avoid
Avoid using basic all-purpose sewing thread for quilting. This thread is often weaker and can break easily under the stress of quilting stitches. Also, be wary of threads that seem fuzzy or have inconsistencies. These can catch and break. If your thread looks like it’s shedding or breaking down, it’s time for a new spool.
Experts at sewing machine manufacturers often advise against using threads that have a lot of lint. Excessive lint can build up in your machine. This can cause tension problems and lead to thread breakage. Using a good quality thread from a reputable brand can save you a lot of headaches.
The Role of Your Presser Foot
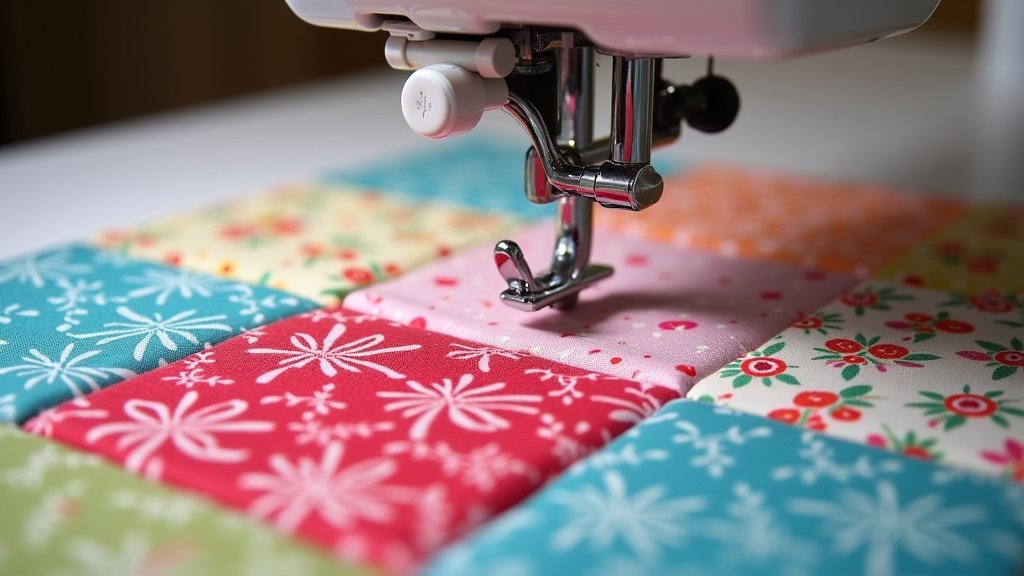
The presser foot holds your fabric in place as you sew. Its condition and type can influence thread breakage. A damaged or improperly adjusted presser foot can create uneven pressure. This can stress your thread.
Ensuring Proper Presser Foot Contact
Your presser foot should make even contact with the fabric. If it’s tilted or not pressing down firmly, it can cause the fabric to shift. This can lead to skipped stitches or thread catching. Make sure your presser foot is securely attached to your machine. Check that it’s not bent or damaged.
When you are quilting, especially over thicker areas like seams, the presser foot might lift slightly. This is normal. However, if it’s consistently uneven, it could be an issue. We found that some quilters use a seam guide or a hump jumper to help navigate thick seams.
Using the Right Presser Foot
Different quilting techniques might require different presser feet. For free-motion quilting, you’ll typically use a darning foot or a special free-motion foot. These feet have springs that allow the fabric to move freely. Make sure this foot is set to the correct height and tension for your machine.
If you’re doing straight-line quilting with a walking foot, ensure it’s properly attached. A walking foot helps feed multiple layers of fabric evenly. If it’s not installed correctly, it can cause drag. This drag can put undue stress on your thread, leading to breakage.
Machine Maintenance and Cleanliness
A clean and well-maintained sewing machine is less likely to cause thread issues. Lint and dust can build up inside your machine. This buildup can interfere with thread movement and tension.
Regular Cleaning of Your Machine
Clean your sewing machine regularly, especially around the bobbin area and feed dogs. Use a small brush to remove lint. Many sewing machine manuals suggest cleaning after every few projects. A buildup of lint can cause threads to snag.
We found that a can of compressed air can be very useful for blowing out dust and lint from hard-to-reach areas. Just be sure to hold the can upright. Also, be careful not to blow the lint deeper into the machine. A clean machine runs smoother and causes fewer thread problems.
Lubrication and Servicing
Proper lubrication is also important for smooth machine operation. Consult your sewing machine manual for recommended lubrication points. If your machine seems to be running rough or making new noises, it might be time for a professional servicing. A well-oiled machine helps everything move freely.
Regular servicing by a qualified technician can catch potential problems before they lead to broken threads. They can ensure all moving parts are working correctly. This is a good investment for any serious quilter. It helps keep your machine in top shape.
Quick Checklist for Preventing Thread Breakage
Here’s a quick rundown to keep your quilting smooth:
- Check your needle: Is it sharp, straight, and the correct size?
- Inspect your thread: Is it high quality and appropriate for quilting?
- Test your tension: Do a sample stitch on your quilt sandwich.
- Clean your machine: Remove lint from the bobbin area and feed dogs.
- Ensure your presser foot is secure and the right type.
- Re-thread your machine: Sometimes, simply re-threading can fix a minor issue.
Conclusion
You’ve learned that thread breakage doesn’t have to be a constant battle in your quilting journey. By paying close attention to your sewing machine’s needle, mastering thread tension, and choosing quality materials, you can dramatically reduce those frustrating snaps. We found that a well-maintained machine and the right presser foot also play vital roles. Your goal is a smooth, enjoyable quilting experience. As a next step, commit to regularly checking your needle and cleaning your machine before each quilting session.
Frequently Asked Questions
How often should I really be changing my sewing machine needle when quilting?
We recommend changing your needle after every 6-8 quilting projects. If you’re working with very dense fabrics or thick batting, you might need to change it even more often. A dull needle is a primary cause of thread breakage, so it’s worth replacing regularly.
What’s the most common mistake quilters make with thread tension?
Many quilters set the top tension too high. This can pull the bobbin thread too tightly, causing the upper thread to snap. We found that starting with a medium tension setting and adjusting incrementally based on test stitches is usually best.
Can the type of thread really cause breakage, even if it’s a good brand?
Yes, absolutely. Using basic all-purpose sewing thread for quilting is a common mistake. Quilting thread is made to be stronger and more durable for multiple layers of fabric. Some specialty threads, like metallics, can also be prone to breakage if not used with the correct needle and tension.
My machine keeps breaking thread over thick seams. What can I do?
Thick seams can cause the presser foot to lift unevenly, stressing the thread. Ensure your presser foot is making even contact. Some quilters find using a “hump jumper” or seam guide helps the presser foot glide over these thicker areas more smoothly, preventing thread snags.
Is it possible that my bobbin thread is causing the upper thread to break?
It’s less common, but yes, a bobbin tension that is too tight can cause issues. If the bobbin thread doesn’t feed smoothly, the upper thread has to pull harder to compensate, which can lead to breakage. Always check your bobbin area for lint buildup and ensure the bobbin tension is correctly balanced with the top tension.