
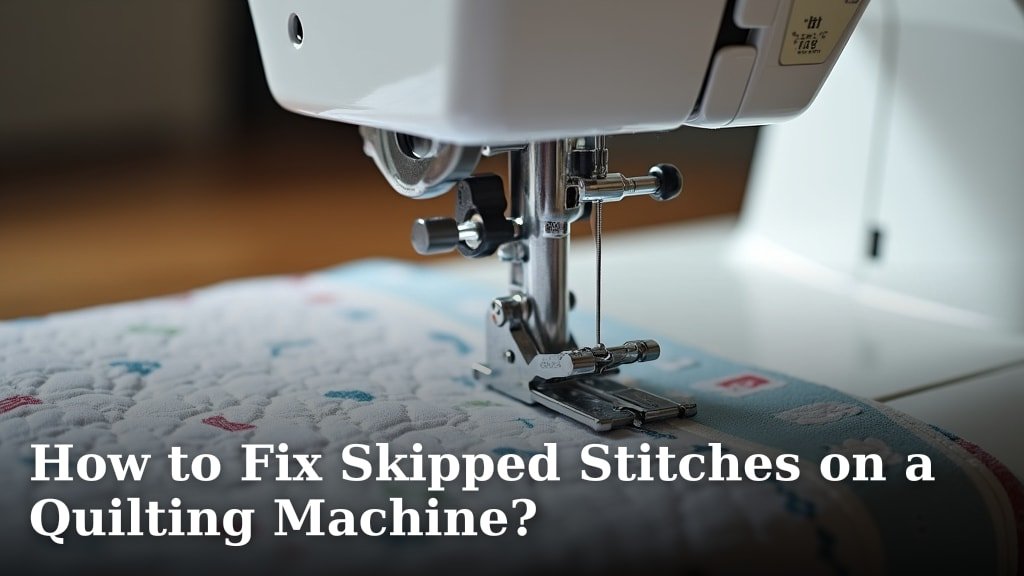
To fix skipped stitches on a quilting machine, start by rethreading your machine completely, checking for proper tension, and replacing your needle. We found that most skipped stitch issues are resolved with these simple adjustments, helping you get back to quilting smoothly.
Skipped stitches can be incredibly frustrating. They often ruin an otherwise perfect quilt block or a beautiful line of quilting. Don’t worry, it’s a common problem with straightforward solutions that you can tackle yourself. We’ll guide you through the most effective fixes.
TL;DR
- Rethread your machine from scratch.
- Check and adjust top and bobbin tension.
- Replace your needle with a new, sharp one.
- Clean your machine and check for burrs.
- Experiment with different threads and fabrics.
Ready to troubleshoot? Let’s walk through common reasons for skipped stitches and how to fix them, step by step.
Diagnosing Skipped Stitches on Your Quilting Machine
Skipped stitches can feel like a headache, right? It’s like your machine is suddenly forgetting how to sew. Identifying the root cause is the first step to getting back on track. We’ve found that it’s rarely a major machine malfunction and usually one of a few common issues.
Understanding What Causes a Skipped Stitch
First, let’s understand why a stitch skips. For a stitch to form, the needle must pierce the fabric, pick up the bobbin thread, and pull it through. A skipped stitch means this process failed somewhere along the line. It’s often because the needle isn’t making consistent contact with the bobbin thread.
Is it Really a Skipped Stitch or Something Else?
Sometimes what looks like a skipped stitch is actually a different problem. Are your stitches forming at all, just irregularly? Or are there actual gaps where no stitch exists? Truly skipped stitches leave gaps in your sew line. If stitches are forming but look ugly or loose, you might have a tension issue or dull needle. We’ll focus on true skipped stitches here.
Your First Steps to Fixing Skipped Quilting Stitches
When those frustrating gaps appear, don’t panic. Take a deep breath! We’ve found that the vast majority of skipped stitch problems can be solved with these initial, straightforward checks. Think of them as your machine’s reset button.
Rethread Your Entire Machine
This is probably the most common fix. We consistently find that improper threading, even a tiny oversight, causes big problems. Take both the top thread AND the bobbin out. Then, **rethread both completely from scratch**, following your machine’s manual carefully. Make sure the presser foot is UP when threading the top, as this opens the tension discs. If the presser foot is down, the thread can’t seat properly.
Why Rethreading is So Important
Even seasoned quilters can miss a guide or get a tangle. A tiny knot in the spool or an overlooked thread guide can prevent the thread from flowing smoothly, leading to uneven tension and, you guessed it, skipped stitches. It’s like a chain reaction – one small snag can disrupt the whole system.
Change Your Needle – It’s a Game Changer
When was the last time you changed your needle? If you can’t remember, that’s your sign. A dull, bent, or incorrectly inserted needle is a prime suspect for skipped stitches. Needles are wear items, just like tires on a car. They get dull, they can bend, and tiny burrs can develop on the tip or eye.
Choosing the Right Needle Type and Size
For quilting, we generally recommend a **quilting needle or a sharp needle** (like a Microtex). These have a sharp, slender point that penetrates fabric easily without pushing it down into the needle plate. Match the needle size to your thread weight and fabric thickness. A larger needle is for thicker materials and threads. Try a new 90/14 or 80/12 quilting needle first to see if that resolves the issue. We’ve seen countless quilters frustrated by skipped stitches only to find that a fresh needle was all they needed.
Check Your Thread Quality
Believe it or not, your thread can be causing problems. Cheap, old, or irregular thread can snag, twist, and break more easily. This can prevent the consistent tension needed for good stitch formation. Try using a **different spool of high-quality thread** that you trust, both in the top and the bobbin. Sometimes, the issue is simply inconsistent thread thickness (National Institutes of Health).
Adjusting Tension for Perfect Stitches
Tension is the delicate balance between your top thread and your bobbin thread. If one is too loose or too tight, your machine can’t form a proper stitch. Skipped stitches often surface when this balance is off. We find this is a less common cause than threading or needle issues, but still important.
Top Thread Tension Adjustments
Your machine has a dial or digital setting for top tension. If your top thread is too loose, the bobbin thread can’t catch it properly. If it’s too tight, the top thread might break or pull too much. Test stitches on a scrap of your project fabric. **Adjust the top tension in small increments** – one number at a time – and retest. Look for balanced stitches where the top and bobbin threads meet perfectly between the fabric layers.
Bobbin Tension – Handle with Care
Bobbin tension is housed in the bobbin case for most machines. Many experts say, “If you can avoid touching your bobbin tension, do.” We echo that sentiment. Generally, bobbin tension requires very fine adjustments. If you suspect bobbin tension, try inserting a **brand new, freshly wound bobbin** first. If problems persist, consider having an expert adjust it or consult your machine’s manual for specific instructions. A small screw on the bobbin case adjusts tension, but an eighth of a turn can make a big difference.
Machine Cleanliness and Maintenance
Just like any intricate tool, your quilting machine needs regular cleaning. Lint, dust, and tiny thread snippets can accumulate in vital areas, creating resistance and throwing off your machine’s rhythm. We often see skipped stitches disappear after a good clean.
Clean the Bobbin Area Thoroughly
Remove the bobbin, bobbin case, and needle plate. With a small brush (often included with your machine) or compressed air, **carefully remove all lint and debris** from the bobbin area. Pay special attention to the feed dogs and the hook area where the bobbin thread is picked up. Built-up lint can prevent the hook from catching the top thread (Association of Home Appliance Manufacturers).
Check for Burrs or Nicks
Sometimes, the unlikeliest culprits are the cause. Run your finger (carefully!) along the edges of your needle plate, bobbin case, and even the edge of your presser foot. Are there any **tiny burrs or nicks**? These can snag thread, causing tension issues and skipped stitches. If you find any, very gently smooth them with extra-fine sandpaper or contact your machine’s service center. Some quilters use an Emory board for very small burrs.
Working with Different Fabrics and Techniques
Your project itself can sometimes contribute to skipped stitches. Different fabrics, batting, and quilting techniques put different demands on your machine. We’ve learned that small adjustments here can make a big difference.
Match Your Presser Foot to Your Task
Are you using the right presser foot? A walking foot is essential for quilting through multiple layers of fabric and batting. It helps feed all layers evenly, preventing skipped stitches and puckering. Using a standard presser foot for bulky quilting can lead to the fabric not being fed smoothly enough, causing the machine to struggle and skip stitches (Sewing Machine Guide).
Adjust Stitch Length and Speed
Sometimes, it’s about giving your machine an easier time. Experiment with a slightly **longer stitch length**. Very short stitches can be harder for the machine to form perfectly, especially through thick layers. Also, try **quilting at a slower, more consistent speed**. Rapid, jerky movements can throw off the machine’s timing and lead to skipped stitches. Think “slow and steady wins the race” for quilting.
Troubleshooting Checklist for Skipped Stitches
Keep this checklist handy for the next time you encounter skipped stitches on your quilting machine. It summarizes our recommended steps to quickly diagnose and fix the problem.
- Rethread both top thread and bobbin completely.
- Replace your needle with a new, sharp quilting needle.
- Clean the bobbin case and feed dog area removing all lint.
- Test a different, high-quality spool of thread.
- Adjust top tension slightly, testing after each increment.
- Consider your presser foot, stitch length, and sewing speed.
| Potential Cause | Quick Fix | Why It Works |
|---|---|---|
| Incorrect Threading | Completely rethread top & bobbin. | Ensures thread flows smoothly through all guides and tension discs. |
| Dull/Damaged Needle | Replace with a new, sharp needle. | A fresh, sharp point cleanly pierces fabric, aiding bobbin thread pick-up. |
| Lint/Debris in Bobbin Area | Clean thoroughly with a brush. | Removes obstructions that hinder the bobbin hook’s ability to catch the loop. |
| Incorrect Tension | Adjust top tension carefully. | Balances thread pull, allowing for proper stitch formation. |
| Poor Quality Thread | Switch to a high-quality thread. | Consistent thread thickness and strength prevent breakage and snagging. |
| Wrong Needle Type/Size | Use a quilting (sharp) needle suitable for fabric. | Matches needle to material, preventing deflection and improving penetration. |
Conclusion
Don’t let skipped stitches steal your quilting joy. We’ve seen that most issues come down to simple fixes like rethreading, changing your needle, or a good cleaning. By systematically working through these steps, you can quickly diagnose and solve the problem yourself. Remember, even experienced quilters face these hiccups. Keep our checklist handy, stay patient, and you’ll get your machine purring smoothly again. Keep quilting with confidence!
Frequently Asked Questions
How often should I change my quilting machine needle?
We recommend changing your needle after every 8-10 hours of sewing time, or at the start of every new project. Needles dull quickly, especially when quilting through multiple layers, and a fresh needle prevents many common stitch problems.
Can using the wrong type of thread cause skipped stitches?
Yes, absolutely. Using thread that is too thick or too thin for your needle, or poor-quality thread with inconsistent thickness can lead to skipped stitches. Good quality thread specifically designed for quilting generally performs best.
Why does my machine suddenly start skipping stitches mid-project?
Mid-project skipped stitches often point to a dull or slightly bent needle, or lint buildup around the bobbin case. Your machine might also shift out of tension slightly due to vibrations. A quick needle change or a thorough cleaning usually solves this.
Is it normal for a new quilting machine to skip stitches?
It’s less common for a brand new machine, but not impossible. Sometimes factory threading can be off, or the needle provided isn’t ideal for your specific fabric. Always rethread and change the needle first, even on a new machine, if you encounter issues.
What if none of these solutions fix my skipped stitches?
If you’ve tried everything on our list and your machine is still skipping stitches, it might be time for a professional tune-up. There could be a timing issue or a more complex mechanical problem that a certified technician can diagnose and repair.
