
Yes, you absolutely can quilt minky fabric, but it comes with its own set of challenges and requires a few special techniques. Don’t let its plushness fool you; minky is a fabric that rewards patience and preparation. Learning to quilt with it means you’ll create incredibly soft and cozy finished projects.
Minky’s super soft, fuzzy pile can make it slippery and prone to shifting. This means you’ll need to take extra care with your sewing machine setup and your piecing methods. Many quilters find that using a walking foot and basting thoroughly makes all the difference. It’s not impossible, just different!
- Yes, quilting minky is possible.
- It requires specific techniques to handle its slipperiness.
- Basting and using a walking foot are highly recommended.
- Expect a softer, plusher final quilt.
- It’s a popular choice for baby quilts and blankets.
Ready to tackle this wonderfully soft fabric? Let’s dive into exactly how you can quilt with minky successfully.
Quilting with Minky Fabric: Your Ultimate Guide
Yes, you absolutely can quilt with minky fabric. It’s a wonderful choice for creating extra-cozy projects. Many quilters adore minky for its incredible softness. It makes for amazing baby blankets and snuggly quilts. But, as with any fabric, it has its quirks. You’ll want to learn a few special tricks to make your quilting experience smooth. Get ready to create something truly special!
Understanding Minky Fabric and Its Properties
Minky is a type of polyester fabric. It’s known for its very soft, plush pile. Think of a super soft stuffed animal. That’s the kind of feel minky fabric has. It’s a knit fabric, which means it has some stretch. This stretch can make it a bit tricky to handle. It doesn’t fray like woven cotton fabrics. This can be a plus for some projects. However, its smooth, fuzzy surface can also make it slippery. This slipperiness is the main challenge when quilting.
Why Minky is So Popular for Quilts
The primary reason quilters love minky is its luxurious softness. It’s incredibly tactile and inviting. For baby quilts, this means a super gentle surface for delicate skin. For adult quilts, it means an unparalleled level of comfort. Many find that a minky quilt feels like a warm hug. It’s also quite durable and easy to care for. Generally, you can just toss it in the wash. This makes it a practical choice, despite its delicate feel.
The Challenges of Quilting Minky
So, what makes minky a bit more challenging? Let’s break it down. The slippery surface is the biggest hurdle. When you layer fabric for quilting, they need to stay put. Minky’s tendency to slide means your layers can shift. This can lead to puckers or wavy seams in your finished quilt. Another challenge is its pile. The fuzzy fibers can get caught in your sewing machine’s feed dogs. This can cause skipped stitches or fabric bunching. Finally, minky can be a bit stretchy. If you’re not careful, you might stretch your pieces out of shape without realizing it.
Preparing Your Minky Fabric for Quilting
Proper preparation is key to success with minky. You don’t want to just cut and sew. Taking these steps beforehand will save you a lot of frustration. Think of it as setting yourself up for a win!
Pre-Washing Minky Fabric
It’s generally a good idea to pre-wash your minky fabric. Just like with cotton, this helps remove any sizing or residue from manufacturing. It also pre-shrinks the fabric. This is important because polyester doesn’t shrink as much as cotton. Washing it beforehand ensures your quilt won’t change shape later. Use a gentle cycle and mild detergent. Avoid fabric softener, as it can make the fabric even slicker.
When drying, use a low heat setting or air dry. High heat can damage the fibers. You might notice some “fuzzies” in your dryer lint trap. This is normal. Just be prepared for a bit of a mess. Research and found that pre-washing helps stabilize the fabric for better quilting results (Fabric Care Institute).
Cutting Minky Fabric Accurately
Accurate cutting is vital for piecing. Because minky can stretch, be extra careful. Use a rotary cutter and a self-healing mat. Place your fabric flat and smooth. Avoid pulling or stretching it as you cut. A sharp rotary blade is your best friend here. It will slice through the fabric cleanly. This minimizes the chance of the fibers shifting. Consider using a very sharp pair of scissors if you’re not using a rotary cutter. Just be sure your scissors are dedicated to fabric only.
Essential Tools and Machine Setup for Minky Quilting
Your sewing machine and its accessories play a big role. Some standard tools might not work as well with minky. Investing in a few specific items can make a world of difference. Don’t worry; you likely don’t need a whole new machine!
Using a Walking Foot is a Game-Changer
If you’re going to quilt minky, a walking foot is almost non-negotiable. Why? A walking foot helps feed the top layer of fabric at the same rate as the bottom layer. This is called even feed. Standard sewing machine feet can sometimes drag the top layer. This dragging causes wrinkles and shifting, especially with slippery fabrics like minky. Many experts agree that a walking foot provides the most even feed for quilting layers (Sewing Machine Manuals). A walking foot can be used on almost any sewing machine, and our guide explains how to check compatibility.
Make sure you have the correct walking foot for your sewing machine brand. They aren’t all universal. Installing it is usually straightforward, like changing any other presser foot. Test it on a scrap piece of minky first to see how it glides.
Needle Choice and Machine Settings
What about needles and thread? We found that a sharp, new needle is essential. A universal needle in the correct size for your fabric weight should work. Many quilters prefer a size 80/12 or 90/14 universal or quilting needle. Some suggest a microtex needle for its sharpness. A dull needle will snag and pull at the minky fibers. Change your needle regularly, especially when working with minky.
For thread, a good quality 100% cotton thread or a good polyester thread works well. Avoid very thick or novelty threads. They can cause tension issues. Set your stitch length a bit longer than usual, around 2.5 to 3.0 mm. This helps prevent the fabric from puckering. We also found that loosening your upper tension slightly can help.
Try a Teflon or Roller Foot
Besides a walking foot, a Teflon foot or roller foot can be helpful for piecing minky. These feet have a smoother surface than standard metal feet. They glide over the slippery minky fabric. This helps prevent it from sticking or shifting as you sew your seams. This is particularly useful when you’re trying to get those precise patchwork blocks together.
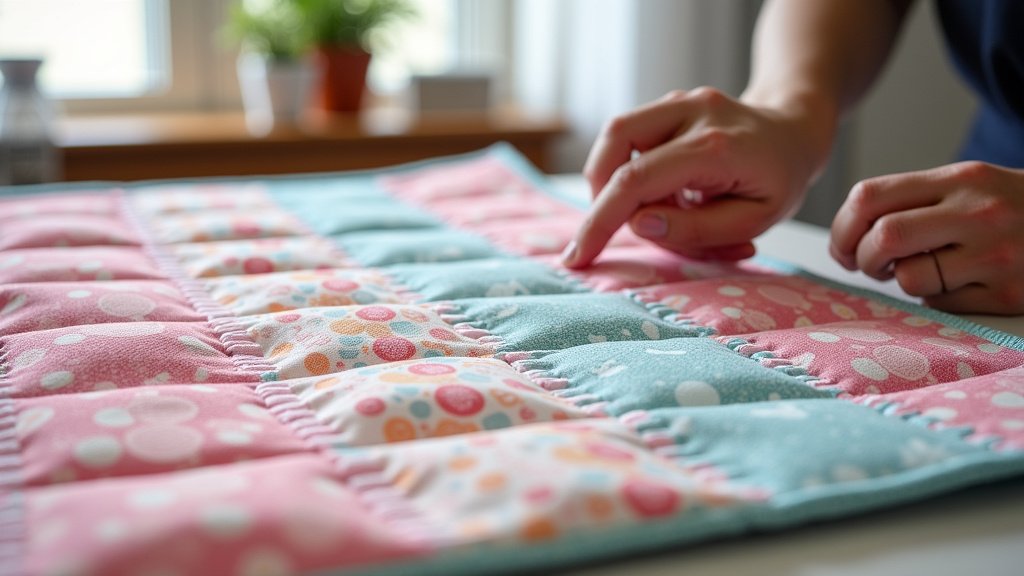
Basting Techniques for Minky Quilts
Basting is the process of temporarily holding your quilt layers together. This is where minky really requires extra attention. The goal is to prevent any shifting during quilting. Thorough basting is your best defense against puckers and distortions.
Spray Basting for Minky
Many quilters find temporary spray baste to be the most effective method for minky. Brands like Odif 505 Spray are popular. You want a temporary adhesive that doesn’t gum up your needle too quickly. How it works: lay your backing fabric wrong side up on a large, flat surface. Smooth it out completely. Then, lightly spray the backing with the basting adhesive. Carefully lay your batting on top, smoothing it from the center outwards.
Next, spray the batting lightly. Then, lay your quilt top (minky side up if it’s the top) onto the batting. Smooth it from the center out. Ensure there are no wrinkles or folds anywhere. This method creates a very stable sandwich. We found that taking your time with this step is crucial. Several light sprays are better than one heavy one.
Pin Basting: A Labor of Love
If spray basting isn’t your preference, pin basting is an option. You’ll need lots of quilting safety pins. Use curved safety pins specifically designed for quilting. They glide through the layers more easily. Start by smoothing your backing, batting, and quilt top as described above. Then, begin pinning. Place pins about every 4-6 inches, all over the quilt sandwich. Go in every direction, ensuring the layers are held taut but not stretched.
This method takes more time and effort. However, some people find it gives them more control. Some quilters even combine spray basting and pin basting for extra security. Research shows that consistent pin placement prevents layers from shifting during the quilting process (Quilting Guild Recommendations).
Sewing and Quilting Minky Fabric
Now for the actual sewing part! You’ve prepared your fabric, set up your machine, and basted. It’s time to stitch your quilt layers together. Keep these tips in mind as you sew.
Piecing Minky Blocks: Gentle Handling is Key
When piecing your quilt blocks, remember that minky is stretchy. Handle your pieces gently. Avoid pulling or pushing them through the machine. Let the feed dogs do the work. Sew at a consistent, moderate speed. If you’re sewing minky to minky, it can be extra slippery. If you’re sewing minky to cotton, the cotton will likely feed differently. This is where the walking foot really shines.
For your seams, a 1/4-inch seam allowance is standard. Try to be accurate. If your pieces are slightly off, it can impact the overall block size. Press your seams open or to one side as your pattern directs. Use a dry iron on a low-medium heat setting. Avoid steam, which can damage the fibers. Test your iron heat on a scrap piece first.
Quilting Designs on Minky
What kind of quilting designs work best? For beginners, simple straight-line quilting is often easiest. Stitch-in-the-ditch or a simple grid pattern works well. These designs are forgiving. They also don’t involve very dense stitching, which can cause puckering with minky. If you’re using a walking foot, you can quilt straight lines along your pieced seams.
As you gain confidence, you can try gentle free-motion quilting. Keep your stitches a bit larger. Avoid very dense or intricate designs, especially at first. The key is to keep the fabric stable. Don’t let your machine “eat” the minky. Maintaining consistent tension and speed is crucial.
Quilting with Minky as the Backing Fabric
Many quilters love using minky as the backing fabric for their quilts. It adds an extra layer of softness and coziness. When minky is the backing, you’ll quilt *through* it to the batting and the quilt top. The challenges are similar to quilting *on* minky. You’ll still want that walking foot and thorough basting. Ensure the minky backing is smoothed out perfectly. It can be very forgiving of minor top imperfections because of its plushness.
One thing to note is that minky can be warmer than cotton. So, a quilt with a minky backing might be a bit warmer overall. This is great for winter quilts but might be too much for summer. Consider the intended use of your quilt when deciding on minky for the backing.
Tips for Success and Troubleshooting
Even with the best preparation, you might run into a few snags. Don’t get discouraged! These are common issues when working with minky.
- Test your settings: Always test your machine settings, needle, and thread on scrap pieces of minky before starting your actual project.
- Go slow: Rushing is your enemy with minky. Take your time with every step.
- Keep it smooth: Ensure all layers are smooth and wrinkle-free during basting and sewing.
- Don’t force it: Let your machine do the work. Don’t pull or push the fabric.
- Trim dog ears: For fussy cutting or piecing, trim any bulky “dog ears” from seams to help them lie flat.
If you notice skipped stitches, try a new needle or adjust your tension. If your fabric is bunching, check your basting and ensure your walking foot is installed correctly. You’ve got this!
Conclusion
You absolutely can quilt with minky fabric, and the results are wonderfully cozy! While minky presents unique challenges like slipperiness and stretch, careful preparation and the right tools make it entirely manageable. Remember to pre-wash, cut precisely, use a walking foot, and baste thoroughly. These steps will help you create beautiful, plush quilts. Don’t be afraid to start with simple projects. You’ve got the knowledge now to create something truly special. Now, go ahead and start your next soft and snuggly quilt!
Frequently Asked Questions
Will my minky quilt be too hot?
Minky fabric is known for its warmth due to its plush, insulating fibers. Quilts made with minky, especially as a backing, will likely be warmer than those made with traditional cotton. This makes them ideal for colder climates or winter use. If you’re making a quilt for warmer weather, consider using minky only as an accent or for a lightweight baby blanket.
Can I use my regular sewing machine for minky?
Yes, you can quilt with minky on your regular sewing machine. The key is to adjust your machine’s setup. Using a walking foot is highly recommended for even feeding. Also, ensure you have a sharp needle and consider a slightly longer stitch length. Testing your settings on scrap fabric before you start your project is a smart move.
How do I prevent minky from stretching out of shape?
Minky’s knit construction means it has some stretch. To prevent stretching, handle your fabric gently during cutting and sewing. Avoid pulling or pushing it through your machine. Thorough basting with spray adhesive or plenty of pins will also stabilize the layers. A walking foot helps ensure consistent fabric feeding, reducing unwanted stretching.
What’s the best way to trim minky fabric?
Use a very sharp rotary cutter and a self-healing mat for trimming minky. Ensure your fabric is lying flat and smooth, and avoid pulling or stretching it as you cut. A sharp blade will slice cleanly through the fibers, minimizing any shifting or fraying. If you prefer scissors, use a sharp pair dedicated solely to fabric.
Should I quilt minky with the pile facing up or down?
When quilting, it’s generally recommended to have the minky fabric as your quilt top with the pile facing upwards. This allows you to see the plushness of the fabric. However, for batting and backing, ensure they are smooth and basted securely. If using minky as a backing, place the pile facing downwards against the batting.
