
Yes, you absolutely can quilt wool fabric! It’s a fantastic choice for cozy quilts, and while it has some quirks, it’s quite manageable. You’ll find wool offers beautiful drape and a wonderful warmth that other fabrics just can’t match, making it perfect for heirloom projects.
Many quilters love working with wool for its unique texture and stability. Unlike some cottons, wool doesn’t fray as much, which can be a real time-saver. We found that pre-washing and stabilizing your wool can make the quilting process even smoother, leading to gorgeous, professional-looking results you’ll be proud of.
- Wool is great for quilts.
- It’s warm and has a nice drape.
- It doesn’t fray much.
- Pre-washing helps.
- Stabilizing is a good idea.
Ready to dive into the world of wool quilting? Let’s walk through some tips and tricks to make your experience a joy from start to finish.
Working with Wool Fabric for Quilting
Absolutely! You can definitely quilt with wool fabric. It’s a wonderful material that brings a unique warmth and texture to your projects. Many quilters love it because it’s stable and doesn’t fray much. This makes it a joy to handle, even for beginners.
Why Choose Wool for Quilting?
Wool offers a cozy and luxurious feel that’s hard to replicate. It drapes beautifully, giving your quilts a lovely weight and flow. Plus, wool is naturally insulating, making your quilts extra warm. Think of a soft, heirloom quilt that feels amazing to snuggle under – that’s the magic of wool.
We found that wool is surprisingly easy to work with once you understand its properties. It’s less prone to stretching than some other fabrics. This stability is a big plus when you’re piecing small shapes or quilting intricate designs.
Preparing Your Wool Fabric
Before you start cutting and stitching, a little preparation goes a long way. Wool can shrink when washed, so it’s important to pre-wash it. This step ensures your finished quilt won’t warp unexpectedly after its first cleaning. Wool can shrink when washed, so it’s important to pre-wash it to ensure your finished quilt won’t warp unexpectedly.
Pre-Washing Wool
You have a few options for pre-washing. Many quilters prefer to hand wash their wool in cool water with a gentle detergent. Some even use their washing machine on a delicate cycle with cold water. After washing, avoid the dryer. Instead, gently roll the fabric in a clean towel to remove excess water. Then, lay it flat to air dry. This method helps maintain the fabric’s shape and softness.
We found that even with pre-washing, some wools might still shrink slightly. So, it’s a good idea to wash a small swatch first. This lets you see how that particular wool behaves before committing your yardage. It’s a simple step that can save you from potential headaches later.
Stabilizing Wool for Quilting
While wool is quite stable, some quilters like to add an extra layer of support. This is especially true for finer wools or when you plan to do a lot of detailed quilting. Using a lightweight fusible interfacing on the back of your wool can help prevent stretching and puckering.
You can also use spray starch or a stabilizer product. Lightly misting your wool with starch before ironing can give it a bit more body. When applying fusible interfacing, follow the manufacturer’s instructions carefully. Make sure your iron is set to the appropriate temperature for wool. We found that a good press is key here.
| Wool Preparation Step | Why It’s Important | Tips for Success |
|---|---|---|
| Pre-wash Wool | Prevents shrinkage after quilting. | Hand wash or delicate machine cycle with cold water. Air dry flat. |
| Test Swatch | Shows how your specific wool reacts to washing. | Wash a small piece first to check for shrinkage or color bleed. |
| Stabilize (Optional) | Adds extra body and prevents stretching. | Use lightweight fusible interfacing or spray starch. |
| Pressing | Ensures smooth, flat pieces for accurate piecing. | Use the correct iron setting for wool. Press, don’t iron back and forth. |
Cutting Wool Fabric
Cutting wool is a bit different from cotton. Because it has a bit more ‘give,’ you need sharp tools. Using a rotary cutter and a self-healing mat is highly recommended. A sharp blade will give you clean, precise cuts without snagging the fabric.
When cutting, try to cut perpendicular to the fabric grain. This helps maintain the integrity of the weave. For small pieces, you might find that templates and a rotary cutter are more accurate than scissors. A good quality cutting mat is your best friend here.
Tips for Accurate Cutting
Ensure your ruler lies flat and doesn’t shift. Some quilters find that placing a piece of freezer paper or a special non-slip ruler gripper underneath their ruler helps. This little trick can prevent the ruler from sliding on the wool surface. Accuracy in cutting makes piecing so much easier later on!
We’ve heard from many quilters that taking your time during the cutting phase pays off. Don’t rush! Make sure each piece is cut exactly as the pattern requires. This attention to detail means your blocks will fit together beautifully.
Piecing Wool Blocks
Sewing wool pieces together is often a highlight for quilters. The fabric’s natural bulk and texture can give your seams a lovely definition. You’ll find that wool doesn’t slide around as much as thinner cottons, which makes it easier to keep your points sharp.
Use a walking foot on your sewing machine. This attachment helps feed the layers of wool evenly through the machine. This prevents the layers from shifting or puckering as you sew. It’s particularly helpful when quilting through multiple layers of wool.
Thread and Needle Choices
For piecing wool, a good quality cotton or polyester thread works well. Many quilters prefer a slightly thicker thread, like a 50-weight or 40-weight, for durability and to complement the wool’s texture. You’ll also want to use a sharp needle, such as a universal or quilting needle, in a size 80/12 or 90/14.
We found that experimenting with different thread colors can add a lovely decorative touch. Contrast stitching can highlight the quilting design or the texture of the wool itself. Just remember to adjust your machine tension accordingly.
Seam Allowances with Wool
A standard 1/4-inch seam allowance is generally used for quilting. However, with wool, you might find that a slightly larger seam allowance, perhaps 3/8-inch, can be beneficial. This extra width helps to enclose the cut edges of the wool, reducing any potential fraying. It also provides a bit more stability to the seam.
When you press your seams, press them to one side or open, depending on your preference and the pattern instructions. Using a dry iron on the wool setting is usually best. Avoid excess steam, which can sometimes cause wool to felt or shrink unevenly. A good, firm press is key to flat seams.
Quilting Your Wool Project
This is where your wool quilt really comes to life! Hand quilting with wool is a popular choice. The stitches stand out beautifully against the fabric’s texture. You can use a thicker quilting thread, like perle cotton, for a wonderfully tactile effect.
For machine quilting, a walking foot is almost essential. It ensures that all layers feed evenly. You can quilt simple straight lines, feathered designs, or even more detailed patterns. Remember that wool has some natural loft, so it will create a lovely, puffy quilt.
Batting Considerations for Wool Quilts
Choosing the right batting is important for your wool quilt’s drape and warmth. Cotton batting is a common choice, as it’s breathable and stable. You can also consider wool batting for an all-wool project. Wool batting adds extra warmth and a beautiful, soft drape.
Polyester batting is another option, offering a lighter weight and puffier look. If you’re using a thin wool fabric, a slightly thicker batting might be nice. If your wool is already quite bulky, a thinner batting will keep the quilt from becoming too heavy. We found that many quilters prefer a cotton or cotton-poly blend for its balance of properties.
Handling Bulk
Wool can add significant bulk, especially in the quilt sandwich. Be prepared for this when you’re machine quilting. You might need to quilt more slowly to guide the layers. Sometimes, trimming the batting slightly within the seam allowance can help reduce bulk in the final sashing or binding.
For hand quilting, you might find that using a quilting hoop helps. It keeps the fabric taut and makes it easier to manage the layers. Don’t be afraid to experiment with different quilting designs. The texture of the wool can make even simple stitches look spectacular. It’s truly a joy to see the quilt develop under your needle!
Binding Your Wool Quilt
Binding a wool quilt is similar to binding other quilts, but with a few wool-specific considerations. You can use a wool binding strip, a cotton binding strip, or even a contrasting fabric. Using a wool binding will give your quilt a very cohesive, finished look and feel.
If you’re using wool for your binding, cut your strips on the lengthwise or crosswise grain, not bias, as wool doesn’t stretch like cotton. A 2.5-inch to 3-inch wide strip is often sufficient for a nice, sturdy binding. Attach the binding using your sewing machine, then finish it by hand or machine. A hand-stitched binding often looks particularly lovely on a wool quilt.
Caring for Your Wool Quilt
Caring for your finished wool quilt is straightforward. Hand washing in cool water with a gentle detergent is always the safest bet for wool. Avoid harsh detergents and high heat. Roll the quilt gently in a towel to remove excess water, and then lay it flat to dry. Never put a wool quilt in a machine dryer.
We found that spot cleaning is often sufficient for minor spills. For more general cleaning, a gentle hand wash every few years is usually all that’s needed. Proper care will ensure your beautiful wool quilt lasts for generations.
Here’s a quick checklist to remember:
- Pre-wash all your wool fabric.
- Use sharp cutting tools.
- Consider stabilizing your wool.
- Use a walking foot for machine quilting.
- Press seams carefully with a dry iron.
- Hand wash your finished quilt gently.
Conclusion
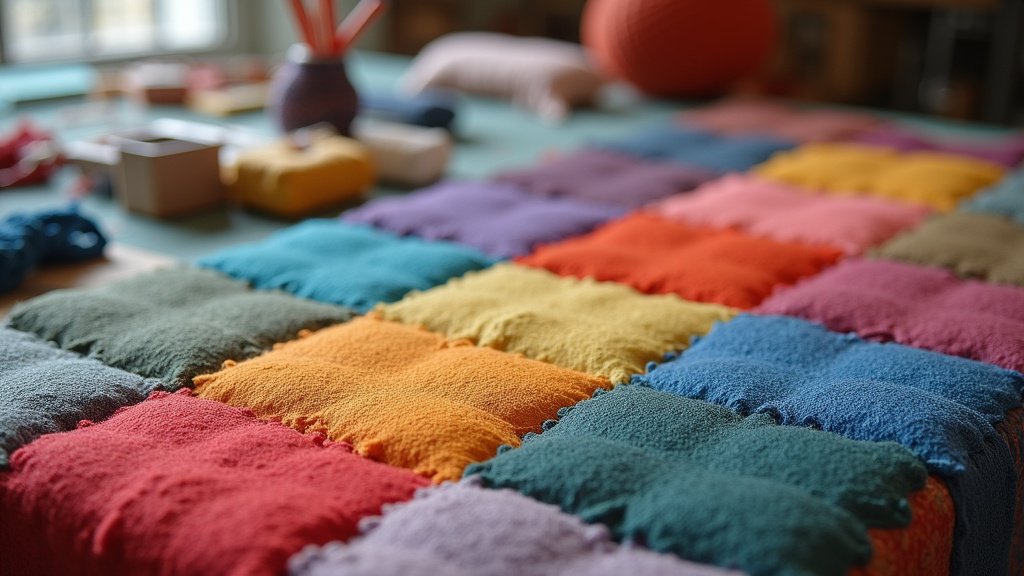
You’ve learned that quilting with wool fabric is absolutely achievable and incredibly rewarding. You can create warm, beautiful quilts with its unique texture and drape. Remember that proper preparation, like pre-washing and optional stabilizing, makes a big difference. Sharp tools and a bit of patience during cutting and piecing will ensure success. Don’t shy away from the bulk; embrace it as part of wool’s charm. Start your next wool quilting project today and enjoy the cozy, heirloom-quality results!
Frequently Asked Questions
What is the best type of wool for quilting?
For quilting, you’ll find that 100% wool is ideal, particularly woven wools like flannel or lightweight wool suiting. These fabrics are less likely to pill and have a stable weave. Avoid loosely woven or felted wools that can be too bulky or prone to unraveling.
Do I need a special sewing machine needle for wool?
While you don’t necessarily need a specialized needle, a sharp, high-quality universal or quilting needle in a size 80/12 or 90/14 is recommended. A sharp needle pierces the wool fibers cleanly, preventing snags and skipped stitches. Ensure your needle is fresh for the best results.
Can I mix wool with cotton fabric in a quilt?
Yes, you can mix wool and cotton, but it requires careful consideration of shrinkage. Always pre-wash both fabrics thoroughly to account for any potential shrinkage in the wool. Using similar weights and pre-washing helps prevent puckering in your finished quilt.
How thick should my wool quilt batting be?
The thickness of your batting depends on the wool fabric and your desired outcome. For thinner wools, a medium-loft cotton or wool batting works well. If you’re using bulkier wool, opt for a thinner batting or even skip batting altogether for a lighter quilt. We found that a cotton-poly blend offers a good balance.
Is it hard to hand quilt wool?
Hand quilting wool can be a wonderful experience. The fabric’s texture makes stitches stand out beautifully. You might prefer a thicker quilting thread, like perle cotton, for a tactile effect. Using a quilting hoop can help manage the bulk and keep the layers taut for smooth stitching.
