Why Is My Free Motion Quilting Foot Vibrating?
On this page (9 sections)
- Troubleshooting Your Vibrating Free Motion Quilting Foot
- The Needle Clamp: A Common Culprit
- The Presser Foot Shank: Another Likely Suspect
- The Bobbin Case: A Less Common, But Possible Cause
- Your Free Motion Quilting Foot Itself
- Machine Maintenance Matters
- Quick Checklist for Your Vibrating Foot
- Conclusion
- Frequently Asked Questions
Your free motion quilting foot might be vibrating because of a loose needle clamp or a worn-out presser foot shank. These common issues often cause a jumpy motion. It’s usually a simple fix, not a sign of major machine trouble.
A vibrating foot can make your quilting feel out of control. We’ve found that sometimes, even a misaligned bobbin case can contribute to this shaky feeling. Ensuring all parts are snug and correctly positioned is key to smooth stitching.
- Loose needle clamp is a top cause.
- Worn-out presser foot shank is another.
- Bobbin case alignment matters.
- Check your machine manual for specifics.
Let’s walk through the common culprits and how to get your free motion quilting foot behaving again.
Troubleshooting Your Vibrating Free Motion Quilting Foot
A vibrating free motion quilting foot can feel like your machine is throwing a tiny tantrum. It’s a common frustration for quilters. This jumpy motion can make it hard to create smooth, even stitches. You might feel like you’re fighting your machine instead of dancing with it. Let’s figure out what’s causing this vibration and get you back to enjoying your quilting. Many quilters find that a few simple checks can solve the problem.
The Needle Clamp: A Common Culprit
The needle clamp holds your sewing machine needle securely in place. If this clamp is loose, your needle can wiggle. This wiggle translates into a vibration you feel in your presser foot. It’s like trying to draw with a wobbly pencil. You won’t get a clean line. This is often the first place to check when your FMQ foot is shaking.
How to Check and Tighten Your Needle Clamp
Locate the screw that holds your needle clamp. This is usually on the side of the presser foot bar. You’ll likely need a small screwdriver. Gently turn the screw clockwise. This will tighten the clamp. Don’t overtighten it. You don’t want to strip the screw or damage the machine. A snug fit is all you need. After tightening, try stitching a few lines. See if the vibration has lessened.
When to Consider Replacing the Needle Clamp
Sometimes, even with tightening, the clamp might be worn. If the metal parts look damaged or stripped, it might be time for a new one. A worn-out clamp can’t grip the needle properly. Check your sewing machine manual for instructions on replacing parts. Many parts are readily available from sewing machine dealers.
The Presser Foot Shank: Another Likely Suspect
The presser foot shank is the part that attaches your presser foot to the machine. It’s like the arm holding the foot. If this shank is loose, bent, or worn, it can cause the foot to wobble. This wobble will definitely lead to a vibrating sensation. It’s the connection point between your machine and the fabric. A shaky connection means shaky stitching.
Inspecting the Presser Foot Shank
Take a close look at the shank. Is it firmly attached to the presser foot bar? Try gently wiggling the shank. Does it feel loose or floppy? Are there any visible signs of damage, like bends or cracks? Some shanks can become loose over time due to repeated stress. Research from sewing machine technicians suggests this is a frequent cause of stitch inconsistency.
Securing a Loose Shank
If your shank is loose, you’ll need to tighten the screw that connects it to the presser foot bar. This screw is usually found on the side or back of the shank. Use the appropriate screwdriver to secure it. Again, don’t force it. A firm attachment is key. If the shank is bent, you might need to replace it. A bent shank can cause the foot to sit at an angle, affecting stitch quality.
Understanding Shank Wear and Tear
Presser foot shanks can wear out over time, especially with heavy use. The metal can become fatigued. This can lead to a slight looseness that develops gradually. Many quilters find that replacing an older shank can make a big difference in their stitching. Think of it like replacing worn-out tires on your car. It restores a smoother ride.
The Bobbin Case: A Less Common, But Possible Cause
While less common, issues with your bobbin case can sometimes contribute to unusual vibrations. If the bobbin case isn’t seated correctly, or if it’s slightly damaged, it can affect the entire bobbin area. This can create a subtle imbalance that travels up. It’s like a tiny imbalance in a spinning wheel. It can cause the whole thing to feel a bit shaky.
Ensuring Proper Bobbin Case Placement
Remove the bobbin case and then reinsert it carefully. Make sure it clicks into place securely. Refer to your sewing machine manual for specific instructions on how to do this for your model. Sometimes, dust or lint can prevent it from seating properly. A good cleaning can often help.
Checking for Damage or Wear
Inspect the bobbin case for any signs of damage. Are there any nicks, dents, or bent parts? If you see any damage, it’s best to replace it. A damaged bobbin case can cause skipped stitches or uneven tension, which might feel like a vibration. Resources from sewing machine repair guides often highlight the importance of a pristine bobbin case.
Your Free Motion Quilting Foot Itself
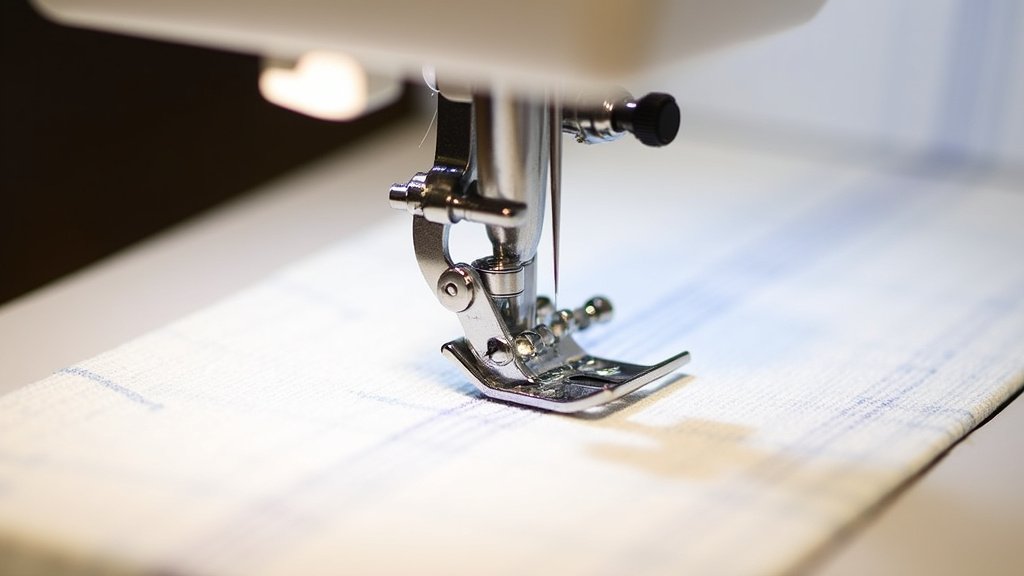
It’s also worth considering if the free motion quilting foot itself has a problem. These specialized feet have springs and mechanisms designed to work with your machine. If these parts are damaged or worn, they might not function correctly.
Inspect the Spring Mechanism
Most FMQ feet have a spring that lifts the foot when you stop or when the needle is at its highest point. Check if this spring is working smoothly. Does it seem weak or stuck? Sometimes, lint or thread can get caught in the spring mechanism, causing it to act erratically. A gentle cleaning can often resolve this.
Is the Foot Properly Attached?
Double-check that your FMQ foot is securely attached to the shank. Sometimes, it might feel attached, but it’s not quite locked in place. Ensure the foot is all the way up and then lower it to snap or screw it into place. A loose connection here will definitely cause movement.
Machine Maintenance Matters
Sometimes, a vibrating foot is a symptom of a larger machine issue. Regular maintenance is key to keeping your sewing machine running smoothly. This includes cleaning, oiling, and professional servicing. A vibrating foot might mean it’s time to change your needle.
Cleaning and Oiling Your Machine
Lint and old oil can build up inside your machine. This buildup can cause parts to move less freely. This can create extra resistance, which might manifest as a vibration. Refer to your manual for the correct cleaning and oiling procedures for your specific model. Many sewing machine maintenance guides recommend a thorough cleaning after every major project.
When to Seek Professional Help
If you’ve checked all the above and your foot is still vibrating excessively, it might be time for a professional tune-up. An experienced technician can identify issues that are not immediately obvious. They can ensure all moving parts are calibrated correctly. Think of it like taking your car to the mechanic for its regular service. It keeps things running optimally.
Quick Checklist for Your Vibrating Foot
Here’s a handy checklist to help you track down the cause of that vibration:
- Is your needle clamp tight?
- Does your presser foot shank feel secure?
- Is the presser foot itself firmly attached?
- Is your bobbin case seated correctly and undamaged?
- Have you cleaned out lint and debris from the bobbin area?
- Does the spring mechanism on your FMQ foot move freely?
Conclusion
It can be frustrating when your free motion quilting foot starts vibrating, but you’ve learned it’s usually a fixable issue. We’ve found that most vibrations stem from simple mechanical checks, like a loose needle clamp or a wobbly presser foot shank. Even a misaligned bobbin case can contribute to that jumpy feeling. Don’t let this stop your creativity! Your next step is to grab your screwdriver and go through the quick checklist. You’ve got this!
Frequently Asked Questions
How often should I check my needle clamp?
It’s a good practice to check your needle clamp periodically, especially if you notice any new vibrations. You might give it a quick wiggle test every few quilting sessions or whenever you change your needle. This simple check can prevent bigger issues down the line.
My presser foot shank looks fine, but it’s still loose. What now?
If your presser foot shank appears visually sound but still wiggles, the internal mechanism might be worn. Sometimes, the screw holding it might just need re-tightening. If that doesn’t help, it might be time to replace the shank itself. Replacing an old shank often restores smoother movement.
Can lint buildup cause my FMQ foot to vibrate?
Yes, absolutely! Lint and thread debris can accumulate in your machine’s bobbin area and around moving parts. This buildup can cause friction and prevent parts from moving freely, leading to vibrations. Regular cleaning is essential for smooth operation.
Is it okay to use a FMQ foot that feels a little loose?
We strongly advise against using a free motion quilting foot that feels loose or vibrates excessively. A loose foot can cause uneven stitches, skipped stitches, and even damage to your machine or fabric. It’s best to address the cause of the vibration before continuing your quilting project.
When should I consider professional sewing machine service for vibration issues?
If you’ve carefully checked your needle clamp, presser foot shank, bobbin case, and the foot itself, and the vibration persists, it’s time to call a professional. A technician can identify internal machine problems or wear that you might not be able to see or fix yourself.