
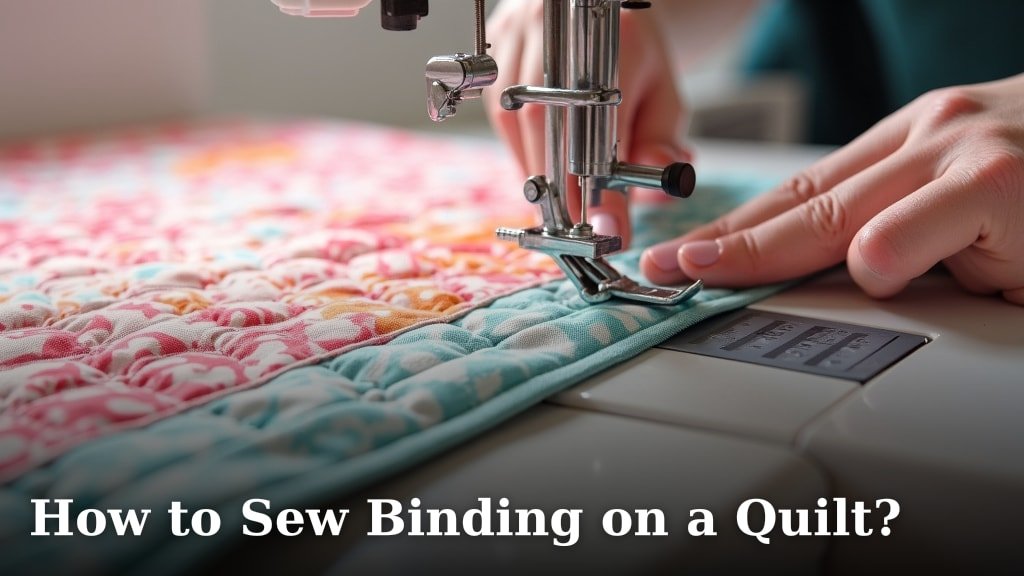
To sew binding on a quilt, you first need to prepare your binding strips, attach them to the front of your quilt, and then hand stitch or machine stitch the binding to the back for a neat, finished edge. This process gives your quilt a professional appearance and protects its edges from wear and tear.
Binding is the final touch that elevates your quilt from a project to a masterpiece. It not only looks great but also helps your quilt last many years. We found that a well-applied binding makes all your hard work shine.
TL;DR
- Prepare binding strips.
- Attach binding to the quilt’s front.
- Finish binding on the quilt’s back.
- Binding protects your quilt.
- A good binding enhances your quilt’s look.
Want to turn those raw edges into a beautiful frame for your quilting efforts? Let’s walk through exactly how to sew binding on a quilt, step by step.
Perfecting Your Quilt’s Edges with Binding
Binding offers a clean, durable border that not only enhances the look of your quilt but also protects its edges from wear. It’s truly the finishing touch that brings your whole project together.
Gathering Your Essential Binding Supplies
Before you begin, gathering everything you need makes the process smoother. Think of it like cooking: having all your ingredients ready prevents last-minute panics.
Tools and Materials Checklist
Having the right tools helps you achieve a professional finish. We’ve compiled a brief list to help you prepare.
- Fabric for binding (usually 2½-inch wide strips)
- Sewing machine (in good working order)
- Sharp scissors or rotary cutter with cutting mat
- Quilting ruler (at least 6 x 24 inches is handy)
- Iron and ironing board
- Thread to match your binding fabric
- Pins or wonder clips
- Walking foot (optional, but highly recommended)
Calculating and Preparing Your Binding Fabric
How much binding do you need? This is a common question, and getting it right means you won’t run short or have too much waste.
Measuring Your Quilt for Binding
First, measure all four sides of your quilt. Add these lengths together to get the total perimeter. Then, add an extra 10-12 inches for joining and trim allowances. For example, a 60″ x 80″ quilt has a perimeter of 280 inches (60+60+80+80). You’d want around 290-292 inches of binding strip.
Cutting Your Binding Strips
Most quilters use a 2½-inch wide strip for double-fold binding. To figure out how many strips to cut, take your total binding length and divide it by the width of your fabric (usually 40-42 inches). Round up to the next whole number. Cut your strips across the width of the fabric (WOF), from selvage to selvage. This method provides the most durability (National Quilters Circle).
Joining Binding Strips Together
Once your strips are cut, you’ll need to join them end-to-end to create one long continuous strip. The best way for a strong, flat join is with a diagonal seam.
- Place two strips right sides together, perpendicular to each other, forming a 90-degree angle.
- Draw a diagonal line from one corner to the opposite corner where the strips overlap.
- Sew along this drawn line.
- Trim the excess fabric, leaving a ¼-inch seam allowance.
- Press the seam open. This helps reduce bulk.
- Repeat this process until all your strips are joined into one long piece.
After joining, press the entire binding strip in half lengthwise, wrong sides together. This creates your double-fold binding, which is much easier to work with.
Attaching Binding to the Front of Your Quilt
Now comes the exciting part – bringing your binding and quilt together! This step creates a frame for your beautiful work.
Starting Point and Stitching Technique
Begin attaching your binding to the front of your quilt on any side, about 10-12 inches from a corner. Leave a 6-inch “tail” of binding unsewn at the start. Line up the raw edges of your folded binding strip with the raw edges of your quilt top.
Using a ¼-inch seam allowance, start sewing your binding to the quilt. We recommend using a walking foot on your sewing machine if you have one. It helps evenly feed all layers of fabric, preventing puckering (American Quilter’s Society). We found this makes a significant difference.
Navigating Corners Gracefully
Corners can seem tricky, but they are quite manageable with this method:
- As you approach a corner, stop sewing ¼-inch from the edge of the quilt.
- Backstitch a few stitches to secure.
- Remove the quilt from under the needle.
- Fold the binding strip straight up, creating a 45-degree angle with the unsewn quilt edge.
- Then, fold the binding strip back down, aligning its raw edge with the next raw edge of the quilt. This creates a neat mitered corner.
- Start sewing again ¼-inch from the folded edge, continuing down the next side.
Repeat this for all four corners. It’s a bit like wrapping a present; a crisp fold looks best.
Finishing the Binding Circle
When you’ve sewn all the way around and are approaching your starting point, stop about 10-12 inches before you reach the beginning tail. You now have two unsewn binding tails. This is where you join them seamlessly.
- Overlap the two tails. Trim one tail so it overlaps the other by 2½ inches (the width of your binding strip).
- Open up the two tails. Place them right sides together, perpendicular to each other, just like you did when joining your initial strips.
- Draw a diagonal line and sew across it.
- Trim the seam to ¼-inch and press open.
- Fold the joined binding in half lengthwise again and finish sewing the remaining unsewn section to the quilt.
This creates a continuous, neat circle of binding around your quilt.
Securing Binding to the Back of Your Quilt
With the binding sewn to the front, the final step is to secure it beautifully to the back. You have two main options here: hand stitching for a traditional look, or machine stitching for speed.
Option 1: Hand Stitching for a Classic Finish
Hand stitching offers an almost invisible finish, adding a touch of classic craftsmanship. Many quilters prefer this method for heirloom quilts.
- Flip your quilt over so the wrong side is facing up.
- Gently pull the folded binding over to the back of the quilt, neatly encasing the raw edges.
- Secure the binding with pins or wonder clips.
- Using a needle and matching thread, hand stitch the folded edge of the binding to the quilt back. We found a blind stitch or whipstitch works best for a discrete finish.
Take your time with hand stitching. It’s a meditative process that truly elevates the final piece.
Option 2: Machine Stitching for Speed
If you prefer a faster finish or are making a quilt that will see a lot of use (like a picnic blanket), machine stitching is an excellent choice. It’s durable and quick.
- With the binding securely pinned to the back, flip your quilt back to the front.
- Sew a stitch line from the front of the quilt, “in the ditch” (the seam line where the binding meets the quilt body).
- This stitch will catch the folded edge of the binding on the back, securing it in place.
While machine stitching is faster, it will be visible on the front of your quilt. Practice on a scrap piece to get your “ditch” stitching perfect.
Comparing Hand Stitching vs. Machine Stitching
Both methods have their merits. Consider what you value most for your specific quilt project.
| Feature | Hand Stitching | Machine Stitching |
|---|---|---|
| Appearance | Nearly invisible, traditional | Visible seam on front |
| Durability | Very durable when done well | Highly durable, great for active use |
| Time | More time-consuming | Much faster |
| Skill Level | Requires patience for neatness | Practice for “in the ditch” accuracy |
Many quilters choose hand stitching for comfort and aesthetic, especially for treasured gifts (Quilters Newsletter).
Final Touches and Care Tips for Your Bound Quilt
Your quilt is almost done! A few final steps ensure it’s ready for cuddling, displaying, or gifting.
A Final Press and Inspection
Once your binding is fully attached, give the entire edge a good press with your iron. This helps flatten and set the binding, giving it a crisp, finished look. Take a moment to inspect your work. Are the corners sharp? Are all stitches secure?
Long-Term Care for Your Quilt’s Binding
Binding is the workhorse of your quilt, taking most of the wear and tear. When washing your quilt, use a gentle cycle with cold water and mild detergent. Air drying or tumble drying on a low setting will help prolong the life of your binding and quilt. We found that proper care makes your beautiful binding last longer.
Congratulations! You’ve successfully bound your quilt. This process, while detailed, is incredibly rewarding. Each stitch adds to the story and longevity of your cherished creation.
Conclusion
You’ve seen how preparing, attaching, and finishing your quilt binding transforms a raw edge into a polished frame. Whether you choose the careful stitches of hand binding or the efficiency of machine stitching, each method offers a durable, beautiful finish.
This final step protects your hard work and makes your quilt shine. We found that the effort you put into binding truly pays off, enhancing both the look and lifespan of your cherished projects.
Now, go forth and give your next quilt the beautiful, lasting edge it deserves. Your finished masterpiece awaits!
Frequently Asked Questions
Is bias binding always necessary for quilts?
No, straight-grain binding is often sufficient for quilts with straight edges. Bias binding is ideal when you need the binding to stretch, such as on quilts with curved edges or scallops. It prevents puckering and provides extra durability around those unique shapes.
How can I make sure my binding corners are sharp and neat?
To get sharp corners, be precise when stopping your stitching ¼-inch from the edge before folding. The key is creating that crisp 45-degree fold with your binding strip before sewing down the next side. Pressing your corners well after stitching also helps them lie flat.
My binding seems bulky. What can I do to reduce bulk?
Bulk often comes from too much fabric in the seams. Try trimming your diagonal seam allowances to ¼-inch and pressing them open instead of to one side when joining strips. Also, consider trimming the quilt batting and backing slightly wider than your quilt top before attaching the binding; this reduces bulk right at the edge.
Can I use a different width for my binding strips?
Yes, while 2½-inch strips are common for double-fold binding, you can adjust the width. A wider strip might be easier to handle or provide a more prominent border. Just remember to adjust your seam allowances and folding measurements accordingly to maintain your desired finished binding width.
How do I prevent my binding from twisting when I sew it on?
To prevent twisting, always press your joined binding strip in half lengthwise very carefully before you start sewing. Use plenty of pins or wonder clips to secure the binding to the quilt’s edge. This keeps both layers of binding aligned with the quilt as you stitch, avoiding unhelpful twists.
