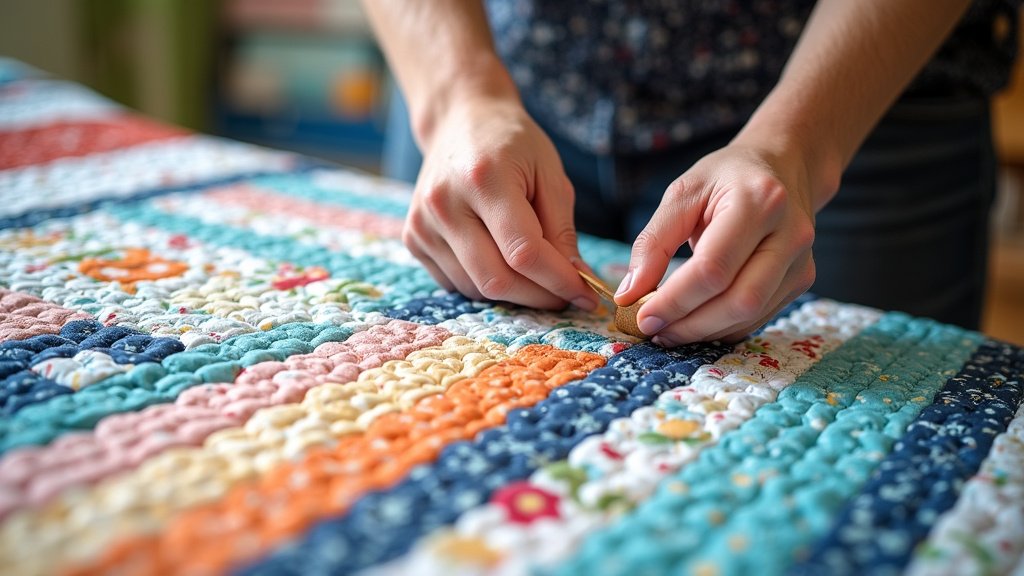
To piece a quilt top, you will bring together all your fabric blocks and stitch them into rows. Then, you will sew those rows together to form the complete quilt top. This process creates the decorative and visible surface of your finished quilt, ready for quilting and binding.
Creating a quilt top is a rewarding part of quilting. It’s where your fabric choices and block designs come to life. We found that careful planning and precise seams are key to a beautiful outcome. Many quilters find this step to be the most creatively engaging part of the entire process.
- Understand the basic steps for assembling a quilt top.
- Learn about essential tools and materials.
- Discover tips for accurate cutting and sewing.
- Get advice on pressing seams for a flat finish.
Let’s walk through exactly how to piece a quilt top, step by step, so you can create a stunning foundation for your next project.
Assembling Your Quilt Top: The Step-by-Step Guide
You’re ready to bring your stunning quilt blocks together! This section will guide you through the process, from preparing your workspace to pressing your finished quilt top.
Preparing Your Workspace and Tools
Before you begin, a little preparation goes a long way. A well-organized space makes the piecing process smoother and more enjoyable for you.
Essential Tools for Quilt Top Assembly
Having the right tools at hand is crucial for accuracy and efficiency. We found that a few key items make a big difference in your quilting journey.
- Sewing Machine: Make sure it’s clean, oiled, and threaded with good quality thread.
- Rotary Cutter, Mat, and Rulers: Essential for precise cutting of sashing, borders, and backing.
- Iron and Ironing Board: You’ll be doing a lot of pressing, so accessibility is key.
- Seam Ripper: Even the most experienced quilters make mistakes. Don’t be afraid to use it!
- Pins or Fabric Clips: Helpful for holding fabric pieces together before sewing.
- Thread: A neutral color, like gray or beige, often blends well with most fabrics.
Setting Up Your Workspace
Think about flow when setting up your space. You’ll move between cutting, sewing, and pressing. Can you minimize steps?
Dedicate a flat, well-lit surface for cutting. Your sewing machine should be stable and comfortable to sit at. Position your ironing board close to your sewing machine, but not so close that it crowds your sewing area (Craft Industry Alliance).
Clear any clutter. A tidy space helps you focus and prevents lost tools or fabric scraps.
Understanding Your Quilt Pattern Layout
Before you sew, visualize the finished product. How will your blocks come together?
Referring to Your Quilt Pattern
Every quilt pattern provides a layout diagram. This is your map! It shows how your individual blocks connect into rows, and then how those rows connect to form the complete quilt top.
We found that understanding your pattern’s numbering or lettering system for blocks and rows is very important. Sometimes patterns use letters for rows and numbers for columns, or vice versa.
Arranging Your Quilt Blocks
This is where your quilt starts to take shape! Lay out all your finished blocks on a design wall, floor, or bed. This lets you see the overall design.
Step back and look at your arrangement. Are the colors balanced? Do the patterns flow as you intended? This is also your chance to rotate blocks if needed, ensuring they face the correct direction (National Quilters Circle).
Take a picture with your phone! This helps you remember the layout before you start sewing. It’s a simple, effective trick we often recommend.
Sewing Your Blocks into Rows
Now the real magic begins: connecting your individual blocks. This process is all about consistency and accurate seam allowances.
The Power of the Quarter-Inch Seam
Most quilting patterns require a perfect ¼-inch seam allowance. Why is this so crucial? Because every seam adds up. If your seams are slightly off, your rows won’t match up, and your quilt top will be distorted.
Many sewing machines have a ¼-inch presser foot. If yours doesn’t, you can often buy one or mark your machine with a piece of tape as a guide. Practice on some scraps until your seams are consistent.
Step-by-Step: From Blocks to Rows
Pick up your blocks one by one, keeping them in order. Here’s a common sequence:
- Pair up blocks: Take the first two blocks in your top row. Place them right sides together, aligning edges carefully.
- Pin if needed: If your blocks are shifty or you’re a beginner, pin along the edge you’re sewing. Remove pins just before your needle hits them.
- Sew with a ¼-inch seam: Stitch slowly and steadily.
- Add the next block: Take your newly sewn pair, and add the third block in the row, again, right sides together. Sew.
- Continue: Do this until your entire first row is complete. Repeat for all subsequent rows.
As you sew, check your progress often. Are your seams staying even? Are your points matching where they should?
Pressing Your Seams for a Flat Finish
Pressing isn’t ironing. Ironing involves pushing the iron around, stretching fabric. Pressing means lifting and setting the iron down. This keeps your fabric from distorting.
Open vs. Nested Seams
You generally have two options for pressing seams: open or to one side. Each has advantages.
- Pressing Seams Open: This creates a very flat finish on both sides of the fabric. It can reduce bulk, especially with many seam intersections. However, seams pressed open might be slightly weaker, as the stitching is the only thing holding the fabric together (Quilters Newsletter).
- Pressing Seams to One Side: This is often called “nesting” seams. It involves pressing all seams in a single direction. When you join two rows, you press the seams in alternating directions. This allows the seams to “nest” together, creating less bulk at intersections and stronger seams. However, it can sometimes create a slight ridge on the front of the quilt.
Your pattern might recommend a specific method. If not, choose what works best for your project and fabric. We found that pressing to one side is usually preferred for strength.
Pressing After Each Step
Do NOT wait until the end. Pressing as you go is essential. After sewing two blocks together, press that seam. After completing a row, press all the seams in that row. This creates crisp, accurate units.
Use a dry iron or a steam iron if your fabric can handle it. Always press from the wrong side first to set the stitches, then flip and press from the right side, being careful not to stretch the fabric.
Joining Your Quilt Rows Together
You’ve got individual rows; now you unite them into the full quilt top.
Aligning Your Quilt Rows
This is where careful pinning is often your best friend. Take your first two finished rows. Place them right sides together, aligning all the raw edges carefully.
Match up your seam intersections. If you pressed your seams in alternating directions (nested seams), these intersections should fit together like puzzle pieces. Pin at each intersection, then add more pins between intersections if you feel it’s necessary for stability.
We found that placing pins perpendicular to the seam helps keep everything aligned as you sew.
Sewing Your Rows into the Quilt Top
Just like sewing blocks, you’ll use a ¼-inch seam allowance. Sew slowly, from one end of the row to the other. Be especially mindful of those pinned intersections.
After sewing, carefully press the seam that joins the two rows. Again, consider if you want to press this seam open or to one side. Often, pressing these long seams open helps keep the overall quilt top flatter.
Continue this process, adding one row at a time, until your entire quilt top is assembled. It’s a thrilling moment when you connect that last row!
Adding Sashing and Borders (If Applicable)
Many patterns include sashing strips between blocks or borders around the entire quilt top. These enhance the design and can help square up your quilt.
Here’s a quick checklist for adding sashing and borders:
- Measure your quilt top for borders at the center, sides, and ends.
- Cut border strips to the longest measurement to avoid distortion.
- Attach side borders first, then top and bottom borders.
- Use consistent quarter-inch seams for clean attachment.
- Press seams towards the border strips for a fuller look.
Final Pressing and Squaring Up
Your quilt top is complete! Now for the final touches to prepare it for quilting.
The All-Important Final Press
Give your entire quilt top a good, thorough final press. This helps to flatten all the seams and remove any wrinkles. Use steam if your fabric can handle it, or a pressing cloth for delicate fabrics.
Lay the quilt top flat and press large sections at a time. This creates a smooth, flat foundation for your batting and backing (Missouri Star Quilt Company).
Squaring Up Your Quilt Top
Even with careful piecing, quilt tops aren’t always perfectly square. Squaring up involves trimming the edges so they are straight and at right angles. This is especially important for machine quilters.
Lay your quilt top on your cutting mat. Use a large square ruler (e.g., 12.5″ or larger) and a long ruler to trim the raw edges. Align the ruler with existing seams or design elements to keep things straight.
Trim off as little as possible, just enough to make the edges straight and ensure your corners are 90 degrees. This final step primes your quilt top for the next exciting stage: quilting!
| Task | Why It Matters | Helpful Tip |
|---|---|---|
| Accurate ¼” Seams | Ensures blocks and rows line up perfectly. | Use a ¼” presser foot or tape guide. |
| Pressing Seams Frequently | Creates flat, crisp units and prevents distortion. | Press after every 2-3 seams; don’t iron! |
| Laying Out Blocks First | Visualizes the final design and catches errors early. | Take a photo of your layout as a reference. |
| Pinning at Intersections | Matches points and keeps seams aligned. | Pin perpendicular to the seam. |
| Squaring Up the Finish | Prepares the quilt for batting and backing, ensuring a neat finish. | Use a large square ruler and sharp rotary cutter. |
<h2><b>Conclusion</b></h2>
<p>You’ve learned that piecing a quilt top is all about <strong>precision and patience</strong>. From preparing your workspace to the final pressing, each step builds on the last. We found that accurate ¼-inch seams and consistent pressing are your best friends.</p>
<p>Don’t rush the process. Take your time, enjoy seeing your fabrics come together, and don’t be afraid to use that seam ripper if needed. <strong>Every stitch gets you closer</strong> to a beautiful, finished quilt.</p>
<p>Now that your quilt top is complete and squared up, the next exciting step awaits! <strong>Prepare it for quilting</strong> by basting it with your chosen backing and batting, and get ready to add those finishing stitches.</p>
<h2><b>Frequently Asked Questions</b></h2>
<h3><b>How can I make sure my ¼-inch seams are accurate?</b></h3>
<p>Practice on scrap fabric first. You can also use a specialized ¼-inch presser foot, or place a piece of tape on your sewing machine bed as a guide line. This helps keep your fabric consistently aligned.</p>
<h3><b>Should I wash my fabric before piecing the quilt top?</b></h3>
<p>Many quilters pre-wash fabric to prevent shrinking or dye bleeding later. However, some prefer not to, enjoying the crinkly look after the first wash. Choose what works best for your project and fabric type.</p>
<h3><b>What should I do if my quilt top isn’t perfectly square?</b></h3>
<p>This is very common! Use a large square ruler and rotary cutter to carefully trim the edges. You want to make them as straight and 90-degree as possible without removing too much fabric. This helps later during quilting.</p>
<h3><b>Is it better to use pins or fabric clips when piecing?</b></h3>
<p>Both work well! Pins are great for holding fabric layers securely, especially at intersections. Clips are useful for thicker seams or when you want to avoid pinholes. Experiment to see what you prefer for different tasks.</p>
<h3><b>Can I use different types of fabric in one quilt top?</b></h3>
<p>Yes, you can mix fabrics, but consider their weight and stretch. Combining cottons with flannels or knits might create challenges. Stick to similar fabric types like 100% quilting cottons for the easiest experience.</p>