
To free motion quilt for beginners, the core action is to remove your feed dogs and use a darning or free-motion foot on your sewing machine. This allows you to move the fabric freely in any direction while sewing, creating beautiful designs without needing to pause or lift the needle. Start with simple meandering patterns to get comfortable.
Free motion quilting lets you add unique texture and design to your quilts. It transforms a simple quilt top into a finished, personalized masterpiece. Many quilters find it intimidating at first, but with a little practice, it’s a joyful and rewarding skill to master.
- Understand your machine settings for free motion quilting.
- Practice basic movements.
- Choose the right thread and needle.
- Manage your quilt sandwich smoothly.
- Start with simple designs.
Ready to try? Let’s walk through exactly how you can start free motion quilting today, even if you’re a complete beginner.
Your First Steps to Free Motion Quilting Success
Beginning your free motion quilting adventure is exciting! It allows you to transform your quilt projects into personalized works of art. The journey starts with understanding your machine and setting it up correctly.
Preparing Your Sewing Machine for Free Motion Quilting
Think of your sewing machine as an extension of your creative hand. To free motion quilt, you need to make a few key adjustments. These changes allow you to control the fabric movement yourself, instead of the machine doing it.
Lowering or Covering Your Feed Dogs
The feed dogs are those little teeth under your presser foot. They normally pull your fabric through at an even pace. For free motion quilting, you want to disable this automatic feeding. Many machines have a switch or lever to lower them. If yours doesn’t, you might have a plate that covers them. Check your machine’s manual for specific instructions. This step is crucial because it gives you complete control over the fabric’s movement. You’ll be guiding the quilt with your hands.
Installing Your Free Motion or Darning Foot
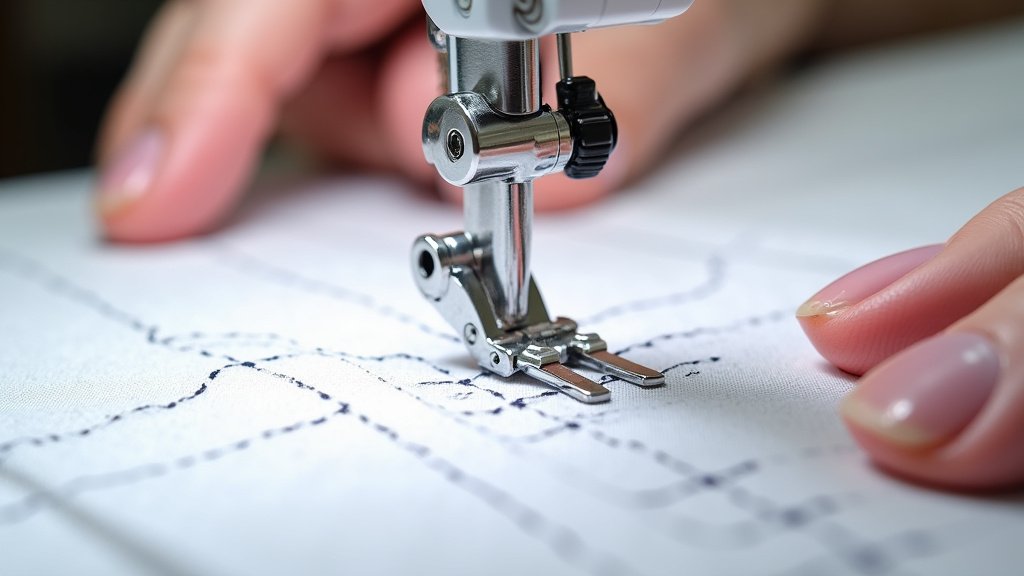
A specialized foot is essential. It’s often called a darning foot, a free motion foot, or an open-toe embroidery foot. This foot doesn’t press down on the fabric constantly like a regular presser foot. Instead, it hovers just above your quilt surface. This allows you to move the fabric smoothly in any direction. The open toe design also gives you a better view of where your needle is going.
Adjusting Your Machine’s Settings
Beyond the feed dogs and foot, a few other settings need attention. You’ll want to use a straight stitch, often with a stitch length of zero if your machine offers that. Since you’re controlling the movement, the machine isn’t dictating stitch length. Your movement will determine it. Many quilters also find it helpful to reduce their top tension slightly. This often prevents skipped stitches or tension issues when you’re first starting out. Always test on a scrap piece first!
Choosing the Right Tools for Free Motion Quilting
Just like any craft, having the right tools makes a huge difference. For free motion quilting, your thread and needle choices can impact your experience and the final look of your quilt. Don’t overlook these details!
Selecting Your Thread
The thread you choose matters for both aesthetics and function. For beginners, we often recommend a good quality cotton or polyester thread. A 50wt thread is a popular choice because it’s strong but not too thick. It blends well into the fabric. You can match your thread to your fabric for a subtle look, or choose a contrasting color for a more dramatic effect. Always ensure your chosen thread is a quilting-specific thread. This means it’s designed to withstand the stress of quilting and general use.
Picking the Perfect Needle
Your needle is key to smooth stitching and preventing fabric damage. For free motion quilting, a sharp or a “topstitch” needle is a common recommendation (National Sewing Council). These needles have a sharp point that glides through layers of fabric easily. A size 90/14 or 80/12 is often a good starting point for general quilting. If you’re using a very fine thread or a very dense fabric, you might adjust this. A fresh needle for every project is a good habit. Needles can dull or bend over time, leading to skipped stitches or fabric pulls.
Managing Your Quilt Sandwich with Ease
The “quilt sandwich” is your quilt top, batting, and backing, all basted together. Getting this right is vital for successful free motion quilting. Proper preparation prevents puckers and keeps your quilting smooth.
Basting Your Quilt Layers Securely
Basting holds your three layers together before quilting. There are a few methods you can use. You can pin-baste using safety pins, spray-baste with a temporary adhesive, or even thread-baste with long, loose stitches. For beginners, many find spray basting to be a great option because it creates a smooth, even surface with no shifting. If you pin-baste, make sure your pins are close together, perhaps every 4-6 inches (Ohio State University Extension). This prevents the layers from shifting while you’re moving the quilt under the needle.
Setting Up Your Workspace
Your workspace setup can make a huge difference in comfort and control. You need an area where your quilt can move freely, without dragging on the floor or getting stuck on furniture. Consider a large, flat table surface around your sewing machine. Many quilters also recommend using a Supreme Slider or similar product. This is a slick mat that adheres to your machine bed. It helps the quilt sandwich glide more easily, reducing friction and fatigue in your arms and shoulders. Keep your hands on the quilt, not supporting its weight.
Developing Your Free Motion Quilting Skills
Practice is truly the secret ingredient for free motion quilting. Don’t expect perfection on your first try. Embrace the journey of learning!
Practicing Basic Movements on a Test Sandwich
Before you touch your prized quilt top, create a practice ‘sandwich.’ Use scrap fabric and batting. This is your playground! The goal here is to get comfortable moving the fabric. You want your hands to work in sync with your machine’s speed. Start by drawing simple shapes on your practice piece with a washable marker. Try loops, squiggles, and circles. Focus on maintaining a consistent speed. Your needle should sew at a steady pace while your hands guide the fabric smoothly. Don’t rush; a slower, steady pace is much better than a fast, jerky one.
Here’s a simple practice checklist:
- Create a small practice fabric sandwich.
- Start with meandering lines, no specific pattern.
- Focus on keeping your hands relaxed.
- Try to make stitches look even in length.
- Experiment with different machine speeds.
- Practice stopping and starting smoothly.
Mastering the Meander Design
The meandering design is often recommended as the first design to master. Why? Because it’s forgiving and doesn’t require precise turns or stopping. It’s essentially a series of curved lines that never intersect and fill the entire space. It looks like a flowing river. Start from the center of your practice piece and work outwards. Keep your curves gentle and flowing. Avoid sharp corners when you’re first learning. The beauty of a meander is that there’s no “right” way. Your unique hand movement will create a beautiful texture.
Need some inspiration for your first practice session? Here are a few basic designs to try:
| Design Name | Description | What It Looks Like |
|---|---|---|
| Meander (Stipple) | Continuous, organic curved lines that don’t cross. | Looks like a puzzle piece or random squiggles. |
| Loops | Connected loops, like a cursive ‘e’ or ‘l’. | Soft, rounded texture. |
| Stippling (Dense) | Very small, close-together meandering. | Creates a highly textured, puffy surface. |
| Wavy Lines | Back-and-forth movement across the quilt. | Simple texture, similar to water ripples. |
Overcoming Common Beginner Challenges
It’s totally normal to face some bumps in the road when learning free motion quilting. Every quilter has been there! Knowing what to look out for can help you troubleshoot and keep moving forward.
Addressing Stitch Quality Issues
You might notice uneven stitches, skipped stitches, or tension problems. Uneven stitches often mean your hand speed and machine speed don’t match. Try to move your hands at a consistent, steady pace while keeping your foot pedal steady. Skipped stitches can be due to a dull needle, incorrect needle type (a sharp is best), or sometimes even slightly off-tension. Thread breaking is often a tension issue or a low-quality thread. Adjust your top tension in small increments, and always check your bobbin tension too (many experts suggest it’s more critical than the top tension).
Managing Fatigue and Fabric Drag
Free motion quilting can be a workout! Your arms and shoulders might get tired. This often happens because you’re supporting too much of the quilt’s weight. Remember that large table surface recommendation? It reduces drag. Also, take frequent breaks. Stand up, stretch, and walk away for a few minutes. If your machine bed isn’t super slick, consider investing in a Supreme Slider. It significantly reduces friction and makes moving the quilt easier. Your goal is to glide, not push, the quilt across the machine.
You’re ready to start your free motion quilting journey. Remember, practice is key, and every stitch is a step toward mastery. Have fun with it!
Conclusion
You now have the essential knowledge to begin your free motion quilting journey. We’ve walked through setting up your machine, choosing the right tools, and preparing your quilt. While it might seem like a lot, remember that every expert quilter started right where you are now.
Your hands will learn with each stitch. Embrace the learning curve, be patient with yourself, and enjoy the process of bringing your quilts to life. Grab your practice sandwich and start experimenting today!
Frequently Asked Questions
How do I know if my tension is correct for free motion quilting?
The best way to check tension is by sewing on a practice quilt sandwich. Your stitches should look balanced, with no loops on the top or bottom of the fabric. If you see loops, adjust your top tension slightly. Sometimes the bobbin tension also needs a small adjustment.
Can I free motion quilt on a regular sewing machine?
Absolutely! Most modern sewing machines can be adapted for free motion quilting. You’ll need to be able to lower or cover your feed dogs and attach a free-motion or darning foot. Always consult your machine’s manual for specific instructions for your model.
What if my stitches are uneven or too long/short?
Uneven stitches usually mean your hand speed and machine speed aren’t perfectly synchronized yet. Practice moving your hands at a consistent pace while keeping your foot on the pedal steady. It takes practice to develop muscle memory, so keep at it!
Do I need a quilting hoop for free motion quilting?
No, a quilting hoop is not typically used for machine free motion quilting. Your hands directly guide the fabric. The goal is for the quilt to move smoothly and easily under the needle, which a hoop would restrict.
How do I avoid getting puckers or tucks in my quilt?
Puckers often happen when your quilt sandwich layers shift during quilting. Proper basting is key; spray basting is excellent for beginners. Also, ensure you have plenty of support around your machine so the quilt’s weight isn’t dragging, which can cause distortions.
