
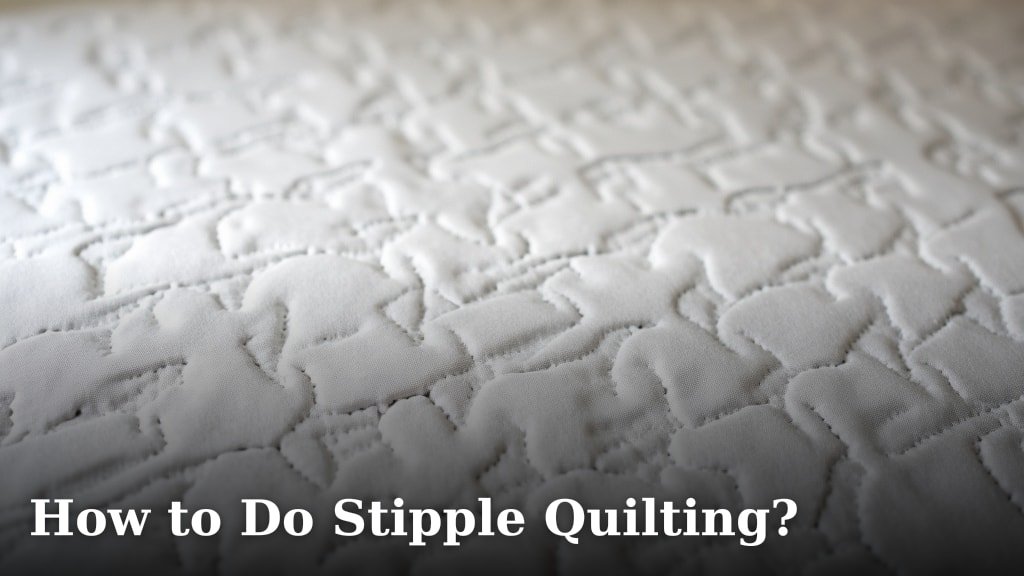
To do stipple quilting, you basically sew continuous, random, meandering lines that don’t overlap to fill an area on your quilt. This creates a textured, pebble-like effect that helps your quilt layers stay together. It’s an easy free-motion quilting technique for beginners.
You can create a beautiful backing for your quilt tops with this simple approach. Many quilters find stippling relaxing and meditative. It’s a fantastic way to add your personal touch without complicated designs. Plus, it’s very forgiving of minor wobbles!
- Stipple quilting uses continuous, non-overlapping free-motion stitches.
- It creates a textured, pebble-like look on your quilt project.
- This method helps stabilize quilt layers effectively.
- It’s an ideal technique for free-motion quilting newbies.
- You can achieve a professional finish with practice.
So, are you ready to give it a try? Let’s walk through exactly how to do stipple quilting step by step.
Starting Your Stipple Quilting Journey
Beginning stipple quilting is exciting! You’ll need some basic supplies to get started. Think of it like baking a cake – you gather all your ingredients first. This preparation makes the whole quilting process much smoother.
Gathering Your Essential Tools
Before you even touch your sewing machine, make sure you have everything ready. Having the right tools on hand prevents interruptions and keeps your creative flow going. It’s all about setting yourself up for an enjoyable experience.
Choosing Your Fabric and Batting
You’ll need a quilt sandwich: a top fabric, batting, and a backing fabric. For practicing stippling, scrap fabric works perfectly. It doesn’t have to be your main project yet. Just grab some fabric pieces you don’t mind experimenting with.
Select a medium-loft batting for your practice sandwich. This type of batting gives you enough cushion to feel your stitches without being too thick or too thin. It’s a good middle-ground for beginners.
Machine Setup for Free-Motion Quilting
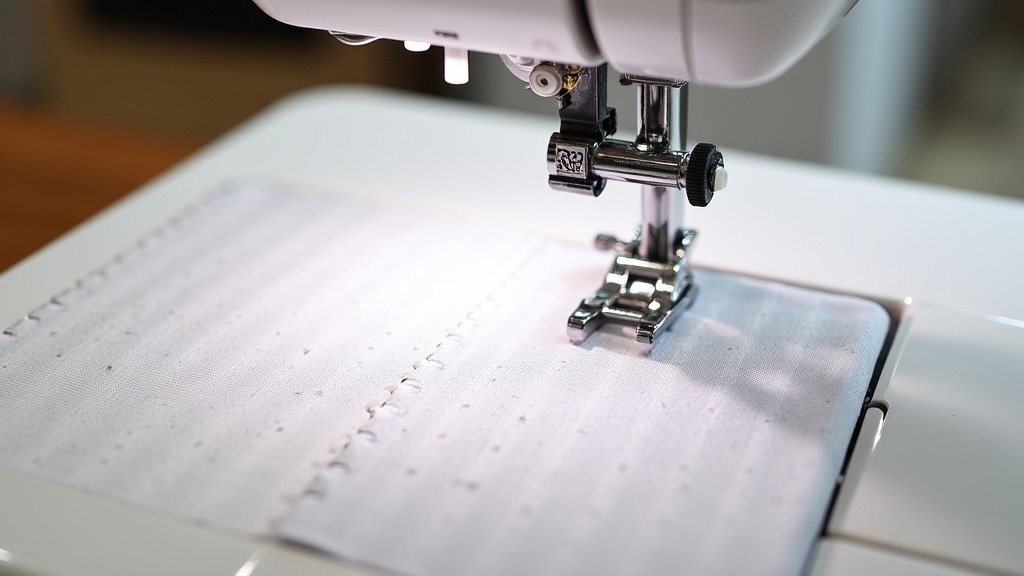
Your sewing machine needs a few adjustments for free-motion quilting. First, you’ll need a darning or free-motion foot. This foot hovers just above your fabric, allowing you to move the quilt in any direction. It’s truly essential.
Next, you’ll need to drop your feed dogs. The feed dogs are those little teeth that pull the fabric through your machine. Dropping them gives you control over fabric movement. If you can’t drop them, some machines offer a plate to cover them.
Selecting the Right Thread and Needle
When it comes to thread, choose a good quality one. A 50-weight cotton thread is a popular choice for stippling. It’s strong enough but not overly thick. Match your bobbin thread to your top thread for the best results.
For your needle, a new quilting needle (size 90/14) is usually a good bet. A sharp, fresh needle will glide through your fabric layers without snagging. This helps prevent skipped stitches and frustration.
- Darning or free-motion foot: Absolutely necessary for moving your quilt freely.
- Drop feed dogs: Gives you manual control over fabric movement.
- Good quality thread: 50-weight cotton is recommended for beginners.
- New quilting needle: Ensures smooth stitching and prevents fabric damage.
- Quilting gloves: Help grip the fabric, reducing hand strain.
- Large, clear workspace: Essential for maneuvering your quilt project.
Preparing Your Quilt Sandwich for Stippling
Making a good quilt sandwich is key to successful stipple quilting. It’s like building the foundation of a house; if it’s not stable, everything else will suffer. Proper layering prevents shifting and puckering as you quilt.
Layering Your Fabrics Correctly
You’ll place your backing fabric right side down first. Then, lay your batting on top. Finally, put your quilt top (or practice fabric) right side up on top of the batting. This creates the three layers of your quilt sandwich. Make sure all layers are smooth and flat, like a perfectly made bed.
Basting Your Layers Securely
Now, you need to hold those layers together. Basting prevents your quilt layers from shifting while you’re sewing. There are different ways to baste, but for practice, safety pins or spray basting work well. Place pins every 4-6 inches across your practice piece. We found that this spacing offers good stability without being excessive. (University of Nebraska-Lincoln Extension)
| Basting Method | Pros | Cons |
|---|---|---|
| Safety Pins | Inexpensive, reusable, good for small projects. | Can be tedious, leaves small holes. |
| Spray Basting | Quick, no pins needed, very flat finish. | Can be sticky, ventilation needed, not reusable. |
| Thread Basting | Very secure, good for large projects. | Time-consuming, requires hand sewing. |
Mastering the Free-Motion Technique for Stippling
Free-motion quilting might feel a little strange at first. You’re controlling both the fabric movement and the speed of your stitches. But don’t worry, it gets much easier with practice. Think of it as drawing with your sewing machine.
Finding Your Rhythm and Speed
The trick is to synchronize your hand movement with your machine’s speed. You want to move the fabric smoothly and consistently while maintaining a steady sewing speed. This creates even stitch length. Too fast with your hands and slow with the machine? Long stitches. Too slow with your hands and fast with the machine? Tiny, bunched stitches.
The Stipple Movement: Continuous and Non-Overlapping
Imagine tracing the outline of a pebble, then moving to trace another, and another, without lifting your needle. That’s the stipple movement. Your goal is to create random, flowing lines that fill the space. The lines should never cross over each other. This is what creates that unique, textured look.
Focus on maintaining about a finger’s width distance between your lines. This ensures good coverage and creates the classic stipple effect. Don’t stress too much about perfect shapes; the beauty is in the organic, free-form nature of the design.
Practicing Your Stippling Motion
Practice truly makes perfect in free-motion quilting. Don’t expect to be an expert on your first try. Give yourself grace and enjoy the learning process. It’s all about building muscle memory.
Start with Small Practice Pieces
Instead of jumping straight to your beautiful quilt top, use smaller practice sandwiches. These are much easier to maneuver under your machine. This helps build your confidence without the pressure of ruining a big project.
Try dividing your practice piece into smaller sections using temporary fabric markers. Quilt within these sections. Focus on consistency in one small area before moving to another. This structured practice can be very helpful.
Troubleshooting Common Stippling Issues
You might encounter a few common hiccups. One common issue is uneven stitch length. This usually means your fabric movement and machine speed aren’t synchronized. Adjust one or both until your stitches look more consistent.
Another problem could be fabric drag. If your quilt feels heavy and hard to move, you might need quilting gloves. They give you extra grip. Also, make sure your machine isn’t struggling; maybe slow down your machine speed a bit. Many experienced quilters find a clean machine also helps. (Quilters Newsletter)
Tips for Achieving a Great Stipple Quilting Finish
You’re almost there! With a little finesse, your stipple quilting will look professional and beautiful. These small tips can make a big difference in the final look of your quilt.
Maintaining Consistent Spacing and Flow
Try to keep the spaces between your “pebbles” consistent. This gives your quilting a harmonious feel. Think of a lazy river, gently meandering but always moving forward. Avoid sharp corners when possible; gentle curves are usually best for stippling.
Keep your eyes a few inches ahead of your needle. This lets your brain anticipate the next move. It helps create that continuous, non-overlapping design we talked about. Many quilters describe it as a mindful process.
Dealing with Starts and Stops (Tying Off)
When you start or stop quilting, you need to secure your stitches. You can do this by taking a few very tiny stitches in place. Or, you can pull your bobbin thread to the top and tie off the threads on the back of your quilt. Some machines have an automatic tie-off function; check your manual!
Always re-bury your thread tails inside the batting when possible. This makes for a cleaner finish. A good loop turner tool can be very handy for this. It keeps the back of your quilt looking just as neat as the front.
When to Use Stipple Quilting in Your Projects
Stipple quilting is incredibly versatile. It works wonderfully on many different types of projects. It’s a fantastic background fill, but it can also be the star of the show. We’ve found it enhances many quilt designs.
As a Background Fill
The most common use for stipple quilting is as a background filler. It makes other elements, like appliqués or pieced blocks, really pop. Because it’s a dense texture, it pushes those feature areas forward. It’s like a quiet backdrop for a vibrant painting.
On the Entire Quilt
Sometimes, all a quilt needs is uniform texture. Stipple quilting the entire quilt creates a soft, pliable finish. It’s perfect for cuddly quilts that get a lot of use. Think baby quilts or simple throw blankets. It adds texture without distracting from your fabric choices.
Combining with Other Designs
You can also use stippling in combination with other free-motion designs. Maybe you quilt loops in one block and stipple in the next. Or use stippling in the border. The possibilities are endless. It’s a great tool in your quilting toolkit.
Conclusion
You now have all the tools and knowledge to start your stipple quilting journey. Remember, practice is truly the key to mastering this relaxed free-motion technique. Don’t be afraid to experiment with different speeds and movements on your practice sandwiches. You’ll soon discover your own rhythm and preferred style.
Embrace stippling as a wonderfully forgiving way to add texture and stabilize your quilt layers. It’s perfect for beginners but loved by all quilters. So, set up your machine, gather your supplies, and start creating beautiful, textured quilts today!
Frequently Asked Questions
What is the main benefit of stipple quilting?
Stipple quilting creates a dense, even texture across your quilt. This helps stabilize all three layers (top, batting, backing) very effectively. It also gives your quilt a soft, pliable, and well-loved feel, making it perfect for snuggling.
Can I stipple quilt on a regular sewing machine?
Yes, absolutely! As we discussed, you just need to equip your machine with a free-motion darning foot. You’ll also need to drop or cover your feed dogs. Most home sewing machines can be adapted for free-motion quilting, including stippling.
How do I prevent my stipple stitches from looking uneven?
Uneven stitches often happen when your hand speed and machine speed aren’t synchronized. To improve, focus on moving your fabric at a consistent pace while maintaining a steady, medium machine speed. It takes practice to find your perfect balance between the two.
Do I need to mark my quilt before stippling?
Generally, no. The beauty of stipple quilting is its organic, random nature. You simply move your fabric to create continuous, non-overlapping lines. For practicing, you might divide a practice piece into sections, but for a finished project, marking isn’t typically needed.
What kind of thread is best for stippling?
For stippling, a 50-weight cotton thread is an excellent choice for beginners. It’s strong and available in many colors. You want a good quality thread that won’t break easily and will blend nicely with your fabric choices. Match your bobbin thread to your top thread for the neatest results.
