How to Choose Borders for a Panel Quilt
Choose a border that is narrower than the panel's boldest motif and echoes its colors, not its pattern. Measure the panel first, then pick a plain, small-print or streaked border that gives the center room to be the star.
On this page (14 sections)
- How do you size a border for a printed panel?
- Which fabrics work best for a panel border?
- How do you match border colors to a panel?
- How do you plan the number of borders?
- How do you handle a panel that is not square?
- How do you choose a border shape and seam plan?
- How do you quilt a border without overpowering the panel?
- How do you use a panel border to change quilt size?
- Which products help you practice border decisions?
- How do you test a border before you sew it on?
- What are the most common border mistakes with panels?
- How do you finish a panel quilt border for hanging or use?
- What if you want a border that is not a straight frame?
- How do you choose quilt border ideas with center panel for your next quilt?
The best quilt border ideas with center panel start with a simple rule: the border frames the panel, it does not join it as a second picture. A printed panel already has its own scene, words or motifs, so your job is to set a calm edge around it.
Measure your panel before you shop for fabric. Note its width, height and the size of its largest motif.
That motif size will decide almost every border choice that follows.
If you want a broader view of sashing and frames, our guide to quilt sashing and border ideas sits well beside this one. Use it for the vocabulary, then come back here for panel-specific proportions.
How do you size a border for a printed panel?
Size the border to the panel's motif, not to the panel alone. A first border should usually sit between 1 and 4 inches finished, with wider borders saved for large, simple panels.
A 2 inch finished border suits a panel with small repeated designs. A 4 inch border suits a panel with one large animal, flower or landscape.
If the panel has text, keep the first border narrower so letters stay readable.
Lay paper strips around the panel on a table. Try 1, 2, 3 and 4 inch widths in the same fabric.
The width that lets your eye rest on the panel is the winner.
Small panels need narrow borders because a wide border can swallow the whole design. Large panels can carry a wider border because the image still fills the frame.
Rule: cut the first border to about half the height of the panel's key motif, and never wider than one third of the panel width.
Which fabrics work best for a panel border?
Choose a fabric that is quieter than the panel in either print scale or value. A solid, tone-on-tone or small sprig print will frame a busy panel without competing with it.
Solid borders give clean color and the easiest quilting surface. They suit detailed panels because they add no new pattern to read.
Small prints add texture when a solid feels flat. Keep the scale under 1 inch finished so it reads as texture, not a second picture.
Streaked or blender fabrics sit between the two. They add movement without a clear motif, which suits photographic or illustrated panels.
Avoid a border print at the same scale as the panel print. Two equal patterns side by side will fight and neither will look settled.
Pick border fabric you can describe in one plain word, such as solid, small or streaked. Skip any fabric you would call busy.
How do you match border colors to a panel?
Pull color from the panel, then quiet it down. Use two or three colors already in the panel and repeat the least busy of them in the border.
Stand in front of the panel with fabric swatches. Hold one swatch at a time against the edge.
The right swatch will look like it belongs to the same family as the panel, but it will not shout over it.
A dark border creates a strong frame and suits light panels. A light border opens a dark panel and suits panels with heavy black outlines.
A mid-tone border gives a softer, more blended edge.
If the panel has a clear background color, use that color, or a shade darker, for the inner border. That choice makes the panel look larger and more planned.
Rule: choose the border color from inside the panel, then go one step darker or quieter for the frame.
How do you plan the number of borders?
Plan for one or two borders, and know what each one does. Use a narrow inner border to separate the panel, and a wider outer border to finish the quilt.
A single border works for a small quilt, a wall hanging or a panel that already fills the space you want. It keeps the design simple and the quilting easy to plan.
Two borders give you more control. The inner border can be a solid in a panel color, and the outer border can carry the main color statement.
Three borders are possible, but they rarely help with a panel. Each extra seam adds a line the eye must cross, and panels usually need fewer lines.
Think of the inner border as a mat in picture framing. It creates breathing room, while the outer border is the frame itself.
Add a second border only when it has a different job from the first. That job might be separation, color or extra quilting space.
How do you handle a panel that is not square?
Measure the panel in four places before you cut anything. Panels are often slightly trapezoidal, so measure the top, middle and bottom of each side and cut borders to fit the real size.
Lay the panel flat and press it gently according to its care needs. Do not stretch the edges to force a square.
Note any curve or taper in inches.
Cut the side borders first, using the average side length. Sew them on, then measure the new top and bottom edges.
Cut the top and bottom borders to those new measurements.
This order matters. If you cut all four borders to the printed panel size, one side will be short or long, and the quilt will not hang flat.
Rule: measure after every pair of borders, and cut the next pair to the new size, never to the original panel size.
What if the panel is a large single image?
A single large image needs a border that acts like a picture mat. Use a solid or streaked fabric and keep the print scale at zero near the image edge.
Place a narrow inner border in the image background color, then a wider outer border if you want more presence. That two-border plan keeps the picture clear.
What if the panel is made of many small motifs?
A panel of small motifs needs a border with even less pattern. A solid border will stop the eye from hunting for more detail at the edge.
Small prints can work here, but only if the scale is clearly smaller than the motifs in the panel. Test it on the floor before you cut.
How do you choose a border shape and seam plan?
Keep the border shape simple unless the panel style asks for more. Straight borders suit most panels, while mitered corners suit formal panels where the pattern must turn cleanly.
For a simple quilting path along those borders, see straight-edge stipple quilting.
Straight sewn corners are faster and more forgiving. They suit solids, small prints and streaked fabrics where no pattern match is needed.
Mitered corners look neat with striped or directional fabrics. They take more time and fabric, so save them for corners seen close up, such as on a wall hanging.
Plan your seam order before you cut. Sew opposite sides first, then measure for the remaining pair.
How do you quilt a border without overpowering the panel?
Quilt the border to support the panel, not copy it. Use a simpler motif, wider spacing or a change of direction so the quilting reads as a frame.
A plain border allows straight lines echoing the panel shape, a feather or leaf, or simple crosshatch.
Keep border motifs larger than panel motifs. Larger quilting stays calm beside detailed print.
Quilt the panel first, then the border. You can then change direction at the seam.
For ideas that suit a framed edge, see How to Quilt Beautiful Borders on Your Machine. It covers spacing, motifs and walking the machine around a border without puckers.
Rule: make border quilting larger, simpler or more directional than panel quilting.
How do you use a panel border to change quilt size?
Use border width to reach the size you need, with a plan. Add width in paired borders and check the finished size after each pair, so the panel stays centered.
Borders on the top and bottom add more length than side borders. That idea is covered in quilt border ideas to make sides longer, which focuses on length and balance.
Measure the desired finished size. Subtract the panel size, then divide the remainder by two for each side.
Repeat that math for top and bottom.
Do not fix a small gap with one very wide border. Two narrower borders look balanced and give two quilting zones.
Rule: divide the extra fabric by two for each side, and add it as one or two measured borders.
Which products help you practice border decisions?
Products can help you test border ideas at small scale before you commit to a full quilt. A practice runner and a finished quilt set let you see how framing, color and stitching change a design.
The June Tailor pattern is printed on batting with easy piece-by-number construction. The batting is 80 percent cotton and 20 percent polyester, and the finished project measures 48 inches by 15 inches.
Fabric is not included, so you supply your own border fabrics and test color choices.
That small format suits a first practice run. You can try a solid border, a small-print border and a two-border plan in 30 seams without cutting a large panel.
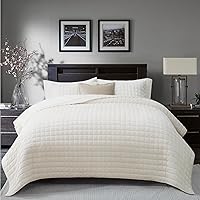
The RECYCO set in Cream White is a King size quilt at 108 inches by 96 inches, with two pillow shams at 20 inches by 36 inches. It uses velvet with channel stitch geometric pattern and polyester fill.
RECYCO describes it as machine washable and lightweight for all seasons.
Use it as a color study. The cream tone is quiet enough to sit beside almost any panel color, which is the role a good inner border plays.
The RECYCO set in Mocha Brown matches the Cream White set in size and construction. It is a King size quilt at 108 inches by 96 inches, with shams at 20 inches by 36 inches, in velvet with channel stitching.
RECYCO describes it as machine washable and suited to all seasons.
Holding a dark brown tone beside a light panel is a useful test. If the brown feels too heavy, you have learned that your border needs a lighter value before you cut.
How do you test a border before you sew it on?
Test every border on a flat surface before you cut the fabric. Pin paper or fabric strips around the panel, stand back and photograph it from across the room.
A photo will show value and scale problems that your eyes miss at arm's length. Look for a border that makes the panel look larger, not smaller, and for corners that feel balanced.
Test the quilting at the same time. Mark a motif on the paper strip and see whether it reads as a frame or as a second panel.
Check the border in the room where the quilt will live. A border that works in daylight may look too dark under evening light, and a pale border may vanish against a light wall.
Keep the test strips. They become your cutting guide when you move to fabric.
What are the most common border mistakes with panels?
Most mistakes come from treating the panel like a block. A panel is a picture, so it needs a frame, not another block in a pattern.
A border print at the same scale as the panel print makes the two compete. The quilt looks busy from across the room.
Cutting borders to the printed panel size causes trouble. Panels can be off square, so the quilt will not hang flat.
A border too wide for the motif overwhelms it. A 6 inch border beside a 1 inch motif makes the panel look like a small picture in a huge frame.
Quilting the border with the same motif and scale as the panel erases the seam. The quilt loses its structure.
If you use structured blocks instead, our guide to quilt block border ideas covers different rules. Panel quilts need the frame approach.
Rule: if border and panel look like two equal pictures, make the border quieter, narrower or both.
How do you finish a panel quilt border for hanging or use?
Finish the border for how the quilt will live. A wall hanging needs a straight edge and a hanging sleeve, while a bed quilt needs binding that can take washing and use.
For a wall hanging, square the corners carefully and add a sleeve on the back. A straight, even top edge matters more than extra quilting, because the eye follows it.
For a bed quilt, match the binding to the outer border or panel background. That choice ties the frame together and hides small cutting errors.
Press border seams toward the border fabric, not toward the panel, when you can. That keeps the panel edge flat and makes quilting easier.
If you quilt a fabric panel step by step, follow How to Quilt a Fabric Panel: Step-by-Step for the order from pressing to binding. For a different motif, How to Quilt Diamond Patterns on Your Machine shows a geometric border motif beside a printed center.
What if you want a border that is not a straight frame?
A straight frame is the default, but a panel can take other shapes when the design calls for it. Use a stepped, piano key or log cabin border only when the panel already uses straight lines and right angles.
Stepped borders suit architecture, text or geometric panels. They need careful measuring, because each step adds a seam that must line up.
A piano key border suits a panel with a strong horizontal line, such as a landscape horizon. It can echo that line without copying the image.
These options take more time than a plain frame. Use them when the panel design will carry the extra structure, not to hide a plain panel.
For a softer approach, our yo yo quilt ideas guide shows how textured borders change the feel. Yo-yo borders suit a decorative, handmade panel rather than a crisp printed one.
Rule: choose a non-straight border only when the panel already has the same lines.
How do you choose quilt border ideas with center panel for your next quilt?
Choose border ideas with center panel by starting with the motif and working outward. Measure the panel, pick a quiet fabric in a panel color, test it at full size and quilt it more simply than the panel.
Pick a single border if the quilt is small or the panel is simple. Pick two if you need size, separation or a wider quilting area.
Keep the first border between 1 and 4 inches finished for most panels. Go wider only when the panel image is large, simple and bold enough to hold the frame.
Use the product studies above as color tests. A practice runner lets you sew a border in small steps, and a quiet cream or brown tone shows how value changes a frame.
When ready to sew, measure the panel in four places, cut side borders first and measure again before cutting top and bottom. That order prevents the most common panel border error.
Frequently asked questions
How wide should a border be on a panel quilt?
A good starting rule is one quarter to one half the width of the panel's smallest repeated motif, and no wider than one third of the panel itself for a first border. Measure the panel, then test strips on the floor.
Wider borders work when the panel image is large and simple.
Should a panel quilt border match the panel or contrast it?
Match the palette and contrast the value or scale. Pull two or three colors from the panel for the border, then choose a quieter print or a solid so the panel stays the focus.
A border that copies the panel print at the same scale will compete with it.
Can I add more than one border to a panel quilt?
Yes, and two borders often work better than one wide border. Use a narrow inner border in a solid or contrasting color to separate the panel, then a wider outer border for the big color and quilting statement.
Keep the total border width in proportion to the panel.
How do I keep borders from making a panel quilt different lengths?
Measure the panel top, middle and bottom on both sides before you cut. Panels can be slightly off square, so cut border strips to the measured length, not the printed size.
Pin at quarter points, then sew in short sections and check after each side.