How to Load a Quilt on an APQS Lenni Longarm
For loading quilts onto a Lenni longarm machine, attach the backing, batting, and quilt top in the order your APQS frame manual specifies, then smooth and baste the layers. Choose the frame's approved attachment method and check alignment each time you advance the quilt.
On this page (10 sections)
- What should you prepare before loading a quilt onto a Lenni?
- Which loading method should you choose for your Lenni?
- How do you attach the backing to the Lenni frame?
- In what order should you add batting and the quilt top?
- How can you keep the layers flat and aligned while loading?
- What should you check before you start quilting?
- How do you advance a quilt without losing alignment?
- What mistakes make loading harder?
- How should you choose your next loading guide?
- Which approach is right for loading quilts onto a Lenni longarm machine?
For loading quilts onto a Lenni longarm machine, prepare a square backing, align the fabric with the frame leaders, and attach each layer in the order APQS specifies. Smooth and baste as you go, then check the exposed area before stitching and after every advance.
The right loading method depends on your frame's leader design, the quilt's size, and how much fabric you can handle comfortably. A careful setup prevents skew, wrinkles, and uneven tension that can become harder to correct after quilting begins.
What should you prepare before loading a quilt onto a Lenni?
Prepare a square backing, batting, quilt top, and clear access to the leaders before loading. Check the APQS instructions for your frame's leader positions, attachment method, and recommended fabric allowance.
Press the quilt top and backing, check that their edges are straight, and remove loose threads. Mark the centers of both pieces so you can match them to the frame and catch a crooked start early.
Make sure the backing extends beyond the quilt top on every side. The extra fabric gives you room to attach it to the leaders and manage the quilt edges; use the allowance recommended for your setup.
If the frame is new to you, review how to set up a longarm quilting machine before loading. The frame should be assembled and ready according to its own instructions.
Which loading method should you choose for your Lenni?
Choose the attachment method built for your frame, then use it consistently across the backing and quilt layers. Follow the Lenni manual to identify the leaders, the direction each roller turns, and whether your setup uses pins, zippers, or another attachment.
A pinned setup can work when the leaders and instructions call for pins, and it lets you secure fabric along a marked line. It takes care to keep pin spacing and fabric tension even; avoid it if pinning is difficult for you or your frame is designed for another connection.
A zipper or other frame-specific system may reduce repeated pinning if your Lenni setup supports it. Don't buy or improvise an attachment based on a general longarm guide alone, because compatibility and leader placement depend on the frame.
For a broader sequence, see how to load a quilt on a longarm frame. Use it to understand the general process, then let your APQS frame instructions settle any Lenni-specific details.
How do you attach the backing to the Lenni frame?
Attach the backing evenly and with its center aligned to the leader's center mark. Confirm which backing edge goes on each leader and which way the fabric winds by checking the Lenni instructions.
Mark or identify the backing's top and bottom before attaching it. This helps you avoid reversing the fabric or loading one edge onto the wrong leader when the quilt is large and the orientation is less obvious.
Smooth the backing from the center toward both sides as you secure it. Keep the fabric flat without stretching it out of shape, and check that the sides remain square to the leaders.
Roll the backing as directed until the working area is accessible. Set even tension so the backing lies smooth and stable, without pulling it so tight that the fabric distorts.
In what order should you add batting and the quilt top?
Add the batting and quilt top in the order and at the loading points shown in your Lenni frame instructions. The top's right side generally faces up, but check your manual before attaching anything.
Lay the batting over the backing without stretching it. Smooth from the center outward and make sure it reaches beyond the quilt top edges.
Align the marked centers of the quilt top and backing. Attach the top edge to the specified leader or loading point, then smooth toward both sides so one edge does not become tighter than the other.
Advance or roll the layers as your frame instructions direct. Keep the top square to the frame and check that the batting has not folded or shifted underneath it.
How can you keep the layers flat and aligned while loading?
Keep layers aligned by matching center marks, smoothing from the center outward, and checking the sides as you advance. Baste the exposed area before quilting so the layers stay together.
Work across the quilt in manageable sections. Smooth wrinkles toward the edges without tugging the top or batting, then check the backing underneath before closing the area with basting stitches.
Baste the top edge and sides with a method approved for your machine and frame. Keep basting stitches out of the quilting path, and remove pins or clips from the area before moving the machine.
If your frame supports a pin-free approach, how to load a quilt without pins explains common alternatives. Skip that method if it does not match the leaders on your setup.
What should you check before you start quilting?
Before stitching, confirm the quilt is square, the layers are secure, and the machine can travel across the work area without catching fabric. For stitch setup, see quilting stitch width guidance.
Check your machine and frame instructions for setup guidance.
Move the machine slowly across the full working space and watch for loose backing, bunched batting, or fabric near the wheels and carriage. Check that the needle path is clear of pins and clips.
Keep quilt edges and excess backing out of the machine's path. If anything shifts or catches, stop and correct it before continuing.
How do you advance a quilt without losing alignment?
Advance the quilt using the frame's instructions, then smooth and inspect the newly exposed section before quilting it. Keep the backing tension and side alignment consistent throughout the project.
After finishing a section, release and advance the rollers as directed. Smooth the exposed area and check that the top, batting, and backing remain flat together.
Compare the quilt's side edges with the frame and look for diagonal pull or wrinkles. Correct drift before stitching the next area instead of stretching the quilt back into place later.
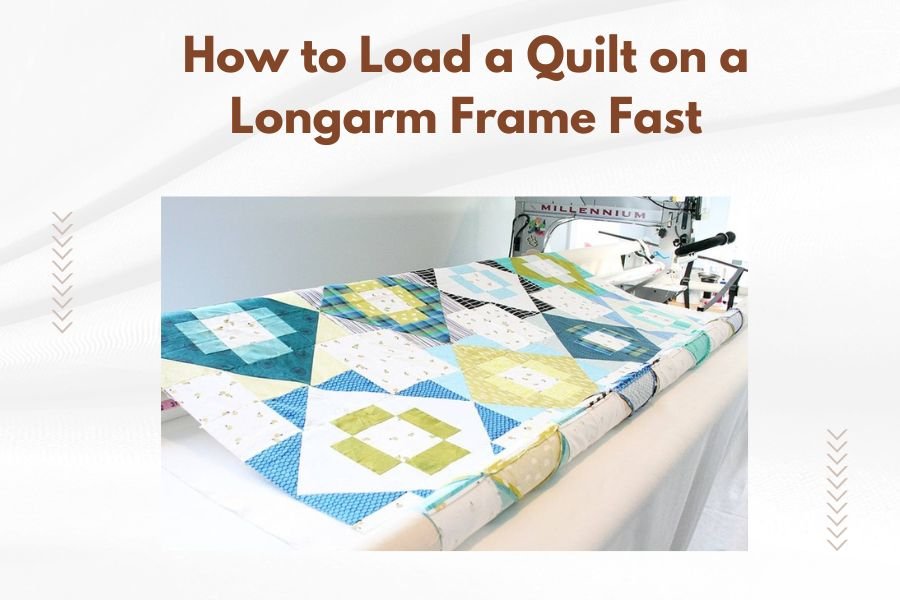
For a quick overview of the general process, see how to load a quilt on a longarm frame fast. Take time to check alignment even when you know the sequence.
What mistakes make loading harder?
The most common loading mistakes are starting off-center, stretching the backing, and advancing without checking the layers. Each can leave the quilt skewed or puckered across the frame.
Don't trim the backing close to the top before checking the leader allowance. You need enough extra fabric for the attachment method and to keep the quilt edges manageable.
Avoid correcting a crooked load by pulling one side hard. Release and realign the fabric at the attachment point, then smooth it again so the backing and top are not under uneven tension.
Don't leave pins or clips in the machine's path, and don't quilt over a fold hidden between layers. A short inspection before each section is easier than unpicking stitches later.
How should you choose your next loading guide?
Choose a guide based on the part of the process you need to solve. The frame-specific instructions remain the reference for leader positions and attachment details.
For a general explanation of the machine type, read what a longarm quilting machine is. If your Lenni setup includes computerized quilting, how to load computerized quilting patterns covers the pattern side after the quilt is secure.
Which approach is right for loading quilts onto a Lenni longarm machine?
For loading quilts onto a Lenni longarm machine, use the APQS-approved leader method, start with centered and square fabric, and baste each working area before stitching. Choose a pin-free option only when your frame supports it, and recheck the layers after every advance.
Use the longarm frame loading guide for the broader sequence, then follow your Lenni manual for frame-specific steps. If you also sew quilt tops on a home machine, see how to use a Singer Quantum Stylist 9960.
Frequently asked questions
How do you load a quilt onto an APQS Lenni longarm?
Follow the loading order and leader instructions for your Lenni frame. Prepare a square backing with enough extra fabric to attach it, align the backing's center with the frame, then add batting and the quilt top as directed.
Smooth and baste the working area before stitching, and check alignment every time you advance the quilt.
Which direction should the quilt top face on a Lenni?
The top's right side generally faces up, but follow the orientation and attachment points shown in your APQS Lenni manual. Confirm the backing's right side and the leader positions before pinning or clipping anything, since frame setups and leader markings can vary.
How much extra backing fabric should I leave?
Leave enough backing beyond every edge of the quilt top to attach it to the leaders and keep the fabric under tension. The amount depends on the frame's loading method and quilt size, so check the Lenni instructions and measure the leaders before trimming.
Can you load a quilt on a longarm without pins?
Some frame setups allow leaders with zippers or other attachment methods, while others use pins or another method. Check what your Lenni frame has and follow its instructions; don't assume a pin-free approach fits your setup.
Smooth and secure the layers before stitching.