How to Choose a Longarm Tracing System
The best longarm tracing system depends on your frame, visibility needs and working position. Choose a laser or camera setup for guided movement, or use a stencil and chalk system when you want a marked design on the quilt top.
On this page (9 sections)
- Which longarm tracing system fits your working style?
- How should you compare frame compatibility?
- Is a laser longarm tracing system right for you?
- When does a camera system make more sense?
- When is a stencil and chalk system the better choice?
- How do you choose between live and marked tracing?
- How should you set up and care for a tracing system?
- What should you check before choosing a longarm tracing system?
- Final choice: which longarm tracing system should you buy?
The best longarm tracing system depends on frame compatibility, line visibility and where you prefer to work. A laser or camera can guide you while the machine moves, while a stencil and chalk method puts the design directly on the quilt top.
Your choice also depends on whether you want a live reference or a marked pattern. Live systems keep the guide separate from the fabric, while physical tracing lets you see the planned path even when you change position.
Which longarm tracing system fits your working style?
Choose a laser system for a live line, a camera system for an on-screen view, or a stencil system for a design marked on the quilt. Each method changes how you see the pattern and how you correct your path.
A longarm tracing system should make the next quilting movement easy to judge. It should also fit the frame, leave room for the machine, and remain visible from the position where you normally stand or sit.
| Method | Guide location | Best match | Main trade-off |
|---|---|---|---|
| Laser | Projected near the quilting area | Live movement guidance | Visibility depends on light and viewing angle |
| Camera | Displayed image or reference view | Quilters who prefer a screen | Requires a clear camera view and display position |
| Stencil and chalk | Marked on the quilt top | Planned designs and physical guides | Requires marking and later removing or managing the guide |
| Straight guide | Visible line for repeated movement | Rows and aligned quilting | Helps with direction more than complex motifs |
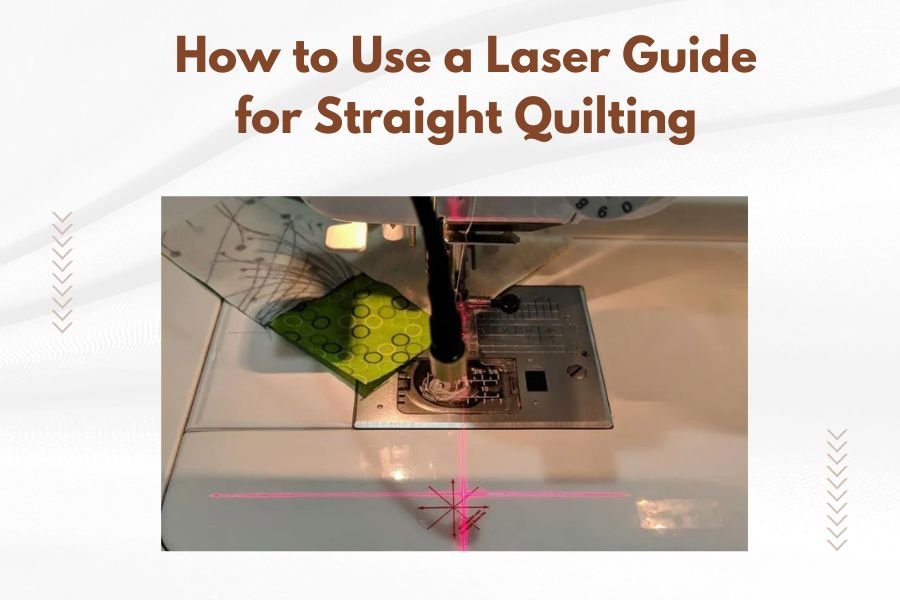
A laser does not mark the fabric. It gives you a moving visual reference, so your hand or machine path must stay aligned with the projected line.
A camera system separates the reference from the needle area. This can help when your preferred working position makes a direct view difficult, but the display must remain easy to read.
A stencil system creates a physical guide. It can be useful when you want to pause, inspect the whole design, or work from a pattern that does not need to remain projected.
How should you compare frame compatibility?
Compare clearance, mounting space and machine movement before choosing a longarm tracing system. A guide that works in one frame layout may be awkward if the machine, rails or quilting area block its view.
Start with the frame itself. Note where the quilt surface sits, how far the machine moves, and whether an accessory can be positioned without interfering with handles, rails or fabric.
For laser and camera systems, check these points:
- Where the guide or camera can be mounted
- Whether the accessory stays clear of the machine path
- Whether the line or image reaches the full quilting area
- Whether the guide remains visible at the front, side or rear
- Whether cables or controls affect movement
For stencils, check the usable marking area instead. The stencil needs to lie flat enough for the design to transfer cleanly, and you need room to position or repeat it across the quilt.
A frame-compatible system should support your normal movement rather than force you to stand at an unusual angle. If you quilt from more than one side, check visibility from each position before deciding.
Our guide to what is a quilting machine table system can help you separate the table, frame and machine-support questions from the tracing decision.
What does frame compatibility mean in daily use?
Frame compatibility means more than whether an accessory can physically attach. The guide must remain usable while the machine travels across the quilt.
A laser that is visible only from one corner may slow you down when you move around the frame. A camera view that shows only part of the quilting area may require frequent repositioning.
A stencil that is too small for your repeat may create more alignment work.
Map your usual quilting position before buying. Mark where your eyes, hands and machine sit, then decide whether the guide will be in front of you, above the fabric, or on a separate display.
Is a laser longarm tracing system right for you?
A laser is a good choice when you want a live visual path without marking the quilt first. It can suit continuous movement, repeated lines and quilters who prefer to guide the machine from a visible reference.
Laser visibility depends on the surrounding light, the color and texture of the quilt, and your viewing angle. A line that looks clear in a dim room may be harder to follow under brighter lighting.
Use the laser as a guide, not as proof that the needle will follow the pattern automatically. Your machine movement, hand position and quilting speed still control the stitched result.
Read how to use a laser for precision quilting for the basic movement approach. If frame fit is your main concern, compare which laser should you choose for your quilting frame before choosing a setup.
How can you improve laser visibility?
Improve visibility by controlling contrast, room light and your viewing angle. Test the line on the actual quilt color and from the position where you will guide the machine.
Keep the work area bright enough to see the quilt, but avoid placing a strong light directly across the projected path. Glare can make a narrow line harder to follow.
Your working distance also matters. A line may appear clear close to the frame but less distinct when you move farther away.
Check the full travel area rather than testing only one section.
If you want a design on the fabric instead of in the air, use a stencil that transfers a visible chalk guide. The best quilting stencils for laser light guide explains how these two approaches can work together.
When does a camera system make more sense?
A camera system can suit quilters who prefer a displayed view of the quilting area. It separates the reference from the direct needle view and may be easier to read when your working position makes the fabric difficult to inspect.
A camera system still needs a clear view. Fabric folds, frame parts, hands or machine components can block the image, and a display placed too far away can interrupt your rhythm.
Choose this method when you are comfortable checking a screen while moving the machine. The display position should let you glance at the reference without repeatedly changing your posture.
Learn more about how a camera system helps your longarm quilting before deciding between a camera and laser. The better method is the one that keeps the guide visible during the full movement.
When is a stencil and chalk system the better choice?
A stencil and chalk system is the better choice when you want a physical design on the quilt top before stitching. It gives you a pattern you can inspect, pause over and follow without relying on a projected line or screen.
A stencil can also suit quilters who work from a seated or standing position that makes live guides difficult to see. Once the design is transferred, the guide stays with the fabric as you move around the frame.
The trade-off is setup time. You need to position the stencil, transfer the design and repeat or align the pattern across the quilt.
Chalk also needs to be removed, allowed to disappear or managed according to the marking method.
For laser-compatible stencil patterns and transfer choices, see how to use a laser guide for straight quilting. A straight guide can support alignment, while a physical stencil can provide the motif you want to stitch.
Which stencil transfer tool helps with setup?
The Full Line Stencil pounce pad helps when you want to transfer a stencil design with white chalk. It is a 1-count plastic pad measuring about 4 x 3 in, with a 2 oz supply of white chalk powder and a refillable design.
The basic process is simple: position the stencil, apply the pounce pad gently, and inspect the transferred guide before quilting. The pad is designed for Full Line Stencils and can also transfer through traditional cut plastic stencils.
The chalk can be removed with a medium to high iron setting or by washing out, according to the product information. Because the pad uses white chalk, check the contrast on your fabric before marking a full quilt.
Its refillable design suits quilters who expect to transfer patterns repeatedly. It does not replace the stencil itself, so plan the pad and pattern as separate parts of the tracing system.
Which stencil suits continuous leaf repeats?
The Full Line Stencil Meandering Leaves suits a quilter who wants a continuous leaf design for hand, machine or longarm quilting. It is a 1-count nylon mesh stencil, sized 7 x 9 in, with a line size of 1.5 in and leaf sizes of about 1.5 and 2 in.
The connected design helps you plan repeats across the quilt rather than treating each leaf as a separate motif. Position the stencil, transfer the lines, then align the next section with care before repeating.
Its nylon mesh construction is intended for repeated use. Clean it with a damp cloth or microfiber towel, and store it flat, rolled or in a binder with sheet protectors.
This stencil is a good match for a quilter who wants a recognizable motif on the fabric. Choose another method if you prefer a plain projected line or a screen-based reference instead of a marked design.
Which stencil suits a larger connected pattern?
The Quilting Stencil for Machine Quilting suits a quilter who wants a larger edge-to-edge continuous line pattern. The nylon mesh stencil measures 8 x 15 in, has a 1-count unit, and includes registration marks to help align repeats and rows.
The Splash of Love design is intended for free-motion, hand, border and long-arm quilting. Its larger size can reduce the number of placements needed compared with a smaller stencil, but you still need to keep each repeat aligned.
The stencil can be folded for carrying and cleaned with a damp cloth or dry microfiber towel. If it wrinkles, the product information says a medium-heated iron can restore its condition.
Choose this pattern when the design and working area fit your quilt. A larger stencil is not automatically easier if your frame or marking space makes it hard to position flat.
How do you choose between live and marked tracing?
Choose a live system when you want speed during movement, and choose a marked system when you want the design visible on the fabric. Your preferred working position should decide close calls.
A laser can reduce the need to transfer chalk, but you must keep watching the projected path. A camera can make the guide easier to view from some positions, but it adds a screen-based step.
A stencil takes more preparation, yet it leaves a reference you can inspect before stitching. It may also make pauses easier because the design remains on the quilt rather than disappearing when the guide is turned off.
Use this decision rule:
- Choose a laser if you follow a projected line comfortably.
- Choose a camera if an on-screen view fits your posture and frame.
- Choose a stencil if you want the pattern marked on the fabric.
- Choose a straight guide if alignment and repeated direction matter most.
- Combine a stencil with a pounce pad if you want a physical design without drawing every line by hand.
The right longarm tracing system should reduce decisions during quilting. It should not add a visibility or positioning problem that you have to solve on every pass.
How should you set up and care for a tracing system?
Set up the system by checking the frame, testing visibility and confirming the pattern before the full quilt. A small trial can reveal contrast, alignment and working-position problems early.
For a laser or camera:
- Place the guide where it stays clear of the machine path.
- View it from your normal quilting position.
- Move across the full frame area.
- Check whether the line or image remains visible.
- Confirm that controls and cables do not restrict movement.
For a stencil:
- Lay the stencil flat on a test area.
- Check the pattern contrast on the fabric.
- Transfer a small section.
- Inspect the line quality and repeat alignment.
- Store the stencil clean and protected after use.
Clean reusable nylon mesh stencils with a damp cloth or microfiber towel when needed. For the pounce pad, keep the chalk transfer tool stored so the powder remains ready for the next marking session.
Do not choose a system only because it works in a product photo. Your frame, fabric color, room lighting and preferred position determine whether the guide stays useful.
What should you check before choosing a longarm tracing system?
Check compatibility, visibility, repeat size and cleanup before you commit. These four questions cover most of the practical differences between laser, camera and stencil methods.
Ask yourself:
- Can the system fit the frame without blocking machine movement?
- Can you see the guide from your normal position?
- Does the design cover the area you need?
- Will you prefer a live guide or a marked pattern?
- How will the guide behave on your fabric color?
- Can you repeat or align the pattern without excessive repositioning?
- Does the method require cleanup after quilting?
For a first system, avoid solving too many problems at once. Choose the method that matches your current frame and quilting habits, then add a stencil, laser or straight guide if a clear need appears.
Final choice: which longarm tracing system should you buy?
Choose a laser longarm tracing system if a projected path matches your movement and remains visible across the frame. Choose a camera system if a display gives you a clearer working view.
Choose a stencil and chalk setup if you want the pattern marked on the quilt before stitching. The Full Line Stencil pounce pad supports that approach, while the Meandering Leaves and Splash of Love stencils suit different repeat sizes and design preferences.
For longarm tracing systems, the best choice is the one that keeps the guide visible, the frame clear and the next stitch easy to judge.
Frequently asked questions
What is the best longarm tracing system for a beginner?
A stencil and chalk system can be a clear starting point because you mark the design before quilting and can inspect the pattern on the fabric. A laser or camera system may suit you better if you prefer guiding the machine from a visible projected or displayed reference.
Can a longarm tracing system work with any quilting frame?
No. Frame clearance, mounting space, machine position and the system's working distance affect compatibility.
Check the frame layout before choosing a laser or camera setup, and confirm that a stencil can lie flat across the area you plan to mark.
Is a laser or stencil better for longarm quilting?
A laser keeps the guide visible while you move the machine, while a stencil transfers a design onto the quilt top before stitching. Choose a laser for live guidance and a stencil for a physical pattern that remains visible as you work.
How do I keep a traced quilting design visible?
Use a marking method that suits the fabric, lighting and quilting speed. Chalk transferred through a stencil can create a visible guide before stitching, while a laser depends on line contrast and your viewing position.
Test the visibility on a small area before marking the full quilt.