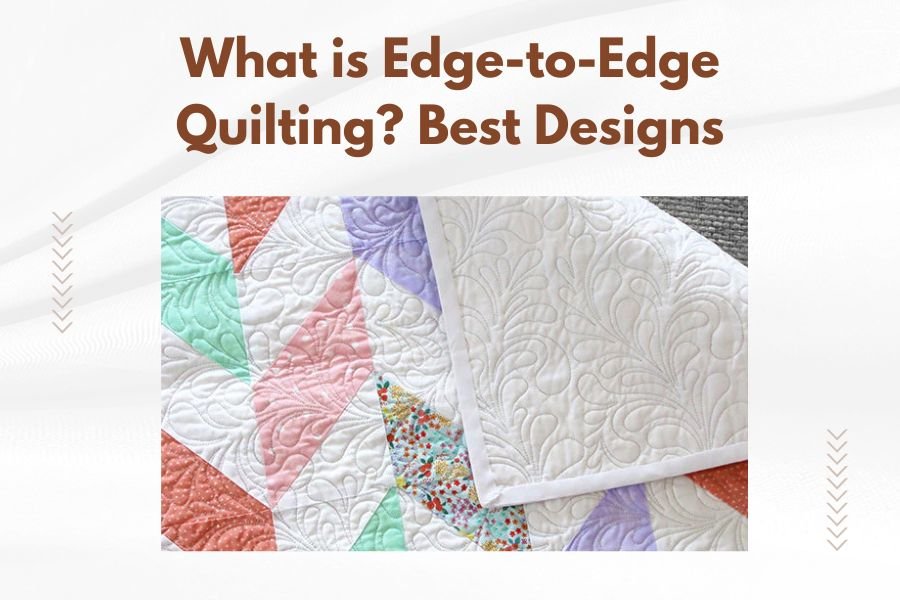
Edge-to-edge quilting is a continuous quilting pattern that runs from one side of your quilt to the other, covering the entire surface with the same repeating design.
This quilting method saves time and creates uniform texture across your quilt, making it perfect for beginners and busy quilters who want professional results.
What Makes Edge-to-Edge Quilting Special
Think of edge-to-edge quilting like wallpaper for your quilt. You pick one pattern and repeat it across the entire surface. No complex planning needed. No matching seams or custom fitting.
Your longarm quilting machine follows the same design path over and over. This creates a beautiful, consistent texture that transforms your quilt top into a finished masterpiece.
How Edge-to-Edge Differs from Custom Quilting
Custom quilting treats each block differently. You might quilt flowers in one section and feathers in another. Edge-to-edge quilting uses one pattern everywhere.
Custom work takes hours of planning and stitching. Edge-to-edge quilting can finish a queen-size quilt in under two hours.
Benefits of Edge-to-Edge Quilting
Why do so many quilters choose this method? The advantages are clear and practical.
Speed and Efficiency
You’ll finish quilts faster than ever before. No stopping to change patterns or reposition your quilt. Just load, start, and let your machine work.
I researched quilting forums and found that most quilters can complete edge-to-edge quilting in half the time of custom work.
Perfect for Beginners
New to longarm quilting? Edge-to-edge patterns are your best friend. They’re forgiving and help you practice consistent speed and tension.
You won’t worry about matching design elements or making artistic decisions on the fly. Pick a pattern and go.
Cost-Effective Choice
Professional quilting services charge less for edge-to-edge work. You’ll save money compared to custom quilting designs.
Your thread usage stays predictable too. No surprise thread shortages in the middle of your project.
Best Edge-to-Edge Quilting Designs
Not all patterns work equally well for every quilt. Here are the top performers that quilters love.
Meandering and Free-Form Patterns
These organic, flowing designs hide imperfections beautifully. Your stitching doesn’t need to be perfect because the pattern looks naturally random.
Classic Meandering
The most popular choice for good reason. Meandering looks like gentle, curved scribbles across your quilt. It works with any fabric style or color.
Stippling Variations
Tighter than meandering, stippling creates more texture and holds your batting firmly. Great for quilts that get heavy use.
Geometric Patterns
Clean lines and repeated shapes give your quilt a modern, structured look.
Pantograph Loops
Consistent loops create rhythm across your quilt. They’re easy to follow and create beautiful shadow effects with the right thread.
Wave Patterns
Gentle waves add movement without being too busy. They complement both traditional and modern quilt designs.
Grid and Crosshatch Designs
Straight lines create classic quilted texture. Your quilt will have that timeless, hand-quilted appearance.
Floral and Organic Motifs
These patterns add elegance and visual interest to your quilts.
Feather Patterns
Continuous feather designs flow beautifully across your quilt surface. They look complex but are surprisingly manageable for intermediate quilters.
Vine and Leaf Designs
Perfect for nature-themed quilts. These patterns add organic beauty without overwhelming your fabric choices.
Choosing the Right Pattern for Your Quilt
Your fabric and quilt style should guide your pattern choice. Here’s how to match them perfectly.
Consider Your Quilt’s Style
Traditional quilts shine with classic patterns like feathers or crosshatching. Modern quilts look great with geometric designs or simple meandering.
Busy fabrics need simple quilting patterns. Plain fabrics can handle more detailed designs.
Think About Function
Daily-use quilts need dense quilting patterns like stippling. Display quilts can use more open patterns that show off your piecing.
Baby Quilts
Choose soft, rounded patterns without sharp points. Meandering and gentle loops work perfectly.
Bed Quilts
Medium-density patterns provide warmth without being too stiff. Wave patterns and loose stippling are ideal.
Tools and Supplies You Need
Getting started with edge-to-edge quilting requires the right equipment and materials.
Essential Equipment
You’ll need a longarm quilting machine or a domestic sewing machine with quilting capabilities. Longarm machines make the process much faster and easier.
Pantographs help guide your stitching for geometric patterns. These paper templates show exactly where to stitch.
Thread Selection
Cotton thread works for most projects. Polyester thread adds strength for heavily-used quilts. Metallic threads create special effects but require more skill.
Choose thread colors that complement your quilt without fighting for attention. When in doubt, match your thread to your backing fabric.
Step-by-Step Process
Ready to start your first edge-to-edge quilting project? Follow these proven steps.
Preparation Steps
Press your quilt top and backing fabric. Remove all wrinkles and fold lines. Layer your quilt sandwich with batting in the middle.
Pin or spray-baste your layers together. Start from the center and work outward to prevent shifting.
Loading Your Quilt
Load your quilt onto your longarm machine following the manufacturer’s instructions. Keep consistent tension across the entire width.
Test your thread tension on a practice sandwich first. Adjust until your stitches look balanced on both sides.
Quilting Technique
Start quilting from one edge and work systematically across your quilt. Maintain steady speed for even stitches.
Don’t rush. Consistent speed produces better results than trying to finish quickly.
| Pattern Type | Difficulty Level | Best For | Time Required |
|---|---|---|---|
| Meandering | Beginner | Any quilt style | 2-3 hours |
| Crosshatch | Beginner | Traditional quilts | 3-4 hours |
| Feathers | Intermediate | Elegant quilts | 4-5 hours |
| Complex Florals | Advanced | Show quilts | 5-6 hours |
Common Mistakes to Avoid
Learn from others’ experiences. These mistakes can ruin your quilting project.
Pattern Selection Errors
Don’t choose patterns that are too complex for your skill level. Start simple and build your confidence.
Avoid patterns that don’t suit your quilt’s style. A modern geometric quilt looks odd with traditional feather quilting.
Technical Problems
Inconsistent speed creates uneven stitches. Practice maintaining steady movement before starting your good quilt.
Poor thread tension causes puckering or loose stitches. Always test on scraps first.
Tips for Professional Results
Want your quilts to look professionally done? These tips make all the difference.
Practice Makes Perfect
Practice new patterns on sample sandwiches before quilting your finished quilt top. This prevents costly mistakes.
Keep a quilting journal with notes about what worked and what didn’t. You’ll improve faster with written records.
Finishing Touches
Trim your batting and backing evenly after quilting. Clean, straight edges make binding easier.
Press your finished quilt gently to set the quilting lines. Use a pressing cloth to protect your thread.
Conclusion
Edge-to-edge quilting opens up a world of possibilities for every quilter. You can create beautiful, professional-looking quilts without spending days on custom quilting designs. The key is choosing patterns that match your skill level and complement your quilt’s style.
Start with simple patterns like meandering or gentle waves. Build your confidence and skills before trying complex designs. Remember that consistent speed and proper tension matter more than perfect execution. Your quilts will improve with every project you complete.
What’s the difference between pantograph and digital edge-to-edge patterns?
Pantograph patterns use paper templates that you follow by hand, while digital patterns are loaded into computerized quilting systems that guide the machine automatically. Digital patterns offer more precision, but pantographs give you more creative control over spacing and sizing.
How much thread do I need for edge-to-edge quilting?
Most edge-to-edge patterns use about 300-400 yards of thread per square yard of quilt surface. Dense patterns like tight stippling need more thread, while open patterns like large meandering use less. Always buy extra thread to avoid running out mid-project.
Can I use edge-to-edge quilting on a domestic sewing machine?
Yes, but you’ll need to adapt your approach. Use free-motion quilting techniques and work in sections since domestic machines have limited throat space. Roll your quilt carefully and move systematically across the surface. The process takes longer but produces good results with practice.
What batting works best with edge-to-edge quilting?
Low-loft cotton or cotton-poly blend batting works best for most edge-to-edge patterns. These battings are easy to needle and don’t shift during quilting. Avoid high-loft batting for detailed patterns since it can make precision stitching difficult.
How do I fix puckering in my edge-to-edge quilting?
Puckering usually comes from uneven basting, incorrect thread tension, or quilting too fast. Stop quilting and check your thread tension first. If tension is correct, slow down your quilting speed and ensure your quilt layers are properly secured. Sometimes you need to remove problem stitching and start over in that area.