
Yes, you can quilt oilcloth, but it requires a different approach than traditional fabric. Because oilcloth is a plastic-coated material, you need to use the right needles and walking foot to prevent snagging and puckering. It’s a fantastic way to create durable, waterproof items.
Quilting with oilcloth opens up possibilities for water-resistant bags, placemats, and outdoor gear. While it doesn’t fray like cotton, managing its slippery surface and potential for needle holes is key. You’ll want to focus on stabilizing the layers well.
- Oilcloth can be quilted successfully.
- Use a walking foot and appropriate needles.
- Stabilize layers to prevent shifting.
- Great for waterproof projects.
Ready to give it a try? Let’s walk through the best practices for quilting with oilcloth so your projects turn out beautifully.
So, you’re wondering if you can quilt with oilcloth? The short answer is a resounding yes! It’s a fantastic way to make sturdy, waterproof items that stand up to wear and tear. Think outdoor cushions, durable tote bags, or even handy picnic blankets. While it’s not quite the same as quilting with cotton, with a few adjustments, you can achieve beautiful and functional results.
Quilting with Oilcloth: What You Need to Know
Quilting oilcloth is certainly possible and opens up a world of durable, water-resistant projects. You’ll discover it handles differently than fabric, but the outcome is often worth the effort. The key is understanding its unique properties and adapting your technique.
Understanding Oilcloth’s Properties
Oilcloth is essentially a woven fabric coated with PVC (polyvinyl chloride) or a similar plastic. This coating makes it waterproof and resistant to stains. Unlike cotton, it doesn’t fray. However, this plastic coating can make it a bit slippery under the needle. It also means you need to be mindful of needle holes, as they are permanent.
Why Quilt with Oilcloth?
The main draw of quilting with oilcloth is its durability and water resistance. Traditional fabric quilts can be ruined by spills or moisture. Oilcloth projects, on the other hand, can handle a bit of a splash. This makes them ideal for outdoor use or for items that need to be easily wiped clean. Imagine a placemat that can handle messy meals or a tote bag that won’t soak through if you get caught in a drizzle.
Essential Tools and Supplies for Quilting Oilcloth
To quilt oilcloth successfully, you’ll need a few specific tools. Using the right equipment can prevent frustration and ensure a smoother quilting experience. It’s like giving your sewing machine the right accessories for a particular job.
Needles: The Right Kind Matters
When quilting fabric, you might grab a standard universal needle. For oilcloth, however, you’ll want something a bit tougher. A leather needle or a denim/jeans needle is often recommended. These needles are sharper and stronger, designed to pierce through tougher materials without snagging or breaking. Many quilters find a size 90/14 or 100/16 works well. You want to minimize resistance as you sew.
Thread Choices
Most standard polyester threads will work well with oilcloth. Avoid cotton threads, as they can be weaker and may not hold up as well to the material’s texture. A good quality polyester thread will offer strength and durability, matching the oilcloth itself. You might also consider using a slightly thicker thread for a bolder look, but ensure your needle size can accommodate it.
The Mighty Walking Foot
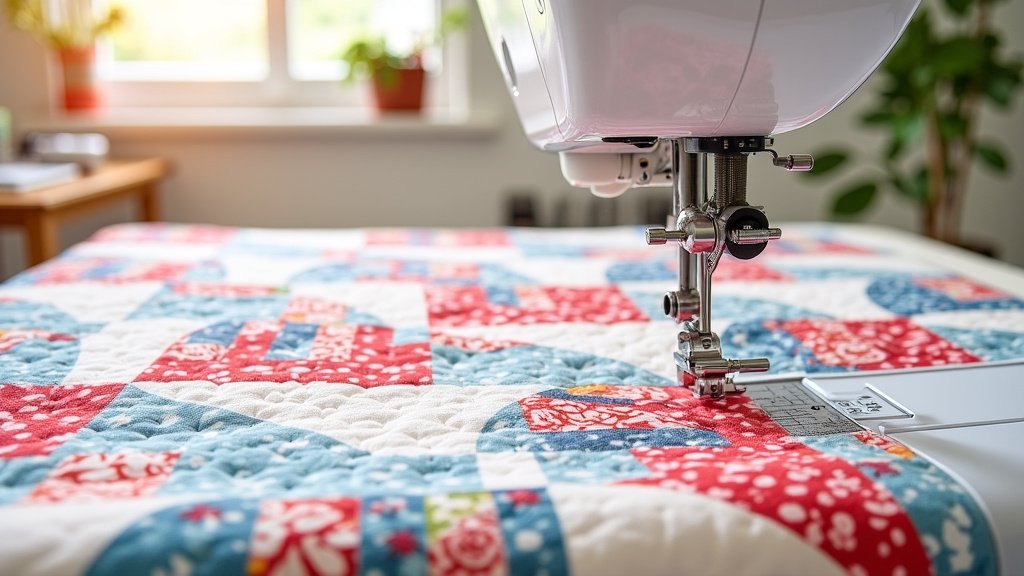
This is arguably the most important accessory for quilting oilcloth. A walking foot (also known as an even-feed foot) helps feed the top and bottom layers of your project evenly through the machine. Oilcloth can be slippery, and without a walking foot, your layers might shift, causing puckering or skipped stitches. It ensures a smooth, consistent feed, which is crucial for preventing those pesky wrinkles. Many sources strongly advise using one.
Other Helpful Notions
A teflon foot or a roller foot can also be beneficial, especially if you’re not using a walking foot or if you find the plastic surface still a bit sticky. These feet have a smoother glide. You’ll also want a good quality pair of scissors for cutting. Since oilcloth doesn’t fray, you don’t need pinking shears. Straight, clean cuts are perfect. And of course, a rotary cutter and mat can be helpful for precise cutting of larger pieces.
Preparing Your Oilcloth for Quilting
Getting your oilcloth ready is key to a successful project. Unlike fabric, you can’t just toss it in the wash. Proper preparation prevents headaches later on.
Pre-Washing and Cleaning
You generally do not need to pre-wash oilcloth. Washing it can actually damage the coating. Instead, simply wipe it down with a damp cloth or a mild soap and water solution if it’s dirty. Ensure it’s completely dry before you start cutting or quilting. This removes any manufacturing residue or dust.
Cutting and Marking
When cutting, use a sharp rotary cutter and a ruler on a self-healing mat for the most accurate results. For marking, be aware that most fabric markers won’t show up well or may even be absorbed unevenly by the plastic coating. Many crafters find that chalk pencils or tailor’s chalk work best for temporary marks. Some even use a fine-tip permanent marker very carefully on the wrong side, testing it first. Always test your marking method on a scrap piece.
The Quilting Process: Step-by-Step
Now for the fun part! Quilting oilcloth requires a slightly different approach to keep things stable and smooth.
Layering Your Quilt Sandwich
When creating your quilt sandwich, place the oilcloth right-side up as your backing or top layer. For the batting, a thin, low-loft polyester batting is often recommended. It doesn’t tend to compress as much as cotton batting. If you’re aiming for complete waterproofing, you might even consider using a waterproof layer like PUL (polyurethane laminate) as your backing instead of traditional batting.
Stabilizing is critical here. Because oilcloth is smooth and can shift, you need to secure your layers well before quilting. Some people like to use a spray adhesive designed for fabric temporarily, but be cautious as it can gum up your needle. Basting is your best friend. You can use safety pins placed closely together, or a basting stitch. Pin basting is often preferred for oilcloth as it holds layers firmly.
Stitching Techniques
Start with a slow and steady speed on your sewing machine. You’ll want to reduce your stitch length slightly compared to regular quilting. A stitch length of 1.5 to 2.0 mm is often suggested. This helps to create a stronger seam and prevents the holes from being too far apart, which can weaken the material.
When you’re sewing, try to keep your hands behind the walking foot and guide the fabric gently. Avoid pulling or pushing. Let the walking foot do the work. If you encounter any resistance, stop, check your needle and tension, and then proceed. Taking your time is key to avoiding puckers and skipped stitches.
Quilting Designs and Density
For oilcloth, simpler quilting designs tend to work best. Straight lines, gentle curves, or a grid pattern are good choices. Avoid very dense quilting, as too many needle holes can weaken the material over time, especially in high-stress areas. A wider quilting line means fewer holes.
You don’t need to quilt every inch. Quilting in the ditch, along seam lines, or in larger geometric patterns is often sufficient. The goal is to hold the layers together without over-perforating the oilcloth. Consider how the finished item will be used; outdoor items might need less dense quilting than a placemat.
Common Challenges and How to Overcome Them
Even with the best preparation, you might run into a few snags. Here’s how to tackle them.
Slippery Surfaces and Shifting Layers
As mentioned, the slippery nature of oilcloth is a big challenge. A walking foot is your best defense. Make sure it’s properly attached to your machine. Pinning your layers generously is also very important. The more pins you use, the less chance the fabric has to shift during sewing. Consider placing pins about every 2-3 inches.
Needle Holes and Seam Strength
Remember, every needle hole is permanent. This means you want to get your stitching right the first time. If you need to unpick a seam, you’ll likely see multiple holes. This can weaken the area. For this reason, many quilters recommend testing your stitch length and tension on scraps first. Also, try to quilt in areas where the needle holes won’t be under extreme stress.
Pressing Oilcloth? Not Really!
You cannot iron oilcloth. The heat will melt the plastic coating and damage your iron and the material. If you need to press a seam open or flatten a crease, you’ll have to rely on your sewing machine’s pressure and careful handling. Sometimes, placing a heavy book on a folded edge for a while can help flatten it without heat.
Ideas for Oilcloth Quilted Projects
Once you’ve got the hang of it, the possibilities are pretty exciting! Oilcloth quilts are perfect for items that need to be tough and weather-resistant.
Waterproof Bags and Totes
Quilted tote bags are a classic. They are great for grocery shopping, beach trips, or as diaper bags. The quilted texture adds a nice touch, while the oilcloth ensures everything inside stays dry. You can create simple tote bags or more complex zippered pouches.
Outdoor Gear and Accessories
Think picnic blankets, outdoor cushion covers, or even a waterproof mat for kids to play on. The durability of quilted oilcloth makes it ideal for anything that will be used outdoors or needs to withstand a bit of mess.
Table Linens and Kitchen Items
Placemats, table runners, and even custom oven mitts or pot holders can be made from quilted oilcloth. They are easy to wipe clean after meals, making them very practical for busy households. The visual appeal of a quilted pattern on your table adds a unique touch.
Here’s a quick checklist to keep you on track:
- Use a walking foot.
- Choose denim or leather needles.
- Pin baste your layers generously.
- Use a slow sewing speed.
- Test stitches on scraps first.
- Do not iron oilcloth.
Conclusion
You’ve learned that quilting oilcloth is absolutely achievable with the right adjustments. By using a walking foot and appropriate needles, you can create beautiful, durable, and waterproof items. Remember that preparation and a slower, more deliberate stitching process are your keys to success. Don’t be afraid to experiment with scraps to get a feel for the material. Now you’re ready to start your next durable project!
Frequently Asked Questions
Can I use a regular sewing machine needle for oilcloth?
No, it’s best to avoid regular universal needles. Research shows that stronger needles like leather or denim needles are recommended. They are sharper and more robust, designed to pierce the plastic coating without snagging or breaking. Using the correct needle will prevent frustration and ensure cleaner stitches.
What’s the best way to baste oilcloth layers?
Pin basting is highly recommended for oilcloth. Because the material can be slippery, generous pinning helps keep your layers from shifting. Place pins fairly close together, about every 2-3 inches, to ensure stability. This prevents puckering and makes the quilting process much smoother.
Can I press oilcloth with an iron?
Absolutely not. You should never iron oilcloth. The heat from an iron will melt the plastic coating, potentially ruining both your iron and your project. If you need to flatten a crease, try using a heavy book or relying on careful handling during sewing.
How do I mark oilcloth for quilting?
Traditional fabric markers may not work well on oilcloth. Many crafters find that tailor’s chalk or chalk pencils are the best option for temporary marks. Always test your marking tool on a scrap piece first to ensure it’s visible and doesn’t damage the material.
What type of batting is best for oilcloth projects?
A thin, low-loft polyester batting is often suggested for oilcloth projects. It tends to compress less than cotton batting under the weight of the oilcloth. For projects where complete waterproofing is essential, you might even consider using a PUL (polyurethane laminate) layer instead of traditional batting.
