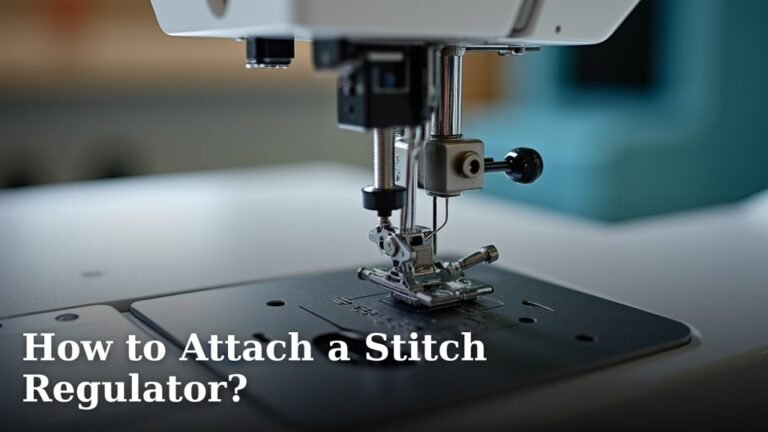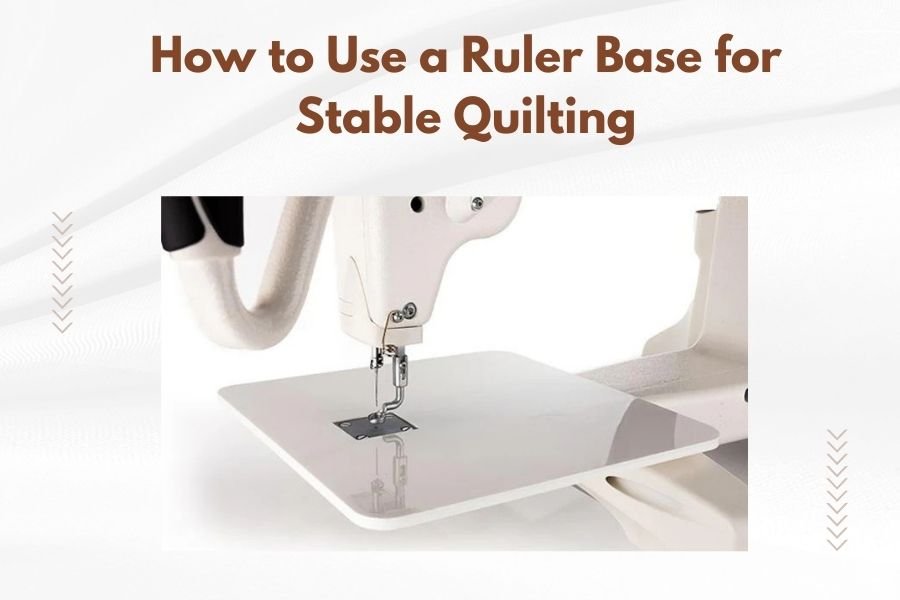
A ruler base is a flat acrylic platform that attaches to your quilting machine’s hopping foot to provide stability and control during free-motion quilting.
Using a ruler base for stable quilting involves installing the base, selecting appropriate quilting rulers, and maintaining consistent pressure while guiding fabric through geometric patterns.
What Is a Ruler Base and Why Do You Need One?
Think of a ruler base as training wheels for your quilting machine. It creates a stable platform between your hopping foot and the quilt surface.
Without this tool, keeping straight lines and perfect curves feels nearly impossible. Your hands shake slightly. The fabric bunches. Lines wobble everywhere.
A ruler base solves these problems by giving you a steady surface to work against. You can lean quilting rulers against it while moving fabric smoothly underneath.
Key Benefits of Using a Ruler Base
Research shows that quilters using ruler bases report better stitch quality and less hand fatigue. Here’s what you gain:
- Perfectly straight lines without wobbles
- Consistent curves and geometric shapes
- Less physical strain on your hands and wrists
- Professional-looking results every time
- Faster quilting once you learn the technique
Types of Ruler Bases Available
Not all ruler bases work the same way. I found that most fall into three main categories.
Machine-Specific Ruler Bases
These attach directly to your quilting machine’s hopping foot system. Popular brands like Handi Quilter and APQS make custom bases for their machines.
The advantage? Perfect fit every time. The downside? You can only use them with one machine model.
Universal Ruler Bases
Universal bases work with multiple machine brands through adjustable mounting systems. They cost less but require more setup time.
Many experts say universal bases work well for occasional use but lack the precision of custom options.
Magnetic Ruler Bases
Some newer bases use strong magnets instead of screws for attachment. They swap on and off quickly but may vibrate loose during heavy use.
Setting Up Your Ruler Base
Installation varies by machine type, but the basic process stays similar across brands.
Tools You’ll Need
Gather these items before starting:
- Your ruler base kit
- Screwdriver (usually Phillips head)
- Quilting rulers
- Practice fabric pieces
- Good lighting
Step-by-Step Installation Process
Remove Your Current Hopping Foot
Turn off your machine first. Safety matters more than speed here.
Loosen the thumb screw holding your hopping foot. The foot should slide off easily.
Attach the Ruler Base
Position the ruler base according to your manual. Most bases have small alignment marks to guide placement.
Tighten screws gradually. Don’t overtighten or you might crack the acrylic.
Check the Height
The base should sit about 1/4 inch above your quilt surface. Too high and rulers won’t work properly. Too low and fabric won’t feed smoothly.
Choosing the Right Quilting Rulers
Your ruler base is only as good as the rulers you use with it. Quality matters here.
Essential Ruler Shapes
Start with these basic shapes. They handle 80% of quilting patterns:
- 6-inch straight edge ruler
- 12-inch straight edge ruler
- Circle template set (3, 4, and 6-inch)
- Curved ruler for feathers and swirls
- Square or rectangle template
Ruler Thickness Requirements
Most ruler bases need 1/4-inch thick acrylic rulers. Thinner rulers slip under the base. Thicker ones create gaps that cause uneven stitching.
I found online that many quilters waste money buying rulers that don’t match their base thickness requirements.
Basic Ruler Base Techniques
Learning proper technique prevents frustration and poor results. Start slowly and build muscle memory.
Hand Position and Grip
Place your non-dominant hand on the ruler. Keep fingers spread for maximum control. Your dominant hand guides the fabric, not the ruler.
Think of it like driving a car. The ruler is your steering wheel. The fabric is your gas pedal.
Maintaining Consistent Speed
Move fabric and ruler at the same steady pace. Fast needle speed with slow fabric movement creates tiny stitches. Slow needles with fast fabric create long, loose stitches.
Practice Exercise for Speed Control
Try this simple drill. Set your machine to medium speed. Draw a 6-inch line on practice fabric.
Count “one Mississippi, two Mississippi” while quilting the line. Aim to finish on “three Mississippi” every time.
Common Ruler Base Problems and Solutions
Even experienced quilters face challenges with ruler bases. Here are the most common issues I found that people encounter.
Rulers Keep Slipping
This usually means your base height is wrong. Check the gap between base and quilt surface. Adjust if needed.
Some quilters add thin grip strips to ruler edges for better control. Just don’t make them too thick.
Uneven Stitch Length
Inconsistent speed causes this problem. Practice moving fabric and rulers together at a steady rate.
Your machine’s tension might also need adjustment. Check your manual for proper settings.
Fabric Puckering Under the Base
Too much downward pressure creates puckers. Let the base float lightly on the quilt surface.
Also check that your quilt backing isn’t too tight in the frame. Loose backing causes drag and puckering.
Advanced Ruler Base Patterns
Once you master basic shapes, try these intermediate patterns. They add visual interest without overwhelming difficulty.
Crosshatch Patterns
Create perfect grids using straight rulers. Start with 1-inch spacing between lines. Maintain consistent angles throughout.
Echo Quilting
Follow curved rulers to create ripple effects around appliqué shapes. Each echo line should be exactly 1/4 inch from the previous one.
Feather Designs
Feather rulers let you create elegant spine and plume patterns. Start with simple feathers before attempting complex wreaths.
Maintenance and Care Tips
Proper care extends your ruler base life and maintains quilting quality.
Cleaning Your Ruler Base
Clean acrylic with mild soap and warm water. Avoid harsh chemicals that can crack or cloud the material.
Dry completely before storage. Water spots can interfere with ruler movement.
Storage Recommendations
Store ruler bases flat in padded cases. Stacking heavy items on top can cause warping or cracking.
Keep rulers organized by size and shape. Scratched or nicked rulers create catching points during quilting.
Troubleshooting Guide
When problems arise, systematic troubleshooting saves time and reduces frustration.
| Problem | Likely Cause | Quick Fix |
|---|---|---|
| Skipped stitches | Wrong needle or tension | Check needle size and thread weight |
| Wobbly lines | Base height incorrect | Adjust base position |
| Ruler sticks | Static buildup | Wipe with anti-static cloth |
| Fabric bunching | Too much pressure | Lighten touch on rulers |
Safety Considerations
Ruler bases are generally safe tools, but accidents can happen. Follow these guidelines.
Machine Safety
Always turn off your machine before installing or removing ruler bases. Moving parts can cause serious injury.
Check that all screws are tight before starting. Loose bases can shift during quilting and damage your machine.
Personal Safety
Take breaks every 30 minutes to rest your hands and eyes. Repetitive motion can cause strain injuries over time.
Use proper lighting to avoid eye fatigue. Poor visibility leads to mistakes and potential accidents.
Conclusion
Using a ruler base transforms your quilting from shaky amateur work to professional-quality results. The key is proper setup, quality rulers, and consistent practice.
Start with basic straight lines and simple curves. Build your skills gradually before attempting complex patterns. Remember that even expert quilters started with wobbly first attempts.
Your ruler base investment pays dividends in improved accuracy, reduced fatigue, and beautiful finished quilts. Take time to master the basics, and you’ll wonder how you ever quilted without one.
What thickness rulers work best with most ruler bases?
Most ruler bases work optimally with 1/4-inch thick acrylic rulers. Thinner rulers can slip underneath the base, while thicker ones create gaps that cause uneven stitching. Always check your specific base manufacturer’s recommendations before purchasing rulers.
Can I use a ruler base with any quilting machine?
Universal ruler bases work with many machine brands, but machine-specific bases provide better precision and stability. Check compatibility before purchasing, as some machines require special mounting hardware or have unique hopping foot designs that limit ruler base options.
How do I prevent my rulers from slipping during quilting?
Ensure proper base height – about 1/4 inch above the quilt surface. Keep rulers and base clean to prevent static buildup. Some quilters add thin grip tape to ruler edges, but avoid making them too thick as this affects the base clearance.
Why are my stitches uneven when using a ruler base?
Inconsistent stitch length usually results from varying your speed while quilting. Practice maintaining steady movement of both fabric and ruler at the same pace. Also check your machine’s tension settings and needle condition, as both affect stitch quality.
How often should I clean and maintain my ruler base?
Clean your ruler base after every few quilting sessions or when you notice buildup of lint or residue. Use mild soap and warm water, avoiding harsh chemicals. Store it flat in a padded case to prevent warping, and regularly inspect mounting screws for tightness.