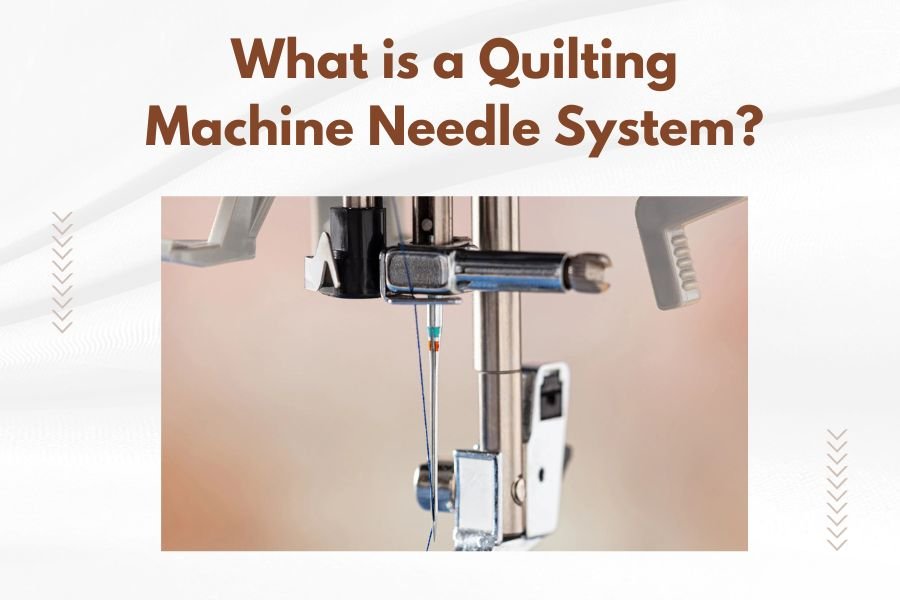
A quilting machine needle system is the complete assembly that holds and positions the needle in your quilting machine, including the needle bar, needle clamp, and the needle itself.
This system controls how your needle moves through fabric layers and batting, making it the heart of your quilting machine’s stitching process.
Understanding Your Quilting Machine Needle System
Think of your quilting machine needle system like the engine of a car. Without it working properly, nothing else matters. The system includes several parts working together to create beautiful stitches.
Your needle system determines stitch quality, thread tension, and how smoothly your fabric feeds through the machine. When something goes wrong with your quilting, the needle system is often where you’ll find the problem.
Main Components of the Needle System
Let me break down what makes up your quilting machine needle system. Each part plays a specific role in creating perfect stitches.
The Needle Bar
The needle bar is the metal rod that moves up and down. It carries your needle through its stitching motion. This bar connects to your machine’s motor system.
When your needle bar gets bent or damaged, you’ll notice uneven stitches. Some quilters don’t realize the needle bar can shift over time with heavy use.
Needle Clamp and Screw
This small but mighty part holds your needle in place. The clamp grips the flat side of your needle shank. The screw tightens everything down.
A loose needle clamp causes skipped stitches and thread breaks. Always check this when troubleshooting stitch problems.
The Actual Needle
Your needle does the heavy lifting. It carries thread through fabric layers and creates the hole for your bobbin thread to meet the top thread.
Different needle types work better for different projects. Using the wrong needle is like trying to cut paper with a butter knife – it might work, but not well.
How the Needle System Creates Stitches
Understanding how your needle system works helps you troubleshoot problems faster. The process happens in precise steps.
The Stitch Formation Process
Your needle pushes down through fabric layers, carrying the top thread. As it reaches the bottom, the thread forms a small loop. The bobbin hook catches this loop and wraps it around the bobbin thread.
When the needle pulls back up, both threads lock together. This creates one complete stitch. The process repeats hundreds of times per minute.
Timing and Synchronization
Everything must happen at exactly the right moment. Your needle system timing affects when the bobbin hook catches the top thread loop.
Poor timing causes skipped stitches or thread tangles. This usually requires professional adjustment, but understanding it helps you identify the problem.
Types of Quilting Machine Needle Systems
Different quilting machines use different needle system designs. Knowing your type helps when buying parts or getting repairs.
Single Needle Systems
Most home quilting machines use single needle systems. One needle creates all your stitches. These systems are simpler and easier to maintain.
Single needle systems work great for most quilting projects. You can change thread colors by switching the top thread spool.
Benefits of Single Needle Systems
- Lower cost and maintenance
- Easier to learn and operate
- Takes up less space
- Good for beginners and hobbyists
Multi-Needle Systems
Commercial and advanced quilting machines often have multiple needles. Each needle can hold a different thread color.
Multi-needle systems speed up production quilting. You switch between colors without rethreading. Professional quilters love this feature.
Multi-Needle Advantages
- Faster color changes
- Better for production work
- More consistent tension across colors
- Professional results
Needle System Maintenance
Taking care of your needle system keeps your quilting machine running smoothly. Regular maintenance prevents bigger problems down the road.
Daily Maintenance Tasks
Before each quilting session, check your needle condition. Look for bent tips, burrs, or dullness. A damaged needle damages your fabric and thread.
Clean lint from around the needle area. Fabric fibers build up quickly during quilting. This buildup affects stitch quality.
Weekly Maintenance
Check your needle clamp screw tightness weekly. Vibration from quilting can loosen this screw over time.
Oil the needle bar if your machine manual recommends it. Some machines have sealed systems that don’t need regular oiling.
Signs Your Needle System Needs Attention
Your quilting machine tells you when the needle system has problems. Learning these signs saves time and frustration.
Common Warning Signs
- Skipped stitches in straight lines
- Thread breaking frequently
- Uneven stitch formation
- Fabric puckering around stitches
- Unusual noise during stitching
Choosing the Right Needles
Your needle choice affects how well your quilting machine needle system performs. Different projects need different needle types.
Needle Size Guidelines
Needle sizes range from very fine to heavy duty. The size number indicates the needle diameter. Higher numbers mean thicker needles.
Match your needle size to your thread weight and fabric thickness. Using a size 18 needle with fine thread creates large holes in your fabric.
| Fabric Type | Recommended Needle Size | Best For |
|---|---|---|
| Light cotton | 70/10 – 80/12 | Piecing, light quilting |
| Medium cotton | 90/14 | General quilting |
| Heavy fabrics | 100/16 – 110/18 | Dense quilts, canvas |
Specialty Quilting Needles
Quilting needles have a tapered point that slides between fabric threads instead of cutting them. This reduces fabric damage.
Topstitching needles have larger eyes for thick threads. Metallic thread needles have special coatings to reduce friction.
When to Use Each Type
Use quilting needles for most projects. Switch to topstitching needles when using thick decorative threads. Try metallic needles if regular needles keep breaking your specialty threads.
Troubleshooting Needle System Problems
When your quilting isn’t going smoothly, start by checking your needle system. Most quilting problems trace back to needle issues.
Fixing Skipped Stitches
Skipped stitches frustrate every quilter. The bobbin hook isn’t catching your top thread loop properly.
First, replace your needle. Dull or bent needles cause most skipped stitch problems. Check that you inserted the needle correctly with the flat side facing back.
Other Skipped Stitch Causes
- Wrong needle type for your fabric
- Loose needle clamp
- Poor thread quality
- Incorrect threading
Solving Thread Breaking Issues
Thread breaks happen when something creates too much friction or tension. Your needle system might be the problem.
Check your needle eye for burrs or rough spots. A damaged needle eye cuts thread as it passes through. Replace the needle and see if breaking stops.
Additional Thread Break Solutions
Make sure your needle size matches your thread. Too small a needle eye creates excessive friction. Clean any lint buildup around the needle area.
Professional Needle System Adjustments
Some needle system problems need professional help. Don’t attempt these repairs yourself unless you have experience.
Timing Adjustments
Needle timing controls when your needle reaches its lowest point relative to the bobbin hook position. This affects stitch formation.
I found that timing problems usually develop after years of heavy use or after a machine gets bumped hard. Professional technicians use special tools to adjust timing.
Needle Bar Height
The needle bar height determines how far your needle travels. Incorrect height causes poor stitch formation or thread problems.
This adjustment requires removing covers and measuring precise distances. Let a qualified technician handle this repair.
Upgrading Your Needle System
Some quilting machines allow needle system upgrades. These improvements can enhance your quilting experience.
Automatic Needle Positioning
This feature stops your needle in the up or down position automatically. It makes positioning easier when quilting around corners.
Many quilters find this feature helpful for precise work. The needle always stops where you want it.
Needle Up/Down Control
This lets you choose whether the needle stops up or down when you stop stitching. Down position holds your fabric in place.
Up position makes it easier to remove your project. Most quilters prefer the down position for continuous quilting.
Conclusion
Your quilting machine needle system is the foundation of great quilting results. Understanding how it works helps you maintain it properly and troubleshoot problems quickly. Remember to use the right needle for each project, keep everything clean and tight, and don’t hesitate to get professional help for timing or alignment issues. With proper care, your needle system will serve you well for many years of beautiful quilting projects.
What happens if I use the wrong needle size in my quilting machine?
Using the wrong needle size creates several problems. Too large a needle makes visible holes in fine fabrics, while too small a needle causes thread breaks and skipped stitches with thick threads or multiple fabric layers.
How often should I replace the needle in my quilting machine?
Replace your quilting machine needle after every 8-10 hours of stitching or when starting a new project with different fabric types. Dull needles cause more problems than most quilters realize.
Can I adjust my quilting machine’s needle system timing myself?
Needle timing adjustments require special tools and expertise. Attempting this repair yourself can damage your machine permanently. Always take timing problems to a qualified sewing machine technician.
Why does my needle keep coming loose during quilting?
A loose needle usually means the needle clamp screw needs tightening or the clamp itself is worn. Check the screw tightness before each quilting session and replace worn clamps promptly.
What’s the difference between a quilting needle and a regular sewing needle?
Quilting needles have a tapered point that slides between fabric threads instead of cutting them like regular needles do. This design reduces fabric damage when stitching through multiple layers.