
A darning foot is used for repairing fabric holes and for free-motion sewing techniques. It lets you move fabric freely under the needle. This sewing machine accessory is essential for mending and creative stitching.
You might know it as a free-motion quilting foot. This special presser foot keeps your fabric flat. It allows you to sew in any direction. This makes it perfect for intricate designs and repairs.
- The darning foot helps you mend holes.
- It works for free-motion quilting.
- You can move fabric in any direction.
- It keeps fabric flat while sewing.
- Many call it a free-motion quilting foot.
Ready to see how this handy tool works? Let’s dive into all the ways you can use a darning foot to enhance your sewing projects.
Exploring the Uses of a Darning Foot
A darning foot is a specialized presser foot for your sewing machine. It helps you repair fabrics and create beautiful free-motion designs. It’s perfect for giving new life to old garments.
You can use it for fixing holes, tears, or worn areas. It also shines in creative tasks like quilting and embroidery. Think of it as your secret weapon for both repair and artistry.
Mending and Repair with a Darning Foot
Darning is the art of repairing holes in fabric. A darning foot makes this process much easier and more effective. You can fix sweaters, jeans, or even delicate household items.
The foot doesn’t press down on your fabric. This lets you move the material freely in any direction. You can build up new stitches where the fabric is missing (NIH).
How to Repair a Hole
First, you’ll need to stabilize the area around the hole. You might use some iron-on interfacing for this. This prevents the fabric from stretching too much while you sew.
Then, you’ll set up your machine with the darning foot. You’ll drop your feed dogs. This is very important. Dropping the feed dogs means your machine won’t pull the fabric for you.
You will then make rows of stitches back and forth over the hole. Imagine weaving a new patch with thread. You’ll then rotate your fabric 90 degrees and stitch across your first rows. This creates a strong, interwoven repair.
- Prepare the torn fabric.
- Install your darning foot.
- Drop the feed dogs on your machine.
- Stitch parallel lines over the hole.
- Rotate and stitch perpendicular lines.
Reinforcing Worn Areas
Sometimes, fabric isn’t torn, but it’s getting thin. A darning foot can help here too. You can use it to sew over worn spots. This adds extra strength and extends the life of the item.
This is especially useful for areas like elbows on shirts or knees on pants. You are essentially adding a thin layer of stitching that acts like a reinforcement patch.
Free-Motion Sewing and Quilting
Beyond repairs, the darning foot is a superstar for creative sewing. It’s often called a free-motion quilting foot for a good reason. It opens up a world of artistic possibilities.
When you free-motion sew, you guide the fabric yourself. The machine’s needle moves up and down. You control the direction and speed of the stitches. It’s like drawing with your sewing machine.
Unleashing Your Creativity
With a darning foot, you can create intricate designs on fabric. You can stitch swirling patterns, stipple designs, or even write words. Many quilters use this technique to add texture and detail to their quilts.
Imagine personalizing a plain tote bag with a unique stitched design. Or adding decorative quilting to a homemade blanket. The only limit is your imagination. We found that practice makes perfect with this technique.
Machine Embroidery Techniques
Did you know you can do machine embroidery without a fancy embroidery machine? A darning foot makes it possible. You can “draw” designs with thread onto your fabric.
It’s not automated like a computer-controlled embroidery machine. But it offers a very organic and artistic look. You get to control every stitch. It’s a truly hands-on approach to embroidery.
Understanding the Darning Foot Design
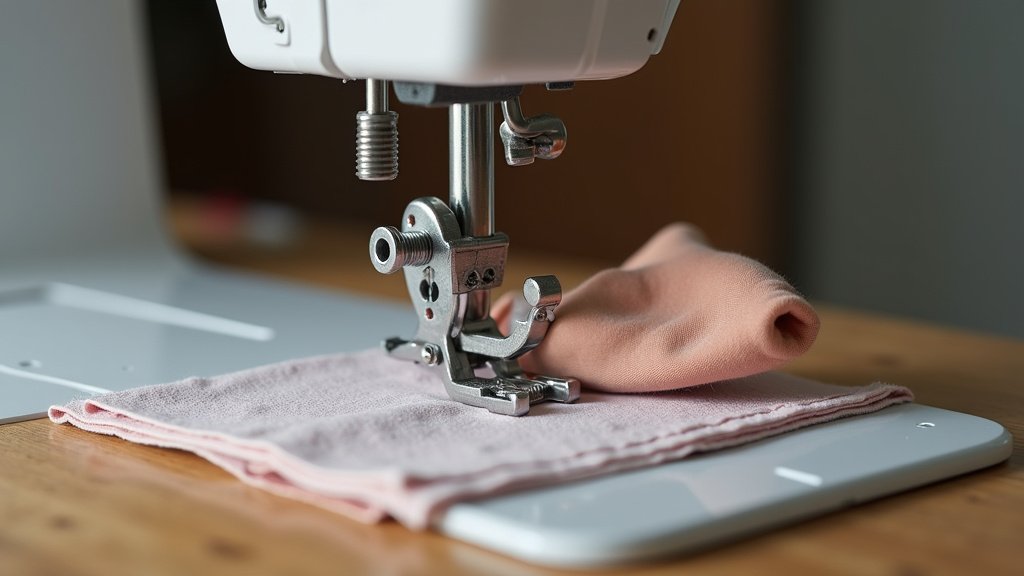
Why is this foot so special? Its design is key to its function. Most presser feet push down on your fabric. A darning foot floats just above the fabric.
It has an open toe or a clear plastic design. This gives you a great view of your needle and stitches. This visibility is super helpful when you’re doing detailed work.
The “Hopping” Action
A darning foot typically has a “hopping” action. It lightly touches the fabric for a moment as the needle goes down. Then, it lifts slightly as the needle comes up. This allows you to move your fabric freely.
This up-and-down motion is what prevents the fabric from shifting. It ensures even stitching while you glide your fabric around. Think of it like a gentle bounce, keeping things in place.
Open Toe vs. Closed Toe
You’ll find darning feet in a few variations. Some have a completely open front. This “open-toe” design offers maximum visibility. It’s popular for very detailed work or when using thick threads.
Others have a small closed circle at the front. This “closed-toe” design is often a bit sturdier. It’s good for general free-motion quilting and darning. The choice often comes down to personal preference and what you’re stitching.
Tips for Using Your Darning Foot Effectively
Using a darning foot can feel a bit different at first. But with a few tips, you’ll be stitching like a pro. Don’t be afraid to experiment and practice on scrap fabric.
| Tip | Explanation |
|---|---|
| Practice first | Always test on scrap fabric. Get a feel for the speed and movement. |
| Drop your feed dogs | This is essential! It allows you to move the fabric yourself. |
| Use an embroidery hoop | A hoop can help keep your fabric taut. This prevents puckering. |
| Match thread to fabric | Choose a thread that blends or contrasts as desired. For repairs, match the original thread. |
| Control your speed | Find a comfortable pace. Don’t go too fast or too slow. |
| Good lighting helps | Make sure you can clearly see your work area. |
Mastering Fabric Movement
The key to successful free-motion sewing is coordinating your hands with the machine’s speed. You want to move the fabric smoothly. Aim for consistent stitch length, even though you’re controlling it manually.
It’s a dance between your hands and the foot pedal. We found that a steady rhythm helps a lot. It might feel awkward at first, but your muscle memory will improve quickly. Many experts recommend starting with simple swirling patterns (Craftsy).
Adjusting Machine Settings
Besides dropping the feed dogs, you might need to adjust your stitch length. Since you’re moving the fabric, you’re effectively controlling the stitch length. You’ll want to set your machine to a straight stitch.
Sometimes, adjusting the presser foot pressure can help too. If your machine has this option, you might slightly reduce the pressure. This allows the fabric to glide more freely under the foot.
Conclusion
You now understand the incredible versatility of a darning foot. It’s not just for fixing worn-out items. It’s also your gateway to creative free-motion sewing and personalized embroidery.
By dropping your feed dogs and mastering fabric movement, you can transform repairs into art. Practice is key, so don’t be afraid to experiment on scrap fabric. This simple accessory truly expands what your sewing machine can do.
So, pull out your darning foot and start giving old items new life. Or, begin designing your own unique quilted projects today!
Frequently Asked Questions
What’s the main difference between a darning foot and a regular presser foot?
A regular presser foot holds your fabric firmly against the feed dogs. This allows the machine to move the fabric. A darning foot floats above the fabric, letting you move the material freely in any direction for repairs or free-motion designs.
Can I use a darning foot on any sewing machine?
Most modern sewing machines can accommodate a darning foot. You’ll need to ensure your machine allows you to drop the feed dogs. Check your machine’s manual for compatibility and installation instructions.
Do I need special thread when using a darning foot?
For darning repairs, we found it’s best to use thread that matches your fabric’s weight and fiber content. For decorative free-motion work, you can experiment with various threads like embroidery thread or even thicker quilting threads to achieve different effects.
How do I control stitch length when using a darning foot?
When using a darning foot, you control the stitch length with your hand movement. Move the fabric faster for longer stitches and slower for shorter, denser stitches. Coordinating this with your machine’s speed takes some practice.
Is free-motion quilting with a darning foot difficult for beginners?
Free-motion quilting can feel challenging at first because you control everything. However, with consistent practice on scrap fabric, you can quickly develop the necessary coordination. Start with simple designs like loops or swirls to build confidence.
