Using a quilting machine becomes easy when you understand the basic setup, thread path, and tension controls that create beautiful, even stitches across your quilt layers.
Start by threading your quilting machine properly, adjusting the tension settings, and practicing on sample fabric to master the smooth movements needed for professional results.
Getting Your Quilting Machine Ready
Before you touch any fabric, you need to prepare your quilting machine. Think of it like warming up your car before a long road trip.
First, check that your machine sits on a stable surface. A wobbly table will make your stitches uneven. Many quilters find that a dedicated quilting table works best.
Clean your machine thoroughly. Remove any lint from the bobbin area and oil the parts according to your manual. A clean machine runs smoother and makes better stitches.
Choosing the Right Thread
Thread choice affects everything about your quilting. Cotton thread works great for most projects, while polyester gives you stronger seams.
Match your thread weight to your project. Use 40-weight thread for general quilting and 50-weight for detailed work. Heavier threads create bolder lines.
Setting Up Your Workspace
Your workspace should support the weight of your quilt. Extension tables help distribute the weight so you’re not fighting gravity while you sew.
Position your chair at the right height. Your arms should be comfortable, and you shouldn’t hunch over the machine.
Threading Your Quilting Machine
Threading might seem basic, but doing it wrong causes most beginner problems. Take your time here.
Start with the spool pin. Place your thread spool so it unwinds in the direction your machine expects. Check your manual for the correct orientation.
Following the Thread Path
Every quilting machine has guides that show you the correct thread path. Follow these exactly. Skipping even one guide can cause tension problems.
The thread should flow smoothly from guide to guide. If it catches anywhere, you’ve probably missed a step.
Threading the Needle
Use a needle threader if your eyes strain. Many modern machines have automatic threaders that work well when properly aligned.
Leave about 6 inches of thread hanging from the needle. This gives you enough to work with when you start sewing.
Loading the Bobbin
Wind your bobbin evenly. Uneven bobbin winding creates tension issues that show up as loose stitches on your quilt back.
Insert the bobbin according to your machine’s design. Some drop in from the top, others load from the front. The thread should pull in the correct direction.
Understanding Tension Settings
Tension controls how tightly your machine pulls the thread. Perfect tension creates stitches that look the same on both sides of your quilt.
Start with your machine’s recommended settings. Most quilting machines work well with tension set between 3 and 5.
Testing Your Tension
Make a test sandwich using scraps of your actual quilt materials. This gives you accurate results because different fabrics behave differently.
Sew a line of straight stitches. Look at both sides. The stitches should lock in the middle of the fabric layers, not on the top or bottom surface.
Adjusting When Things Go Wrong
If the top thread shows on the back, your top tension is too loose. Increase the top tension number slightly.
If the bobbin thread shows on top, your top tension is too tight. Lower the top tension number.
Preparing Your Quilt Layers
Your quilt sandwich needs three layers: the top, batting, and backing. Each layer affects how your machine handles the project.
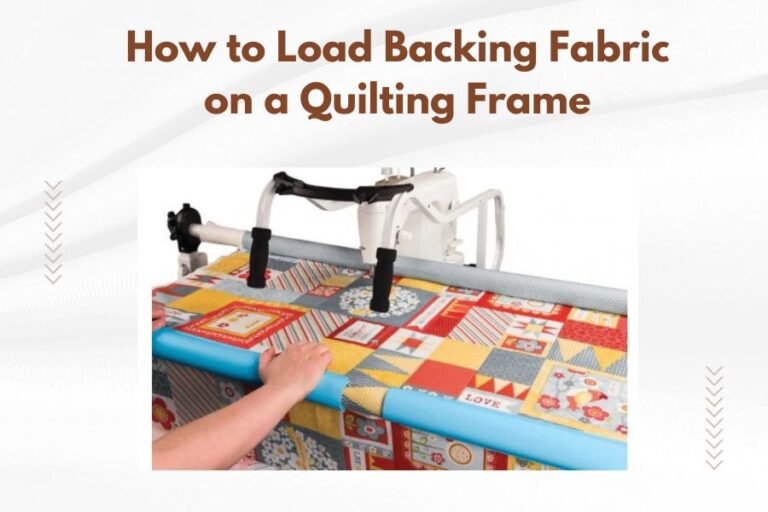
Lay out your backing fabric face down on a large, flat surface. Smooth out any wrinkles because they’ll show in your finished quilt.
Adding the Batting
Center your batting on the backing. The batting should be 2-3 inches larger than your quilt top on all sides.
Different batting types behave differently under the machine. Cotton batting grips the fabric layers, while polyester batting slides more easily.
Positioning the Quilt Top
Place your quilt top face up, centered on the batting. Take time to align everything properly now rather than fighting shifting layers later.
Pin or baste the layers together. Safety pins work well for machine quilting because they don’t catch on the machine foot.
Mastering Basic Quilting Movements
Quilting machine movements feel different from regular sewing. You’re guiding much thicker material, and the weight changes as you work.
Start quilting in the center of your project and work outward. This prevents puckering and keeps your layers aligned.
Straight Line Quilting
Begin with straight lines because they’re the most forgiving. Use your machine’s walking foot to feed all layers evenly.
Keep your hands relaxed and guide gently. Let the machine do the work rather than pushing or pulling the fabric.
Maintaining Consistent Speed
Steady speed creates even stitches. Practice on scraps until you find a comfortable pace.
Many quilters prefer slower speeds when learning. You can always speed up as you get more comfortable.
Free Motion Quilting
Free motion quilting lets you create curves and patterns. You control the fabric movement while the machine handles the stitching.
Drop your feed dogs and use a free motion foot. Your hands become the fabric guides, moving the quilt in any direction.
Coordinating Hand and Machine Movement
Move your hands steadily while maintaining consistent machine speed. This coordination takes practice but creates beautiful results.
Think of it like drawing with thread. Your hands trace the design while the machine provides the “ink.”
Troubleshooting Common Problems
Every quilter faces challenges. Knowing how to fix common issues keeps your projects moving forward.
Thread breaks usually mean your tension is too tight or your needle is dull. Try a fresh needle first, then adjust tension.
| Problem | Likely Cause | Solution |
|---|---|---|
| Skipped Stitches | Wrong needle or dull needle | Change to quilting needle |
| Puckering | Tension too tight | Reduce top tension |
| Uneven Stitches | Inconsistent speed | Practice steady movement |
| Thread Nests | Threading error | Re-thread completely |
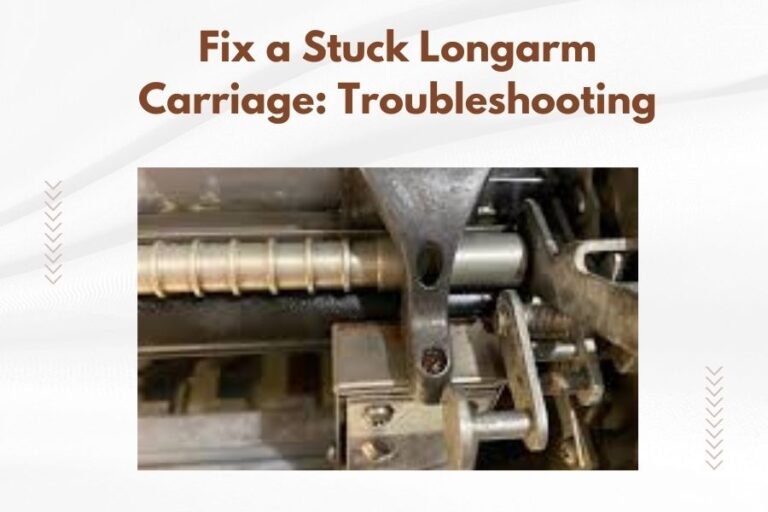
When Your Machine Jams
Stop immediately when you hear unusual sounds. Turn off your machine before investigating.
Remove the work carefully and check for thread tangles in the bobbin area. Clean out any debris before re-threading.
Finishing Your Quilted Project
As you near completion, your quilt handling changes. The finished sections become heavier and more awkward to maneuver.
Roll the completed portions to make handling easier. Some quilters use quilting clips to keep rolled sections secure.
Final Quality Checks
Inspect your work regularly. Catching problems early saves time later.
Look for areas where the layers might have shifted. These usually show up as small puckers or loose areas.
Conclusion
Using a quilting machine successfully comes down to preparation, practice, and patience. Start with proper setup, master your threading and tension, then build your skills gradually. Remember that every expert quilter started as a beginner, making the same mistakes you might encounter. Focus on one technique at a time, and don’t rush the learning process. Your quilting machine will become an extension of your creativity as you gain experience. Keep practicing with scraps, stay patient with yourself, and enjoy watching your skills grow with each project.
How often should I clean my quilting machine?
Clean your quilting machine after every major project or every 8-10 hours of use. Quilting creates more lint than regular sewing, so frequent cleaning prevents buildup that can affect stitch quality and machine performance.
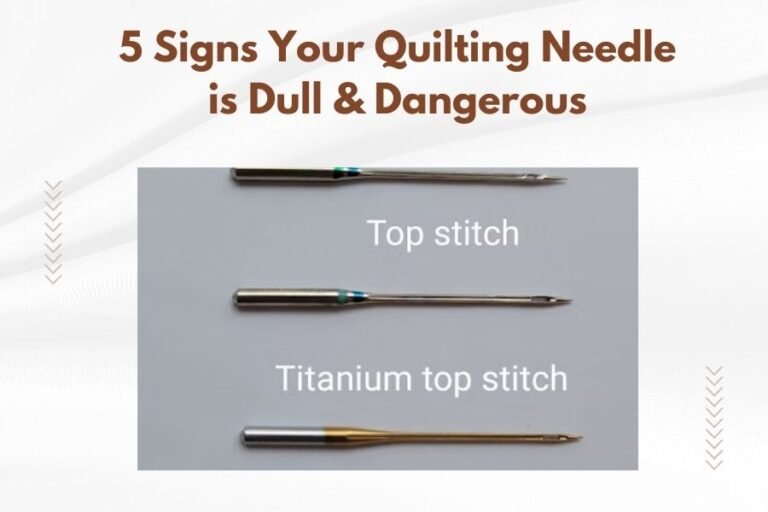
What needle size works best for most quilting projects?
Use a size 90/14 quilting needle for most cotton quilts with standard batting. Switch to size 80/12 for lightweight fabrics or size 100/16 for thick batting or multiple layers. Quilting needles have a special point designed to penetrate multiple fabric layers cleanly.
Can I quilt without a walking foot on my machine?
A walking foot feeds all quilt layers evenly and prevents shifting, making it essential for straight-line quilting. While you can attempt quilting without one, you’ll likely experience puckering and uneven feeding that creates poor results, especially with thick batting.
Why does my thread keep breaking during quilting?
Thread breaks typically result from excessive tension, a dull or wrong needle, or poor thread quality. Check your tension settings first, then replace your needle with a fresh quilting needle. Old or cheap thread also breaks more frequently than quality quilting thread.
How do I prevent my quilt layers from shifting while quilting?
Baste your quilt layers thoroughly with safety pins placed every 4-6 inches, or use spray basting for temporary adhesion. Start quilting from the center and work outward, and avoid pulling or pushing the fabric as you guide it through the machine.