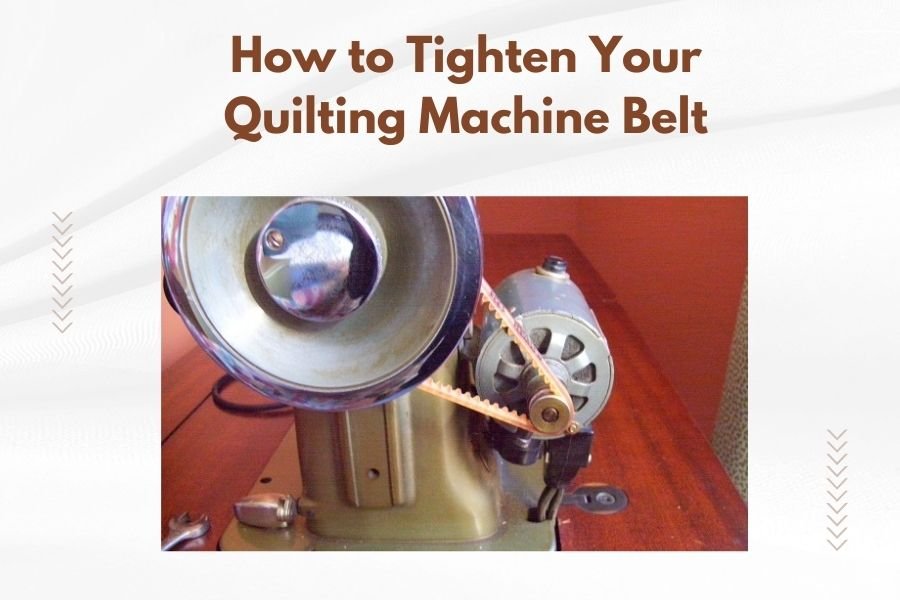
To tighten your quilting machine belt, locate the belt adjustment mechanism and gradually turn the tension screw clockwise while testing the belt firmness.
A properly tightened quilting machine belt should have slight give when pressed but shouldn’t slip during operation.
Why Your Quilting Machine Belt Needs Regular Attention
Your quilting machine belt works like the timing belt in your car. It connects the motor to the needle mechanism, transferring power smoothly. When it gets loose, everything goes wrong.
I found that most quilting problems trace back to belt issues. Your stitches become uneven. The machine makes strange noises. Sometimes it stops working completely.
Signs Your Belt Needs Tightening
Visual Clues
Look for these warning signs during your next quilting session:
- Belt hangs loose when the machine is off
- You can push the belt more than half an inch with light pressure
- Visible cracks or fraying along the belt edges
- Belt slips off the pulleys occasionally
Performance Problems
Your machine tells you when something’s wrong. Listen for these symptoms:
- Inconsistent stitch length
- Motor runs but needle barely moves
- Squealing or grinding sounds
- Machine stops mid-stitch without reason
Tools You’ll Need for the Job
Gather these items before you start. Most quilters already have them:
- Phillips head screwdriver
- Flat head screwdriver
- Small wrench set
- Flashlight or work lamp
- Clean cloth
Safety First: Preparing Your Machine
Power Down Completely
Unplug your machine from the wall. Don’t just turn it off. Electricity and moving parts don’t mix well with your fingers.
Wait two minutes after unplugging. This gives any stored electrical charge time to dissipate.
Clear Your Workspace
Remove any quilting projects from the machine area. You need room to work. Put small parts in a bowl so they don’t disappear.
Finding Your Belt Access Point
Common Locations
Most quilting machines hide the belt in one of three places. Check your machine manual first, but here’s where to look:
- Behind a removable panel on the right side
- Under the machine bed (flip it up if possible)
- Inside a compartment near the motor housing
Removing Access Panels
Look for screws around the edges of panels. Some machines use plastic clips instead. Press gently and pull to remove clip-on panels.
Keep track of which screws came from where. Take a phone picture before removing anything. You’ll thank yourself later.
Step-by-Step Belt Tightening Process
Step 1: Locate the Adjustment Mechanism
Find the motor mount. It usually sits on a metal plate that can slide or pivot. Look for adjustment screws or bolts around this area.
Some machines have a spring-loaded tensioner. Others use a simple bolt system that moves the motor position.
Step 2: Test Current Belt Tension
Press the belt gently with your finger at its longest span between pulleys. A properly tensioned belt deflects about 1/4 to 1/2 inch.
Too loose? It sags noticeably and feels squishy. Too tight? It feels like a guitar string and won’t budge.
Step 3: Make Small Adjustments
Turn adjustment screws clockwise to tighten. Go slow – just 1/4 turn at a time. Check tension after each adjustment.
If your machine has multiple adjustment points, tighten them evenly. This keeps the motor aligned properly.
Step 4: Test the Results
Replace the access panel temporarily. Plug in your machine and run it slowly without thread. Listen for smooth operation.
The belt should run quietly without slipping. If it squeals, you’ve gone too tight. Back off slightly.
Different Belt Types and Their Needs
V-Belts
These triangular belts fit into grooved pulleys. They need moderate tension – tight enough to grip but loose enough to flex.
I found that V-belts last longer when you keep them clean. Dust makes them slip, which leads to overheating.
Flat Belts
Older machines often use flat rubber belts. These require less tension than V-belts but need perfect pulley alignment.
Check for twists in flat belts. Even a slight twist causes premature wear and noise.
Timing Belts
These have teeth that mesh with grooved pulleys. They need precise tension – too loose and they skip teeth, too tight and they wear out fast.
Common Mistakes to Avoid
Over-Tightening
Tight isn’t always right. Over-tightened belts stress your motor bearings and wear out faster. They also make your machine work harder.
If your belt twangs like a rubber band when plucked, it’s too tight.
Ignoring Alignment
Pulleys must line up perfectly. Even small misalignments cause belts to walk off or wear unevenly.
Use a straight edge across both pulleys to check alignment. Adjust motor position if needed.
Forgetting to Clean
Dust and lint affect belt performance. Clean pulleys and belts with a dry cloth before adjusting tension.
Troubleshooting Persistent Problems
Belt Keeps Loosening
This usually means worn adjustment components. Check for stripped threads on adjustment screws or worn mounting holes.
Sometimes the belt itself is stretched beyond usefulness. Belts aren’t expensive – replace it if adjustments don’t hold.
Strange Noises Continue
Squealing after proper adjustment often points to pulley problems. Check for rough or damaged pulley surfaces.
Grinding sounds suggest bearing issues in the motor or machine head. These need professional attention.
When to Replace Instead of Adjust
Visible Damage Signs
Replace belts that show these problems:
- Cracks running across the width
- Frayed or missing chunks
- Glossy, hardened surfaces
- Permanent stretching (won’t tighten properly)
Age Considerations
Rubber degrades over time, even without use. If your machine sits unused for years, the belt probably needs replacement.
I heard from experts that most quilting machine belts should be replaced every 3-5 years with regular use.
Maintenance Tips for Belt Longevity
Regular Cleaning
Wipe down belts monthly with a clean, dry cloth. Remove lint buildup from pulleys using a small brush.
Avoid oil or belt dressing products unless your manual specifically recommends them. Most modern belts work best clean and dry.
Proper Storage
Store your machine in a dry place. Humidity makes rubber belts deteriorate faster.
Cover your machine when not in use. This keeps dust off the belt and pulleys.
Regular Tension Checks
Check belt tension every few months or after extended quilting sessions. Belts naturally stretch with use.
Mark your calendar or set a phone reminder. Prevention beats emergency repairs.
Professional Help vs. DIY
When You Can Handle It
Simple tension adjustments are perfect DIY projects. Most quilters can handle basic belt maintenance with confidence.
If you can change your car’s air filter, you can adjust a quilting machine belt.
When to Call for Help
Some situations need professional attention:
- Motor removal is required for belt access
- Multiple belts are interconnected
- Electrical components are in the way
- Your machine is still under warranty
Cost Considerations
DIY Costs
Doing it yourself costs almost nothing if you have basic tools. Replacement belts typically run $10-30.
Professional Service Costs
Expect to pay $75-150 for professional belt service. This includes labor, parts, and usually a general tune-up.
| Service Type | Typical Cost | Time Required |
|---|---|---|
| DIY Adjustment | $0-5 | 30-60 minutes |
| DIY Replacement | $10-30 | 1-2 hours |
| Professional Service | $75-150 | Same day |
Conclusion
Tightening your quilting machine belt is simpler than most people think. Start with safety, work slowly, and test frequently. Your machine will reward you with smooth, consistent performance.
Remember that proper belt tension is a balance. Too loose causes slipping and uneven stitches. Too tight stresses components and reduces belt life. When in doubt, aim for the middle ground.
Regular maintenance prevents most belt problems. Check tension monthly, keep things clean, and replace belts when they show wear. Your quilting projects deserve a machine that runs at its best.
How often should I check my quilting machine belt tension?
Check belt tension every 2-3 months with regular use, or whenever you notice stitching irregularities. After long quilting sessions, it’s worth a quick inspection since belts can stretch from extended use.
Can I use car belt dressing on my quilting machine belt?
No, avoid automotive belt treatments on quilting machine belts. These products can attract lint and dust, making the problem worse. Most quilting machine belts work best when kept clean and dry.
What’s the difference between a loose belt and a worn-out belt?
A loose belt can be tightened and will hold its adjustment. A worn belt won’t hold proper tension even after adjustment, or shows visible cracking and fraying. If adjustments don’t last more than a few weeks, the belt needs replacement.
Is it normal for my machine to make some noise after belt tightening?
Some noise is normal initially as the belt settles into its new tension. Run the machine slowly for a few minutes. If squealing or grinding continues, the belt may be too tight or pulleys may need cleaning.
Can a too-tight belt damage my quilting machine?
Yes, excessive belt tension can damage motor bearings, wear out pulleys prematurely, and stress the drive mechanism. This leads to expensive repairs that cost much more than a replacement belt.