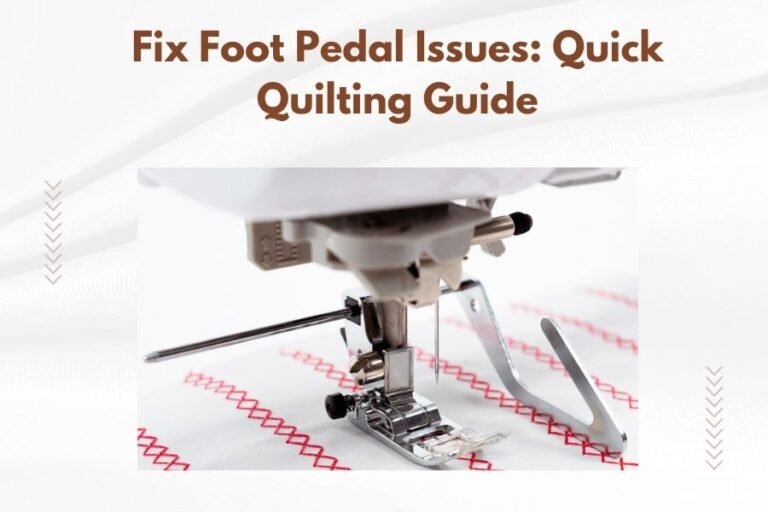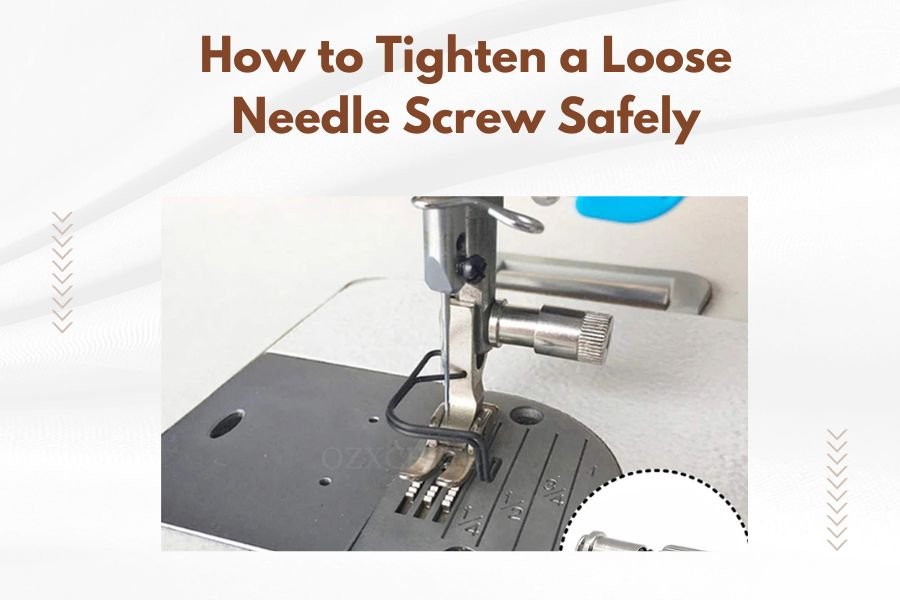
To tighten a loose needle screw safely, first turn off your quilting machine and remove the thread, then use the small screwdriver from your machine toolkit to turn the needle screw clockwise until snug.
Never over-tighten the needle screw as this can damage the threading mechanism or cause the needle to break during quilting.
Why Your Needle Screw Comes Loose
Your quilting machine vibrates constantly while you work. Every stitch creates tiny movements that can gradually loosen screws over time.
Thread tension also plays a role. When you pull fabric or adjust tension settings, you create stress on the needle assembly. The screw naturally works itself loose.
Some machines are more prone to this issue than others. I found that older machines and heavily used quilting machines tend to develop loose needle screws more often.
Signs Your Needle Screw Needs Attention
Visual Indicators
Look for a needle that appears tilted or crooked. A properly secured needle should sit perfectly straight in the needle bar.
You might see a small gap between the needle and the needle clamp. This gap means the screw isn’t holding the needle firmly in place.
Performance Problems
Skipped stitches often point to a loose needle. When the needle moves during stitching, it can’t form proper loops with the bobbin thread.
Thread breakage becomes more common too. A wobbly needle creates uneven tension that snaps thread unexpectedly.
Strange clicking or rattling sounds during quilting usually mean something is loose in the needle assembly.
Safety First: Pre-Work Checklist
Power and Threading
Always turn off your machine before touching the needle area. This prevents accidental needle movement that could injure your fingers.
Remove all thread from the needle and unthread the machine completely. Thread can get tangled around your tools while you work.
Tool Preparation
Find your machine’s toolkit. Most quilting machines come with a small screwdriver designed for needle screws.
If you lost the original screwdriver, use a small flathead screwdriver instead. Make sure it fits the screw head properly to avoid stripping.
Lighting and Position
Position a bright light near your work area. Good lighting helps you see exactly what you’re doing.
Sit or stand in a comfortable position where you can easily reach the needle area without straining.
Step-by-Step Tightening Process
Initial Assessment
Gently wiggle the needle with your fingers. A secure needle shouldn’t move at all when you try to shift it.
Check if the needle is seated properly in the needle clamp. The flat side should face the back of the machine on most models.
The Tightening Technique
Hold the needle steady with one hand. This prevents it from dropping into the machine or falling to the floor.
Insert your screwdriver into the needle screw. Turn clockwise slowly until you feel resistance.
Stop when the screw feels snug. You want firm contact, not maximum torque.
Testing Your Work
Try to wiggle the needle again. It should feel completely solid with no movement.
Turn the hand wheel slowly to move the needle up and down. Watch for any wobbling or irregular movement.
Common Mistakes to Avoid
Over-Tightening Problems
Many quilters think tighter is always better. This isn’t true for needle screws.
Over-tightening can crack the needle clamp or damage the screw threads. I found online that repair technicians see this problem frequently.
You might also bend the needle itself if you apply too much pressure while tightening.
Wrong Tool Usage
Never use pliers or large screwdrivers on needle screws. These tools apply too much force and can strip the screw head.
Avoid electric screwdrivers too. Hand tools give you better control over the tightening process.
Needle Positioning Errors
Some quilters tighten the screw with the needle in the wrong position. Always check that the flat side faces the correct direction first.
Make sure the needle is pushed all the way up into the needle clamp before tightening.
When to Replace Instead of Tighten
Screw Condition Issues
Look at the screw head carefully. Stripped or damaged screws won’t hold properly no matter how you tighten them.
Rusty screws should be replaced too. Corrosion weakens the metal and makes future loosening more likely.
Thread Damage
If the screw turns easily but never gets tight, the threads might be worn out. This happens on older machines or frequently used quilting equipment.
Cross-threading from previous repairs can also prevent proper tightening. You’ll need professional help to fix damaged threads.
Machine-Specific Considerations
Longarm Quilting Machines
Longarm machines often have larger needle screws that require slightly more pressure. Follow your manual’s specific instructions.
Some longarm models have special needle holding systems. Don’t assume all machines work the same way.
Computerized Models
Modern computerized machines might have safety features that prevent operation with loose needles. Pay attention to error messages.
These machines often have more sensitive needle positioning systems. Extra care during tightening helps avoid alignment problems.
Vintage Machine Quirks
Older machines sometimes have reverse-thread screws or unusual tightening directions. Check your manual or contact a repair specialist.
Maintenance Tips to Prevent Future Loosening
Regular Inspection Schedule
Check your needle screw tightness every few quilting sessions. This takes 30 seconds and prevents bigger problems.
I found that quilters who do heavy thread work or use thick batting should check more often.
Proper Threading Habits
Avoid pulling hard on stuck thread near the needle area. This stress can loosen screws over time.
When changing threads, cut the old thread instead of pulling it through the needle eye.
Storage Considerations
Store your machine in a stable environment. Temperature changes can cause metal parts to expand and contract, affecting screw tightness.
| Inspection Frequency | Quilting Type | Why Check More Often |
|---|---|---|
| Every session | Heavy quilting with thick batting | Extra machine vibration |
| Every 2-3 sessions | Standard quilting projects | Normal wear patterns |
| Weekly | Light quilting or embroidery | Minimal stress on needle assembly |
| Before each use | Shared or classroom machines | Multiple users, varying skill levels |
Troubleshooting After Tightening
Persistent Loosening
If your needle screw keeps coming loose despite proper tightening, you might have worn internal parts. This requires professional attention.
Some quilters try thread-locking compounds, but these can damage delicate machine parts. Stick to proper mechanical solutions.
Stitching Quality Issues
Poor stitch formation after tightening usually means the needle isn’t positioned correctly. Double-check the needle orientation and height.
Tension problems can also appear if you accidentally moved other settings while working on the needle screw.
Unusual Sounds
New clicking or grinding noises after tightening suggest you might have over-tightened or misaligned something. Loosen slightly and retry.
Professional Help vs DIY
When to Call a Technician
Damaged screw heads or stripped threads need professional tools and replacement parts. Don’t attempt these repairs yourself.
If you’re uncomfortable working with small screws and tools, a repair shop can handle this safely for a small fee.
DIY Success Indicators
You can handle this repair if you have steady hands, good vision, and basic tool skills.
Most quilters find needle screw tightening easy once they try it a few times. Practice builds confidence.
Conclusion
Tightening a loose needle screw is a simple maintenance task that every quilter should know. With the right tools and careful technique, you can fix this problem in just a few minutes.
Remember to work safely with your machine turned off and thread removed. Check your needle screw regularly to catch loosening before it affects your quilting projects.
When in doubt, ask for help or consult your machine manual. A properly maintained needle assembly keeps your quilting smooth and enjoyable for years to come.
What happens if I don’t tighten a loose needle screw?
A loose needle screw will cause skipped stitches, thread breaks, and poor stitch quality. Eventually, the needle could fall out completely and potentially damage your machine’s timing or internal components.
Can I use regular household screwdrivers instead of the machine toolkit?
Yes, but choose a small flathead screwdriver that fits the screw head perfectly. Avoid screwdrivers that are too large or don’t fit properly, as these can strip the screw head and create bigger problems.
How often should I check my needle screw tightness?
Check your needle screw every 2-3 quilting sessions for normal use, or before each session if you do heavy quilting with thick materials. Quick weekly checks work fine for light quilting projects.
Why does my needle screw keep loosening even after I tighten it?
Repeated loosening usually indicates worn screw threads, a damaged needle clamp, or internal vibration issues. This problem typically requires professional repair or replacement of worn parts.
Is it normal for different quilting machines to have different screw types?
Yes, needle screw designs vary between manufacturers and machine models. Some use flathead screws, others use specialized screws or different holding mechanisms. Always check your machine manual for the correct procedure.