Ruler work on a quilting machine involves using quilting rulers as guides to create straight lines, curves, and geometric patterns while free-motion quilting.
You’ll need a quilting ruler, ruler foot, lowered feed dogs, and practice to master this technique that transforms your machine into a precision quilting tool.
What Is Ruler Work on a Quilting Machine?
Think of ruler work like drawing with a really big pencil. Your quilting machine becomes the pencil, and the ruler guides where that “pencil” goes.
The technique combines free-motion quilting with physical guides. You move both the fabric and the ruler to create perfectly straight lines, smooth curves, and repeat patterns. It’s like having training wheels for free-motion quilting.
Many quilters find ruler work easier than pure free-motion quilting. The ruler gives you something to lean on when your hands feel shaky.
How Ruler Work Differs from Regular Quilting
Regular quilting uses your machine’s feed dogs to move fabric forward. The presser foot stays in one spot while the fabric moves underneath.
Ruler work flips this around. You drop the feed dogs and move everything by hand. The ruler becomes your guide, and you control the speed and direction.
It’s the difference between riding a bike on a path versus steering your own course through an open field.
Essential Equipment for Ruler Work
The Right Ruler Foot
Your regular presser foot won’t work for ruler work. You need a special ruler foot that sits higher off the quilt surface.
Most ruler feet look like a clear plastic circle with a short shank. The extra height lets you slide rulers underneath without the foot getting stuck.
I found that different machine brands often require specific ruler feet. Check your machine manual or ask your dealer which foot works best.
Choosing Your First Rulers
Start with these basic ruler shapes:
- 6-inch straight ruler for lines and borders
- 4-inch circle template for medallions
- Curved ruler set for feathers and swirls
- Square or rectangle for geometric patterns
Quality matters here. Cheap rulers can slide around or break. Look for rulers that are 1/4-inch thick with smooth edges.
Ruler Materials That Work Best
Acrylic rulers work great because you can see through them. Some quilters prefer rulers with a slight texture on the bottom to prevent sliding.
Avoid rulers that are too thin. They’ll bend under pressure and give you wobbly lines.
Machine Setup Requirements
Your machine needs a few key features for ruler work:
- Ability to drop or cover feed dogs
- Large throat space (at least 9 inches helps)
- Good lighting around the needle area
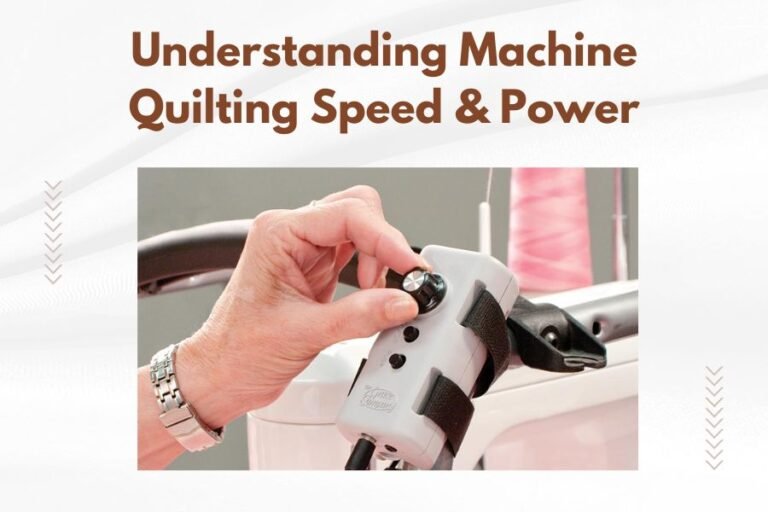
- Speed control to slow things down
Most modern sewing machines can handle ruler work. You don’t need a fancy longarm machine to get started.
Preparing Your Machine for Success
Feed Dog Settings
Drop those feed dogs down or cover them completely. Any part of the feed dogs sticking up will catch your rulers and create problems.
Some machines have a switch to lower feed dogs. Others require a special cover plate. Check your manual for the exact steps.
Tension and Thread Setup
Start with your normal thread tension. You might need to adjust it slightly once you begin quilting.
Use good quality thread that won’t break under the start-and-stop motion of ruler work. Cotton or polyester both work fine.
I found that matching thread colors to your fabric helps hide any wobbly learning lines.
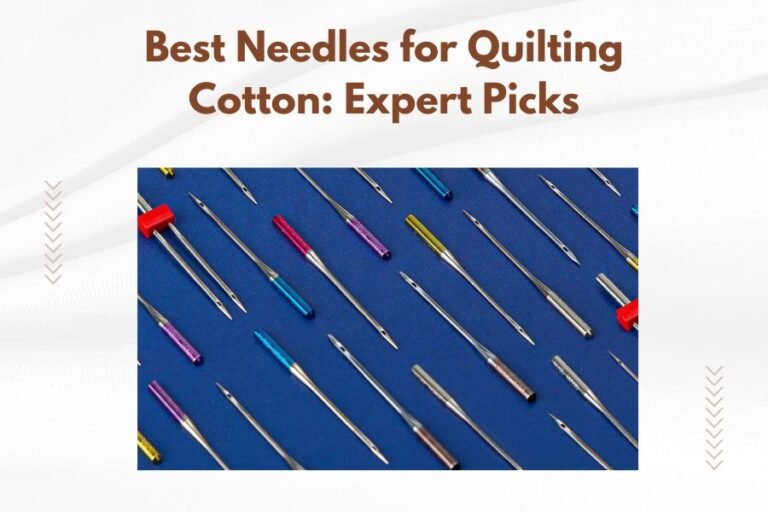
Needle Selection Tips
A size 90/14 universal needle works for most ruler work projects. Go smaller for delicate fabrics or larger for thick batting.
Change your needle often. Ruler work involves lots of direction changes that can dull needles quickly.
Your First Ruler Work Practice Session
Creating a Practice Sandwich
Make a small quilt sandwich just for learning. Use:
- Muslin or scrap fabric for the top
- Thin cotton batting
- Another piece of muslin for backing
- Safety pins or spray basting to hold layers together
Keep it small. A 12-inch square gives you plenty of room to practice without wrestling a big project.
Hand Position and Movement
Place one hand on the ruler to keep it steady. Use your other hand to guide the fabric.
Think of your hands as a team. The ruler hand sets the direction. The fabric hand provides the movement.
Keep both hands relaxed. Tension in your hands leads to jerky movements and uneven stitching.
Finding Your Rhythm
Start with the machine running slowly. You want steady needle movement with smooth fabric motion.
The goal is consistent stitch length. Fast machine plus slow hands equals tiny stitches. Slow machine plus fast hands equals big stitches.
Practice until you find the sweet spot where everything flows together.
Basic Ruler Work Techniques
Straight Line Quilting
Begin with simple straight lines using a ruler edge as your guide.
Place your ruler where you want the line. Put the needle down right against the ruler edge. Move the fabric steadily while keeping the ruler in place.
Don’t push or pull hard. Let the fabric glide smoothly under the needle.
Creating Curved Lines
Curved rulers help you make smooth arcs and circles. The technique stays similar to straight lines, but you’ll move both the ruler and fabric together.
Start with gentle curves before attempting tight circles. Your hands need time to learn the coordination.
Managing Direction Changes
When changing direction, stop with the needle down in the fabric. Reposition your ruler for the next section. Continue quilting.
This stop-and-start method helps maintain accuracy. Trying to change direction while stitching often leads to mistakes.
Common Beginner Mistakes to Avoid
Speed Control Issues
New ruler workers often run the machine too fast. Slow and steady wins this race.
If your machine has speed control, set it to about 25% while learning. You can speed up later as your skills improve.
Ruler Slipping Problems
Rulers that slide around cause wavy lines and frustration. Make sure your ruler foot height is correct.
Some quilters add a thin grip strip to their ruler bottom. Others prefer rulers with textured surfaces that naturally resist sliding.
Fabric Bunching
If fabric bunches up around the needle, you’re probably moving too fast or pressing too hard.
Relax your grip. Let the fabric move naturally. Think of guiding rather than forcing.
Building Your Ruler Work Skills
Progressive Practice Exercises
Week 1: Practice straight lines in different directions. Aim for consistent spacing and smooth motion.
Week 2: Add gentle curves and circles. Focus on maintaining even stitch length around bends.
Week 3: Try combining straight and curved elements. Practice stopping and starting cleanly.
Week 4: Attempt simple repeating patterns using multiple ruler shapes.
Troubleshooting Common Problems
Uneven stitches usually mean inconsistent speed between machine and hand movement. Practice matching your rhythm.
Broken threads often result from moving too fast or using poor quality thread. Slow down and check your thread choice.
Puckered fabric suggests tension issues or moving the fabric in multiple directions. Check your machine tension settings.
Moving Beyond Basic Techniques
Pattern Development
Once you master basic shapes, start combining them into patterns. A simple flower might use circle rulers for the center and curved rulers for petals.
Sketch your ideas on paper first. Planning helps you figure out the ruler sequence and avoid painting yourself into corners.
Advanced Ruler Shapes
After mastering basics, consider adding these specialty rulers:
- Crosshatch rulers for perfect grids
- Feather rulers for traditional quilting motifs
- Wave rulers for flowing border designs
- Nested templates for consistent repeated shapes
Custom Pattern Creation
You can create custom rulers using sturdy cardboard or plastic sheets. Trace your desired shape, cut it out, and sand the edges smooth.
This opens up unlimited design possibilities without buying expensive specialty rulers.
Safety Tips for Ruler Work
Protecting Your Fingers
Keep fingers away from the needle area. The combination of moving rulers and fabric can catch you off guard.
Some quilters wear thin gloves for better grip and finger protection. Others prefer bare hands for better feel.
Taking Breaks
Ruler work requires concentration and steady hand control. Take breaks every 20-30 minutes to avoid fatigue and mistakes.
Tired hands make more errors. Fresh hands create better quilting.
Conclusion
Ruler work opens up a whole new world of quilting possibilities. With the right equipment and some practice, you’ll create professional-looking straight lines, smooth curves, and intricate patterns.
Remember that everyone starts as a beginner. Your first attempts might look wobbly, but keep practicing. Each session builds muscle memory and confidence.
Start with simple shapes and basic techniques. Master the fundamentals before moving to complex patterns. Soon you’ll wonder how you ever quilted without rulers guiding your way.
What’s the difference between a ruler foot and a regular presser foot?
A ruler foot sits higher off the fabric surface, creating space to slide rulers underneath during quilting. Regular presser feet sit too low and would catch on the rulers.
Can I do ruler work on any sewing machine?
Most modern sewing machines can handle ruler work if they have drop-feed capability and accept a ruler foot attachment. Machines with larger throat space make the process easier but aren’t required.
How thick should my quilting rulers be?
Quarter-inch thick acrylic rulers work best for most machines. Thinner rulers can bend and create wavy lines, while thicker rulers might not fit under your ruler foot properly.
Why do my ruler work stitches look uneven?
Uneven stitches usually result from inconsistent speed between your machine’s needle movement and your hand movement. Practice coordinating a steady machine speed with smooth, consistent fabric movement.
Should I use special thread for ruler work quilting?
Quality cotton or polyester thread works fine for ruler work. Avoid bargain threads that break easily, as the stop-and-start nature of ruler work puts extra stress on thread fibers.