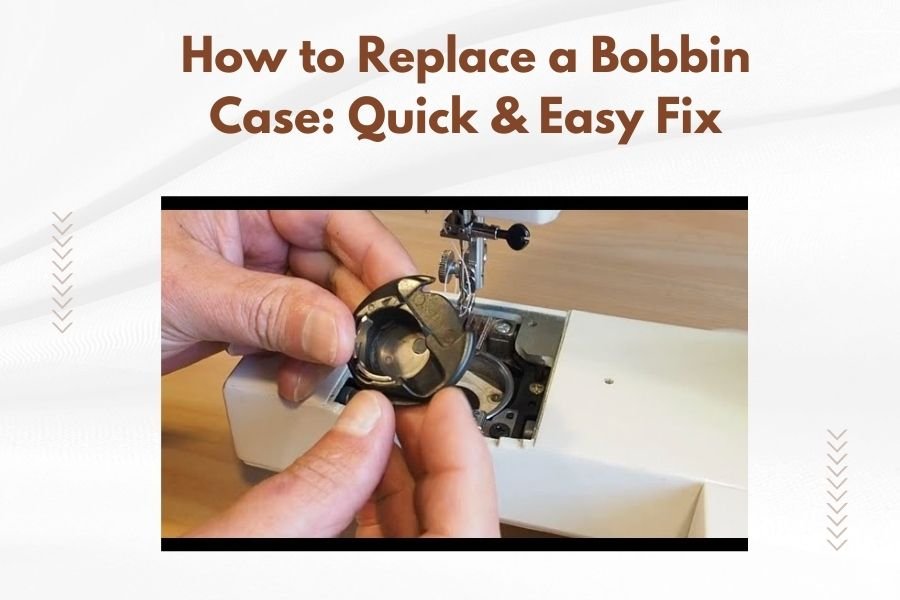
Replacing a bobbin case takes just 5-10 minutes and requires no special tools – simply remove the old case by lifting it out and snap the new one into place.
Most sewing machines use either a drop-in bobbin case or a front-loading case, and the replacement process is nearly identical for both types.
What You Need Before Starting
Getting organized makes this job much smoother. You’ll need your replacement bobbin case, a small brush or lint tool, and maybe a flashlight to see better inside your machine.
Make sure your sewing machine is turned off and unplugged. Safety first, right? You don’t want any surprise needle movements while your hands are near the bobbin area.
Check Your Machine Type First
Take a quick look at how your current bobbin sits. Does it drop down from the top? Or do you load it from the front behind a small door?
This tells you which replacement method you’ll use. Most modern machines use drop-in cases, but older or industrial machines often have front-loading ones.
Step-by-Step Bobbin Case Removal
Start by removing any thread and the bobbin itself. You want a clear workspace without anything getting tangled up.
For Drop-In Bobbin Cases
Look for a small latch or tab on one side of the bobbin case. This little piece is your key to getting it out.
Gently lift the latch while pulling the entire case straight up. It should come out easily – no forcing needed.
If It Feels Stuck
Sometimes lint builds up around the edges. Use your brush to clean around the case before trying again.
You can also try wiggling it very gently while lifting. Think of it like removing a jar lid that’s just a bit tight.
For Front-Loading Cases
These cases usually have a small metal tab sticking out. Grab this tab firmly but gently.
Pull the case straight toward you. Some machines require you to turn the case slightly while pulling – check your manual if it won’t budge.
Watch for Small Parts
Front-loading cases sometimes have tiny springs or washers. Keep track of these pieces so you can put everything back correctly.
Clean Before Installing the New Case
Now’s the perfect time for a quick cleanup. You’re already in there, so why not make everything fresh?
Remove Lint and Debris
Use your brush to sweep out any fuzz or thread bits. Pay attention to the corners where stuff likes to hide.
I found that compressed air works great here too, if you have a can handy. Just don’t blow debris deeper into the machine.
Check for Damage
Look at the area where the bobbin case sits. You want smooth surfaces without scratches or dents.
Small scratches are usually fine, but deep gouges might cause thread problems later. If you see damage, consider having a repair shop take a look.
Installing Your New Bobbin Case
This is basically the removal process in reverse, but there are a few tricks to make it go smoothly.
Line Everything Up First
Before pushing anything down, make sure the new case is facing the right direction. Most cases have a small notch or tab that needs to match up with your machine.
Take a second to compare the old and new cases. They should look identical and face the same way.
Drop-In Installation
Lower the case straight down into the machine. You should feel it settle into place with a soft click.
The latch should close easily. If you have to force it, something’s not lined up right.
Front-Loading Installation
Slide the case in until it stops. You might need to push it in while turning slightly.
Replace any small parts you removed earlier. Springs and washers go back exactly where you found them.
Test Your Installation
Don’t assume everything’s working just because it looks right. A quick test saves headaches later.
Load a Bobbin and Try It
Put in a bobbin with thread and see how it moves. It should turn smoothly without catching or binding.
Try pulling the thread out by hand. You want steady resistance, not jerky pulling or thread that won’t come out at all.
Run a Test Stitch
Thread your machine normally and sew a few stitches on scrap fabric. Watch for even stitches without loops or gaps.
If the stitches look wonky, recheck your bobbin case installation. Sometimes it takes a second try to get everything just right.
Common Problems and Quick Fixes
Even simple jobs can have hiccups. Here’s what to do when things don’t go as planned.
Case Won’t Go In
Stop pushing and take a closer look. You might have it upside down or turned the wrong way.
Try rotating the case 180 degrees. Many people get this backwards on the first attempt.
Still Stuck?
Check for lint or thread pieces blocking the way. Sometimes tiny bits of debris cause big problems.
Make sure you’re using the right replacement part. Cases look similar but have small differences between machine models.
Thread Problems After Installation
Uneven stitches usually mean tension issues. Double-check that your bobbin case is fully seated.
Try a different bobbin too. Sometimes the problem isn’t the case at all.
Bobbin Spins Too Freely
This happens when the case isn’t locked in properly. Remove and reinstall it, making sure everything clicks into place.
When to Replace vs Repair
Not every bobbin case problem needs a full replacement. Sometimes a simple fix does the job.
Signs You Need Replacement
Cracks in the case mean it’s time for a new one. Cracked plastic or metal won’t hold tension properly.
Severely worn tension springs also call for replacement. You can’t really fix these parts – they just need to be swapped out.
| Problem | Repair or Replace? | Why |
|---|---|---|
| Small scratches | Keep using | Won’t affect function |
| Loose tension spring | Try adjusting first | Might just need tightening |
| Cracks or chips | Replace | Will cause thread problems |
| Won’t stay in place | Replace | Worn locking mechanism |
Cost Considerations
New bobbin cases typically cost $15-40 depending on your machine model. That’s usually much cheaper than a repair shop visit.
Generic replacement cases work fine for most machines. You don’t always need the exact brand name part.
Maintaining Your New Bobbin Case
A little care goes a long way toward making your replacement last.
Regular Cleaning
Clean out lint every few projects, not just when problems start. This prevents buildup that causes wear.
A quick brush-out takes 30 seconds and saves you from bigger headaches later.
Oil Lightly If Needed
Some machines benefit from a tiny drop of sewing machine oil on the bobbin case. Check your manual first though – not all machines want this.
Handle With Care
Don’t drop or bang your bobbin case around. These parts are tougher than they look, but they’re not indestructible.
Store extra cases in a safe spot where they won’t get knocked around or collect dust.
Troubleshooting Weird Issues
Sometimes you’ll run into problems that don’t make immediate sense. Here’s help for the oddball situations.
Everything Looks Right But Stitches Are Wrong
Double-check your upper threading too. Bobbin case problems and upper thread issues can look very similar.
Try a fresh needle while you’re at it. Bent or dull needles cause stitch problems that seem like bobbin issues.
Timing Might Be Off
If your machine took a hard hit or jammed badly, the timing between needle and bobbin might be wrong. This needs professional help.
Case Keeps Falling Out
This usually means either the wrong replacement part or a worn machine. Check your model numbers carefully.
Sometimes the machine itself has worn spots where the case sits. A repair shop can tell you if this is fixable.
Conclusion
Replacing a bobbin case is one of those jobs that looks scary but turns out to be pretty straightforward. You just need to take your time, keep track of small parts, and not force anything that doesn’t want to move.
The whole process takes less time than threading your machine, and you’ll save money compared to a repair shop visit. Plus, you’ll know exactly how your machine works in this area, which helps with future maintenance.
Remember to clean while you’re in there, test your work before starting a big project, and don’t hesitate to try again if something doesn’t feel right the first time. Your sewing machine will thank you with smoother, more consistent stitches.
Can I use a generic bobbin case instead of the brand name part?
Yes, generic cases work well for most machines as long as you match the model number and style. They cost less and perform just as well as brand name parts in most situations.
How often should I replace my bobbin case?
Most bobbin cases last several years with regular use. Replace yours when you see cracks, excessive wear, or consistent thread tension problems that cleaning doesn’t fix.
What happens if I install the bobbin case upside down?
An upside-down case usually won’t let your machine stitch at all, or will create very loose, loopy stitches. Simply remove and reinstall it the correct way – no damage occurs from this mistake.
Why does my new bobbin case make different sounds than the old one?
New cases often sound slightly different because they fit more snugly and don’t have wear patterns yet. Give it a few hours of sewing time to break in – the sounds should normalize.
Should I keep my old bobbin case as a spare?
Only if it’s in decent condition without cracks or severe wear. A damaged spare case can cause problems if you forget its condition and use it during an important project.