A broken knee lifter socket can be repaired by removing the damaged socket, cleaning the mounting area, and installing a replacement socket using the correct screws and alignment.
Most knee lifter socket repairs take 30-45 minutes and require basic tools like screwdrivers, pliers, and sometimes a drill for new mounting holes.
What Is a Knee Lifter Socket and Why Does It Break?
Your knee lifter socket is the metal housing that connects your knee lifter lever to your sewing machine. It sits under your sewing table and holds the mechanism that raises your presser foot when you push it with your knee.
These sockets break for several reasons. The most common cause is wear from repeated use over many years. Metal fatigue weakens the socket walls until they crack or split.
Sometimes the mounting screws work loose from vibration. When this happens, the socket wobbles and eventually breaks away from its base. I’ve found that heavy quilting projects put extra stress on this part.
Signs Your Socket Needs Repair
You’ll know your socket is broken when the knee lifter feels loose or wobbly. The lever might not engage properly with the presser foot mechanism.
- Knee lifter moves but doesn’t raise the presser foot
- Socket visibly cracked or separated from mounting plate
- Metal pieces or screws fallen out
- Grinding or clicking sounds when using knee lifter
Tools and Parts You’ll Need
Before starting your repair, gather these basic tools. Most people already have these items in their toolbox.
Essential Tools
- Phillips head screwdriver
- Flathead screwdriver
- Needle-nose pliers
- Flashlight or work light
- Clean cloth or paper towels
Replacement Parts
You’ll need a new socket assembly that matches your machine model. Check your owner’s manual for the exact part number. Most sewing machine dealers can order these parts.
If you can’t find an exact match, universal knee lifter sockets work for many machines. Just make sure the mounting holes line up correctly.
Where to Find Parts
Sewing machine repair shops stock common replacement sockets. Online retailers also carry these parts. Expect to pay $15-35 for a quality replacement socket.
Step-by-Step Repair Process
Now let’s walk through the actual repair. Take your time and work carefully. Rushing leads to mistakes that cost more money to fix later.
Step 1: Disconnect Power and Access the Socket
Turn off your sewing machine and unplug it completely. Safety comes first when working with any mechanical equipment.
You’ll need to access the socket from underneath your sewing table. Some tables have removable panels that make this easier. Others require you to crawl under the table with a flashlight.
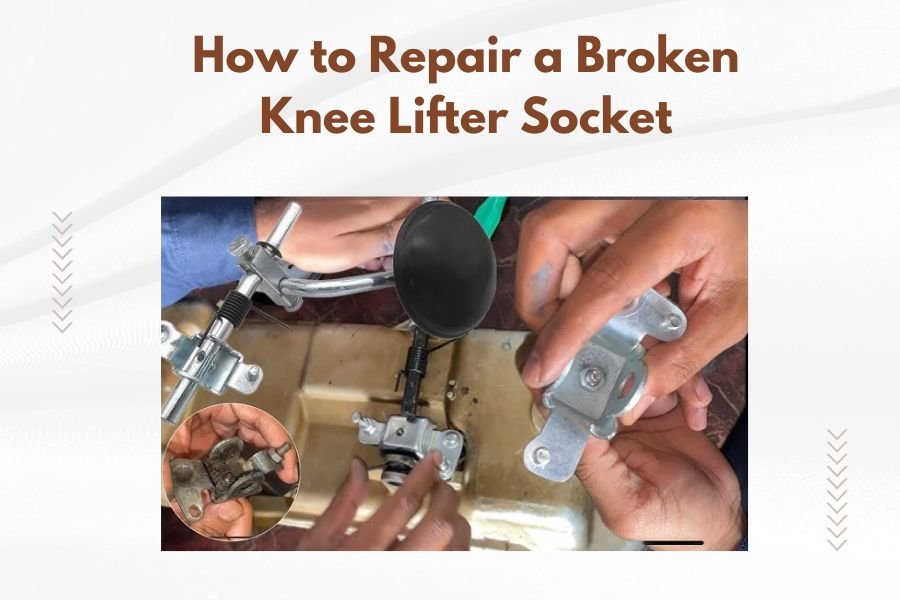
Step 2: Remove the Broken Socket
Look for the mounting screws that hold the socket to its bracket. These are usually Phillips head screws, but some older machines use flathead screws.
Remove these screws carefully and keep them in a small bowl. You might be able to reuse them if they’re in good condition.
Gently pull the broken socket away from the mounting area. Be careful not to drop any small pieces into the machine’s internal mechanisms.
Dealing with Stubborn Screws
Old screws sometimes refuse to budge. Apply a small amount of penetrating oil and wait 10 minutes. This usually loosens stuck threads without forcing anything.
Step 3: Clean the Mounting Area
Wipe down the mounting bracket with a clean cloth. Remove any old grease, lint, or metal shavings from the broken socket.
Check the mounting holes for damage. If they’re stripped or enlarged, you might need to drill new holes slightly offset from the original ones.
Step 4: Test Fit Your New Socket
Hold the replacement socket in position and check the alignment. The knee lifter lever should move smoothly without binding against other parts.
Make sure the mounting holes line up correctly. If they don’t match perfectly, you may need to file or drill new holes.
Installing the Replacement Socket
With everything cleaned and test-fitted, you’re ready to install your new socket. This part requires patience and attention to detail.
Proper Alignment Techniques
Position the socket so the knee lifter lever points toward your normal sewing position. Most people prefer the lever angled slightly to the right for comfortable knee access.
Hold the socket firmly in place while starting the first screw. Don’t fully tighten it yet – just make it snug enough to hold the socket steady.
Securing the Socket
Install the remaining screws, working in a cross pattern if there are multiple mounting points. This distributes the clamping force evenly.
Tighten all screws gradually and evenly. Over-tightening can crack the socket or strip the mounting holes.
Final Adjustment Tips
Test the knee lifter action before fully tightening everything. The lever should raise the presser foot smoothly without excessive force.
| Problem | Likely Cause | Quick Fix |
|---|---|---|
| Lever too stiff | Socket mounted too tight | Loosen screws slightly |
| Lever too loose | Worn connection points | Check for missing washers |
| Binding or grinding | Misaligned socket | Adjust socket position |
Testing Your Repair
Once everything is installed and tightened, it’s time to test your work. Plug your machine back in and turn it on.
Function Testing
Press the knee lifter gently and watch the presser foot. It should rise smoothly and return to its down position when you release pressure.
Try using the knee lifter while sewing a test seam. The action should feel natural and require minimal knee pressure.
Long-term Testing
Use your machine normally for several hours after the repair. This helps identify any issues that weren’t obvious during initial testing.
Listen for unusual sounds that might indicate loose parts or poor alignment. A properly repaired knee lifter operates almost silently.
Preventing Future Socket Problems
Regular maintenance keeps your knee lifter socket working smoothly for years. A little prevention saves expensive repairs later.
Regular Cleaning
Wipe down the knee lifter mechanism monthly to remove lint and dust. Use a dry cloth or slightly damp cloth – never spray cleaners directly on the mechanism.
Lubrication Schedule
Apply a tiny drop of sewing machine oil to the socket pivot points every six months. Too much oil attracts dirt, so use just enough to keep things moving smoothly.
Signs of Wear to Watch For
- Increased effort needed to operate knee lifter
- Slight play or looseness in the lever
- Any unusual sounds during operation
- Visible wear on metal contact points
When to Call a Professional
Some knee lifter problems need professional attention. Don’t feel bad about seeking help when repairs get complicated.
Complex Repairs
If your machine’s internal knee lifter mechanism is damaged, that’s usually beyond DIY repair skills. Professional technicians have specialized tools for internal work.
Electrical problems with computerized knee lifters also need expert diagnosis. These systems connect to the machine’s main control board.
Cost Considerations
Professional knee lifter repairs typically cost $50-120 depending on your location and machine type. Compare this to the cost of parts and your time before deciding.
Troubleshooting Common Issues
Even after a successful repair, you might encounter minor adjustments or problems. Here’s how to handle the most common ones.
Socket Feels Loose Again
This usually means the mounting screws have worked loose from machine vibration. Check and retighten them monthly during heavy use periods.
Knee Lifter Doesn’t Raise Presser Foot Fully
The socket might be mounted slightly out of position. Loosen the screws, adjust the angle, and retighten carefully.
Adjustment Techniques
Small changes make big differences in knee lifter performance. Move the socket just 1-2 millimeters at a time when making adjustments.
Alternative Solutions
If replacement sockets aren’t available for your machine model, you have other options. These alternatives might actually work better than the original design.
Universal Retrofit Kits
Several companies make universal knee lifter assemblies that work with most sewing machines. These often include improved socket designs that last longer than original parts.
Aftermarket Upgrades
Some replacement sockets include better materials or improved ergonomics. They cost more than basic replacements but offer better long-term value.
Conclusion
Repairing a broken knee lifter socket is straightforward work that most sewers can handle themselves. The key is working carefully and using the right replacement parts. Take your time during installation and test everything thoroughly before considering the job complete.
Remember that proper maintenance prevents most socket failures. Clean your knee lifter regularly and watch for early signs of wear. A well-maintained knee lifter socket can last for decades of heavy quilting use.
If you’re not comfortable with mechanical repairs, don’t hesitate to consult a professional. A properly functioning knee lifter makes quilting much more enjoyable and efficient.
How long does a knee lifter socket typically last?
Most knee lifter sockets last 10-15 years with regular use, or 5-8 years with heavy quilting work. Proper maintenance and gentle operation can extend this lifespan significantly.
Can I use my sewing machine while the knee lifter socket is broken?
Yes, you can still sew normally, but you’ll lose the convenience of hands-free presser foot lifting. Just make sure no broken pieces can fall into the machine’s mechanisms.
Are universal knee lifter sockets as good as original equipment parts?
Many universal sockets are actually better than original parts because they incorporate design improvements. Just ensure the mounting dimensions match your specific machine model.
What causes knee lifter sockets to break more frequently on some machines?
Heavy-duty quilting puts more stress on the socket than regular sewing. Machines used for thick batting or multiple fabric layers tend to wear out sockets faster due to increased operating forces.
Should I upgrade to a different style knee lifter when replacing my socket?
Stick with your original style unless you’re having ongoing problems. Different knee lifter designs require different mounting arrangements and may not be compatible with your machine’s framework.