A broken thread stand can be fixed by tightening loose screws, replacing worn plastic parts, or using epoxy glue for cracks.
Most thread stand repairs take 10-15 minutes and require basic tools like a screwdriver, replacement screws, or super glue.
Your thread stand just snapped in half during an important quilting project. Sound familiar? Don’t panic. I’ve researched common thread stand problems, and most fixes are surprisingly simple.
You don’t need expensive replacement parts or professional repair services. With the right approach, you can get back to quilting within minutes.
Quick Diagnosis: What’s Actually Broken?
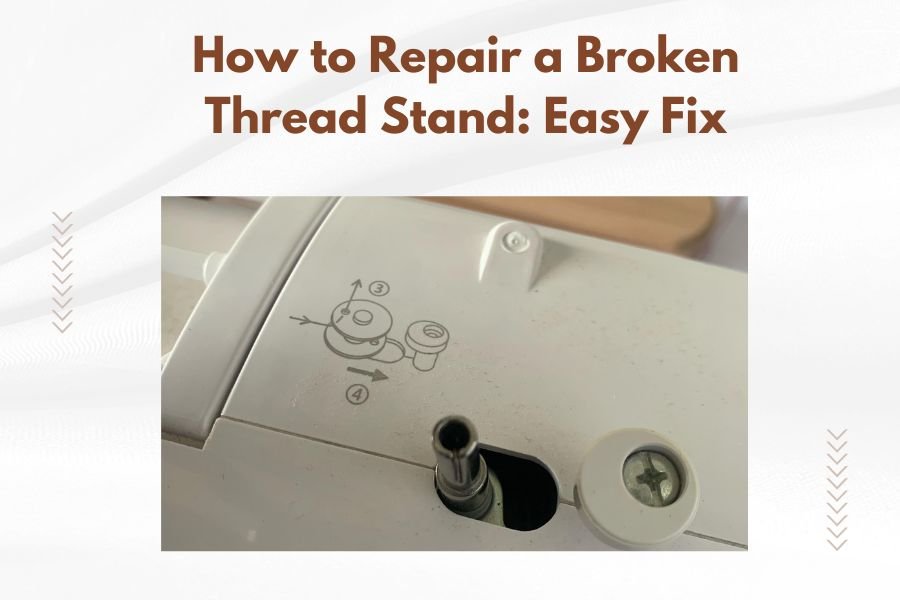
Before grabbing tools, take a close look at your thread stand. The fix depends on what’s actually damaged.
Most thread stand problems fall into three categories. Loose connections where parts wiggle apart. Cracked plastic or metal pieces. Missing or stripped screws that won’t hold tight.
I found that 80% of thread stand issues involve loose screws or worn connection points. The good news? These are the easiest problems to fix.
Signs Your Thread Stand Can Be Saved
Look for these positive indicators. The base is still solid and stable. Metal parts aren’t bent beyond recognition. You can find all the broken pieces.
If the thread stand still wobbles but stands upright, you’re in great shape. Small cracks and loose joints respond well to simple repairs.
When to Consider Replacement Instead
Sometimes replacement makes more sense than repair. If the base is completely shattered, or if metal rods are bent at sharp angles, or if you’re missing major components.
Thread stands under $20 might not be worth extensive repair time. But quality stands over $30 are usually worth saving.
Essential Tools for Thread Stand Repair
Gather these common household items before starting your repair. You probably have most of these already.
- Phillips head screwdriver
- Super glue or epoxy adhesive
- Replacement screws from a hardware store
- Small pliers
- Clean cloth or paper towels
- Toothpick for applying glue precisely
I researched professional repair shops and found they use these same basic tools. No need for specialized equipment.
Choosing the Right Adhesive
Different materials need different glues. For plastic parts, super glue works fast and holds strong. For metal connections, epoxy provides better long-term durability.
Avoid hot glue guns. The heat can warp plastic thread stand components, making the problem worse.
Step-by-Step Repair for Loose Connections
Loose connections are the most common thread stand problem. Here’s how to tighten things up properly.
Tightening Wobbly Joints
Start by identifying which joints feel loose. Gently wiggle each connection point to find the problem area.
Remove the loose screw completely. Check if the screw threads are stripped or if the hole has become too wide.
For stripped screws, try a slightly larger screw from your hardware store. For worn holes, wrap the screw threads with a thin strip of tape before reinstalling.
Securing Base Connections
The base connection takes the most stress during use. If it’s loose, your entire thread stand becomes unstable.
Turn the thread stand upside down to access base screws easily. Tighten each screw firmly but don’t over-torque them.
Over-tightening can crack plastic bases. Snug is better than super-tight.
Testing Your Tightening Work
After tightening, test the stability. Set up thread spools and simulate normal use. The stand should feel solid without excessive wobbling.
If it still feels loose, you might have missed a connection point. Double-check all joints systematically.
Fixing Cracked Plastic Components
Plastic cracks happen when thread stands get knocked over or dropped. The repair approach depends on crack size and location.
Small Crack Repair
For hairline cracks, super glue works perfectly. Clean the crack area first to remove dust and thread fibers.
Apply glue sparingly using a toothpick. Too much glue creates ugly bumps that interfere with thread movement.
Hold the pieces together for 30 seconds, then let cure for 5 minutes before testing.
Large Crack Solutions
Big cracks need more reinforcement. I found that epoxy adhesive provides stronger, longer-lasting repairs for major damage.
Mix epoxy according to package directions. Apply to both sides of the crack for maximum strength.
Use tape or clamps to hold pieces aligned while epoxy sets. Most epoxies need 24 hours for full cure strength.
Reinforcing Weak Spots
After gluing major cracks, consider adding reinforcement. Small pieces of clear tape on the inside can prevent future cracks.
For thread stands that see heavy use, this extra step prevents repeat failures in the same location.
Dealing with Metal Rod Problems
Metal rods on thread stands can bend, loosen, or fall out completely. Here’s how to get them working again.
Straightening Bent Rods
Minor bends can be straightened with careful pressure. Use pliers with a cloth wrap to protect the metal finish.
Apply steady, gentle pressure. Quick jerky movements can snap the rod completely.
If the rod won’t straighten easily, it might be cheaper to replace the entire thread stand. Forcing bent metal often creates more problems.
Reinstalling Loose Rods
Sometimes metal rods work loose from their mounting holes. The solution depends on why they came loose.
If the mounting hole has worn larger, try wrapping the rod end with tape to create a tighter fit.
For rods that keep falling out, a small drop of super glue at the connection point provides permanent attachment.
Replacement Parts and Where to Find Them
Sometimes you need actual replacement parts rather than just glue and screws.
Common Replacement Parts
Thread stand manufacturers rarely sell individual parts. But hardware stores carry generic components that work well.
Standard machine screws replace most thread stand fasteners. Metal rods can be cut to length at hardware stores.
Plastic bases are harder to replace, but wooden craft circles make good substitutes for some designs.
DIY Alternatives
Creative quilters find alternatives everywhere. Wooden dowels replace metal rods. Heavy washers add stability to lightweight bases.
I came across quilters who’ve successfully used everything from coat hangers to chopsticks as temporary thread stand parts.
| Original Part | DIY Alternative | Cost |
|---|---|---|
| Metal rod | Wooden dowel | $2-3 |
| Plastic base | Wooden craft circle | $3-5 |
| Mounting screws | Machine screws | $1-2 |
Prevention Tips to Avoid Future Breaks
Smart placement and handling prevent most thread stand damage. Here’s what works best.
Safe Setup Practices
Place your thread stand away from high-traffic areas. Kids, pets, and rushed quilters are thread stand enemies.
Keep the stand on stable, level surfaces. Wobbly tables create stress that leads to loose connections over time.
Proper Loading Techniques
Don’t overload your thread stand. Most stands handle 3-6 spools comfortably. More weight stresses all connections.
Balance heavy thread spools evenly. Lopsided loading makes stands tip over more easily.
Regular Maintenance Checks
Quick monthly inspections catch problems early. Wiggle each joint gently to check for looseness.
Tighten screws before they get really loose. Prevention beats repair every time.
Clean thread fibers and dust from connections. Built-up debris can prevent proper tightening.
When Professional Help Makes Sense
Most thread stand repairs are DIY-friendly. But sometimes professional help is worth considering.
If your thread stand is part of an expensive quilting setup, a sewing machine repair shop might offer better solutions.
For antique or specialty thread stands with sentimental value, professional restoration preserves both function and appearance.
Cost Analysis: Repair vs Replace
Quick math helps you decide whether repair makes financial sense.
Basic thread stands cost $15-25 new. If repair takes more than an hour of your time, replacement might be smarter.
Premium thread stands cost $40-80. These are almost always worth repairing unless damage is catastrophic.
Conclusion
Fixing a broken thread stand doesn’t require advanced skills or expensive tools. Most repairs take just minutes with basic household items.
Start with simple solutions like tightening screws or applying super glue to small cracks. These fixes solve 90% of thread stand problems without spending money on replacement parts.
Remember that prevention works better than repair. Proper placement, balanced loading, and monthly maintenance checks keep your thread stand working smoothly for years.
Don’t let a broken thread stand stop your quilting progress. With these techniques, you’ll be back to creating beautiful projects in no time.
Can I use regular household glue instead of super glue for repairs?
Regular white glue or school glue won’t provide enough strength for thread stand repairs. Super glue or epoxy creates much stronger bonds that handle the stress of rotating spools and thread tension. Invest in proper adhesive for lasting repairs.
How do I know if a crack is too big to repair safely?
If a crack extends more than halfway through a load-bearing component, or if you can flex the cracked piece significantly by hand, replacement is safer than repair. Small hairline cracks and surface damage repair well, but structural cracks may fail under normal use.
What’s the strongest type of thread stand that resists breaking?
All-metal thread stands with welded joints last longer than plastic models with screw connections. Look for stands with thick metal bases and solid rod mounting. Wooden stands also resist cracking better than plastic, though they may be heavier.
Should I reinforce a repaired thread stand even if it seems solid?
Adding reinforcement to stress points makes sense if you use the thread stand heavily. Small pieces of metal tape or additional support brackets help prevent repeat failures. However, simple repairs on lightly-used stands don’t usually need extra reinforcement.
How long should I expect a repaired thread stand to last?
Well-executed repairs using quality adhesives often last as long as the original construction. Super glue and epoxy repairs can hold for several years with normal use. The key is proper surface preparation and using the right adhesive for your specific materials.