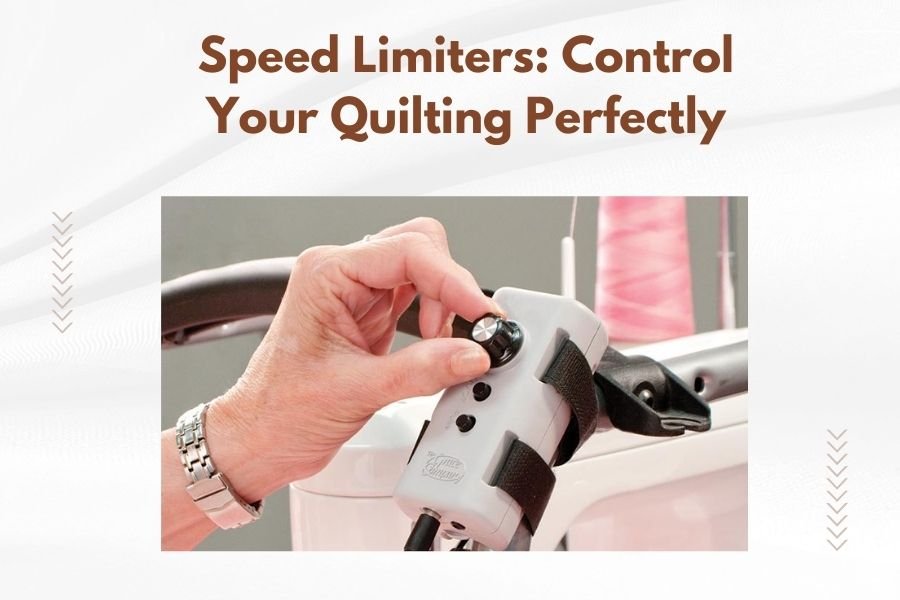
Speed limiters on quilting machines let you control the maximum stitching speed, preventing accidents and giving you better precision on detailed work.
Most quilting machines have built-in speed limiters that you can adjust with a dial, slider, or electronic controls to match your skill level and project needs.
Why Speed Control Matters in Quilting
Have you ever watched a new quilter try to tackle their first project at full speed? It rarely ends well. Speed limiters act like training wheels for your quilting machine.
When you’re working on detailed patterns or delicate fabrics, going too fast creates problems. Your stitches become uneven. The fabric bunches up. Thread breaks happen more often.
I found that quilting experts recommend starting slow and building speed over time. This approach helps you develop muscle memory and better control.
What Happens When You Quilt Too Fast
Fast stitching might seem efficient, but it often backfires. Your machine works harder than it should. The motor heats up. Parts wear out faster.
You also lose accuracy. Sharp turns and curves need steady, controlled movement. Racing through these sections leads to wobbly lines and puckered seams.
Benefits of Proper Speed Control
Speed limiters help you stay in the sweet spot. You get consistent stitch quality. Your hands stay relaxed instead of fighting the machine.
Many quilters tell me they finish projects faster when they slow down. Fewer mistakes mean less time ripping out stitches and starting over.
Types of Speed Limiters on Quilting Machines
Different machines use different speed control systems. Understanding your options helps you pick the right machine or use your current one better.
Mechanical Speed Limiters
These are the simple, reliable option. You turn a dial or move a slider to set your maximum speed. The machine won’t go faster than that setting, no matter how hard you press the foot pedal.
Basic quilting machines often use this system. It’s easy to understand and rarely breaks down.
Dial Controls
Turn the dial clockwise to increase speed, counterclockwise to decrease. Numbers or marks on the dial show your setting. Some machines have 1-10 scales, others use percentages.
Slider Controls
Move the slider left or right to adjust speed. These controls usually sit on the front or side of your machine for easy access while quilting.
Electronic Speed Limiters
Higher-end machines use digital controls. You press buttons or touch a screen to set your speed limit. These systems often remember your settings for different stitch types.
Electronic controls give you more precision. You can set exact speeds down to individual stitches per minute.
LCD Display Controls
A small screen shows your current speed setting. Buttons let you increase or decrease the limit. Some displays show both your current speed and maximum setting.
Touchscreen Controls
Modern quilting machines sometimes include full touchscreens. You tap icons or drag sliders on the screen to adjust speed limits.
How to Set Your Speed Limiter
Setting the right speed takes some experimentation. Your skill level, project type, and fabric choice all matter.
For Beginners
Start with your speed limiter set to 25-30% of maximum speed. This gives you time to think and react as you guide the fabric.
Practice basic straight lines first. Once those feel comfortable, try gentle curves and corners.
For Intermediate Quilters
You can probably handle 40-60% of maximum speed on most projects. Adjust down for tricky sections, up for long straight seams.
Pay attention to how your fabric moves. If it’s hard to guide smoothly, slow down a bit.
For Advanced Quilters
You might use the full speed range depending on your project. Set high limits for piecing large blocks, lower limits for detailed free-motion quilting.
Speed Settings for Different Quilting Tasks
Each type of quilting works best at different speeds. Here’s what I found works well for most quilters:
| Quilting Task | Recommended Speed Range | Why This Speed Works |
|---|---|---|
| Piecing blocks | Medium to fast (60-80%) | Straight seams don’t need much precision |
| Curved piecing | Slow to medium (30-50%) | Curves need careful fabric guidance |
| Free-motion quilting | Medium (40-60%) | Balance between smooth lines and control |
| Binding attachment | Slow to medium (30-50%) | Even stitching prevents puckering |
| Applique work | Slow (20-40%) | Detailed work needs maximum precision |
Free-Motion Quilting Speed Tips
Free-motion work requires coordination between your hands and foot pedal. Your hand speed should match your stitching speed.
Move your hands too fast with slow stitching, and you get long stitches. Move too slow with fast stitching, and stitches pile up in one spot.
Straight-Line Quilting Speeds
Long straight lines can handle faster speeds. Your walking foot helps feed the fabric evenly, so you don’t need as much manual control.
Still, don’t max out the speed right away. Build up gradually as you get comfortable with the rhythm.
Adjusting Speed for Different Fabrics
Fabric type affects how fast you should quilt. Some materials need gentle handling, others can take more speed.
Delicate Fabrics
Silk, thin cotton, and vintage fabrics need slow, careful stitching. High speeds can cause tears or distortion.
Set your speed limiter to 30% or less when working with these materials. Take your time and let the machine do the work.
Heavy Fabrics
Denim, canvas, and thick batting require more power from your machine. Moderate speeds often work better than trying to rush.
Your machine motor needs time to punch through multiple layers. Going too fast can cause skipped stitches or broken needles.
Stretchy Fabrics
Jersey, knits, and stretchy materials move around more as you sew. Slower speeds give you better control over fabric placement.
Fast stitching can stretch these fabrics out of shape, creating wavy seams.
Common Speed Limiter Problems and Solutions
Speed limiters sometimes act up or get confusing. Here are problems I hear about most often:
Speed Limiter Not Working
If your speed limiter seems broken, check the obvious things first. Make sure it’s actually turned on. Some machines have an override button that bypasses speed limits.
Clean around the control mechanism. Dust and lint can interfere with mechanical limiters.
Inconsistent Speed Control
Electronic limiters sometimes glitch. Try turning your machine off and on again. This resets the computer systems.
If problems continue, your machine might need professional service.
Speed Jumps Around
Worn foot pedals can cause erratic speed control. The internal components wear out over time, sending mixed signals to the machine.
You can often replace just the foot pedal without buying a whole new machine.
Maintaining Your Speed Control System
Regular maintenance keeps your speed limiter working smoothly. Most care is simple and takes just a few minutes.
Cleaning Mechanical Controls
Wipe dial and slider controls with a soft cloth. Don’t use harsh cleaners that might damage the markings.
If controls feel sticky, a tiny amount of sewing machine oil on the moving parts can help.
Electronic Control Care
Keep screens clean with appropriate cleaners. Don’t press too hard on buttons or touchscreens.
Update your machine’s software when manufacturers release new versions. These updates often fix speed control bugs.
Upgrading Your Speed Control Options
Older machines sometimes have limited speed control. A few upgrades might help without buying a new machine.
Aftermarket Foot Pedals
Some companies make replacement foot pedals with better speed control. These pedals give you finer control over stitching speed.
Make sure any replacement pedal works with your specific machine model.
Knee Lifters for Speed Control
Knee lifters don’t control speed directly, but they help you maintain steady speeds. You can keep both hands on your fabric while lifting the presser foot with your knee.
Teaching Others to Use Speed Limiters
If you teach quilting or help friends get started, speed limiters are one of your best tools.
Setting Up Student Machines
Start new quilters at very slow speeds. They need time to develop coordination between their hands and feet.
Increase speed limits gradually as students improve. This builds confidence without overwhelming them.
Explaining Speed Control Benefits
Some beginners want to quilt fast right away. Explain that speed comes with practice, not machine settings.
Show them examples of stitching done at appropriate speeds versus work rushed at high speeds. The difference is usually obvious.
Advanced Speed Control Techniques
Once you master basic speed limiting, a few advanced techniques can improve your quilting even more.
Variable Speed Within Projects
Change your speed limiter settings as you work through different sections of the same quilt. Use higher speeds for long seams, lower speeds for detailed areas.
This approach saves time while maintaining quality where it matters most.
Speed Matching for Consistent Results
When quilting matching blocks or repeating patterns, use the same speed limit setting for each section. This helps create consistent stitch quality across the whole quilt.
Conclusion
Speed limiters give you the control you need to quilt beautifully and safely. Whether you’re just starting out or working on detailed projects, the right speed setting makes everything easier.
Start slow and build your speed gradually. Pay attention to how different fabrics and techniques respond to various speeds. Your quilting will improve as you learn to match your machine’s speed to each task.
Remember that consistent, controlled stitching beats fast, sloppy work every time. Your speed limiter is there to help you succeed, not hold you back.
Why won’t my quilting machine slow down even with the speed limiter set low?
Check if your machine has a speed limiter override button that might be engaged. Also examine your foot pedal for wear – old pedals can send incorrect signals to the machine. Try cleaning around the speed control mechanism and restart your machine to reset electronic systems.
What’s the best speed setting for quilting with thick batting?
Set your speed limiter to 40-50% of maximum when working with thick batting. The machine needs extra power to penetrate multiple layers, and slower speeds prevent needle breakage and skipped stitches. Let the machine work steadily rather than forcing it to rush.
Can I add a speed limiter to an older quilting machine that doesn’t have one?
You can’t add a built-in speed limiter, but you can replace your foot pedal with an aftermarket model that offers better speed control. Some specialized foot pedals provide more precise speed regulation than older standard pedals.
How do I know if my speed limiter is set correctly for free-motion quilting?
Your hand movement and stitching speed should feel coordinated, with even stitch lengths throughout your quilting design. If stitches are too long, either slow your hands or increase the speed limit slightly. If stitches pile up, move your hands faster or decrease the speed limit.
Should I use different speed settings for different thread types?
Yes, delicate threads like silk or metallics work better at slower speeds to prevent breaking and shredding. Heavy threads like topstitching thread can handle moderate speeds but may need slower settings through multiple fabric layers. Cotton thread is the most forgiving and works well at various speeds.