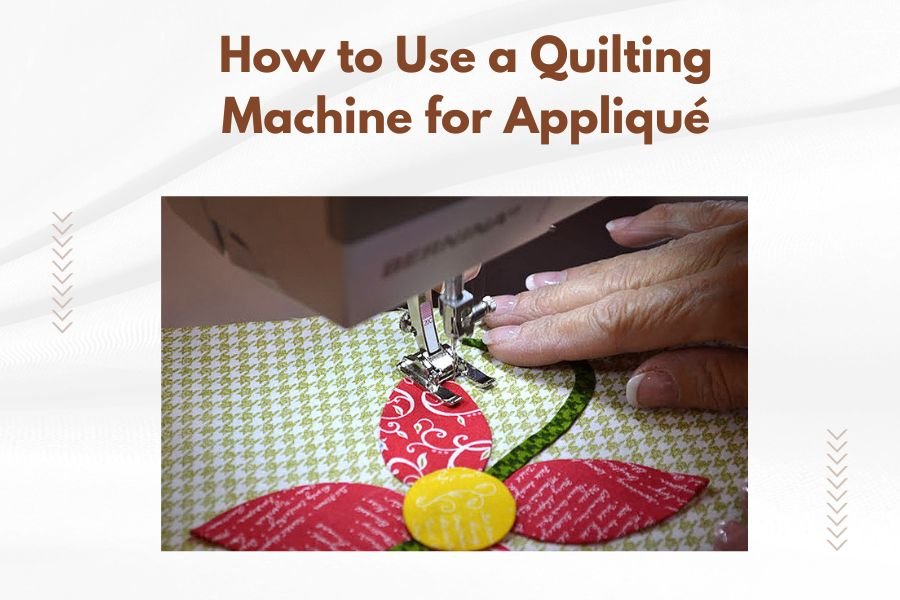
Using a quilting machine for appliqué involves securing fabric pieces onto a base fabric using decorative stitches, with the machine providing precise control and professional-looking results.
You’ll need to prepare your appliqué pieces, choose the right thread and needle, then use your quilting machine’s decorative or zigzag stitches to attach the pieces permanently.
What Makes Quilting Machines Perfect for Appliqué
Quilting machines offer superior control compared to regular sewing machines. The extended throat space gives you room to maneuver larger projects. You get consistent stitch quality across your entire design.
Most quilting machines come with built-in appliqué stitches. These include blanket stitch, satin stitch, and decorative edge stitches. From what I found, these specialized stitches make appliqué work much faster and more professional-looking.
Essential Supplies You’ll Need
Fabric and Interfacing
Choose cotton fabrics for beginners. They’re forgiving and easy to handle. Your appliqué fabric should contrast nicely with your background fabric.
Fusible web is your best friend here. It temporarily holds pieces in place while you stitch. I found that lightweight fusible web works better than heavy-duty versions for most projects.
Thread Selection
Cotton thread works well for most appliqué projects. Polyester thread offers more durability if you’re making items that need frequent washing.
Match your thread color to either the appliqué piece or create contrast for a bold look. Invisible thread works great when you want the fabric to be the star.
Needles and Tools
Use a sharp needle for precise stitching through multiple fabric layers. Size 80/12 needles work well for most cotton appliqué projects.
You’ll also need sharp fabric scissors, pins or clips, and a seam ripper for fixing mistakes. Trust me, everyone needs a seam ripper.
Preparing Your Appliqué Pieces
Creating Templates
Start with simple shapes like circles, hearts, or stars. Draw your design on paper first. This becomes your template.
Trace around your template onto the fusible web. Remember to flip asymmetrical designs so they appear correctly on your finished project.
Cutting and Fusing
Cut your fusible web pieces roughly, leaving extra space around the edges. Iron them onto the wrong side of your appliqué fabric following the manufacturer’s directions.
Now cut along your traced lines precisely. Remove the paper backing when you’re ready to position the pieces on your background fabric.
Setting Up Your Quilting Machine
Machine Threading
Thread your machine with your chosen appliqué thread. Use matching or contrasting bobbin thread depending on your design goals.
Check your thread tension. Many experts recommend slightly loosening the top tension for appliqué work. This prevents puckering and creates smoother stitches.
Stitch Selection
Start with a basic zigzag stitch if you’re new to machine appliqué. Set the width to about 2-3mm and length to 0.5mm for a satin stitch effect.
Blanket stitch gives a hand-sewn look that many quilters love. Decorative stitches add personality but practice on scraps first.
Tension and Speed Settings
Slower stitching speeds give you better control. You can always speed up as you get comfortable.
Adjust your presser foot pressure if your machine allows it. Lighter pressure works better for appliqué since you’re stitching through multiple layers.
Step-by-Step Appliqué Process
Positioning Your Design
Arrange your appliqué pieces on the background fabric. Step back and look at the overall balance. Does it feel right to your eye?
When you’re happy with the placement, fuse the pieces in place with your iron. Follow the fusible web instructions for time and temperature.
Starting to Stitch
Begin stitching at an inconspicuous spot, like the bottom of a shape. Lower your needle into the fabric before putting the presser foot down.
Stitch slowly around the edges of your appliqué pieces. Keep the bulk of the fabric to your left to avoid wrestling with it.
Navigating Corners
For sharp corners, stop with your needle down in the fabric. Lift the presser foot, pivot your fabric, then continue stitching.
Inside corners need extra care. Stitch to the corner, stop with the needle on the outside swing of your zigzag, then pivot.
Handling Curves
Curves require frequent small adjustments. Stop often with your needle down to reposition your fabric slightly.
The goal is smooth, even stitches that follow your appliqué edge consistently. Take your time here.
Advanced Appliqué Techniques
Layered Appliqué
Some designs require multiple fabric layers. Attach the bottom layer first, then add subsequent layers on top.
This creates depth and visual interest in your finished piece. Think of flower petals or overlapping leaves.
Raw Edge Appliqué
Skip the fusible web for a more casual look. Pin your fabric pieces in place and stitch around the edges.
The edges will fray slightly after washing, creating a soft, homespun appearance that many quilters prefer.
Reverse Appliqué Method
Place your appliqué fabric behind your background fabric. Cut away the top fabric to reveal the design underneath.
Stitch around the cut edges to secure everything. This technique works beautifully for silhouette designs.
Troubleshooting Common Issues
Thread Breaks and Tension Problems
Frequent thread breaks usually mean your tension is too tight or your needle is dull. Try loosening the tension slightly first.
If stitches look loose or uneven, your bobbin tension might need adjustment. Many quilting machine manuals include tension troubleshooting guides.
Fabric Puckering
Puckering happens when fabric layers don’t feed evenly through the machine. Reduce your presser foot pressure if possible.
Using a stabilizer underneath your background fabric often solves puckering problems. Tear-away stabilizer works well for most projects.
Uneven Stitch Coverage
Inconsistent stitching speed causes uneven coverage. Practice maintaining steady speed on practice pieces first.
Your stitch width and length settings also affect coverage. Wider stitches need shorter stitch length for complete coverage.
Finishing Your Appliqué Project
Trimming and Cleaning Up
Trim any loose threads close to the fabric surface. Check both front and back of your work.
Remove any visible stabilizer according to the manufacturer’s instructions. Some tear away easily, others dissolve in water.
Pressing Your Finished Work
Press your completed appliqué from the wrong side to avoid flattening your stitches. Use a pressing cloth if needed.
Steam can help relax any minor puckers that might remain in your finished piece.
Practice Projects for Beginners
Simple Pot Holders
Start with basic shapes like hearts or stars on pot holder backgrounds. You’ll practice your technique and create something useful.
Pot holders are forgiving projects. Small imperfections won’t show much in everyday use.
Wall Hanging Designs
Create a small wall hanging with seasonal motifs. Flowers for spring, leaves for fall, snowflakes for winter.
These projects let you experiment with different stitches and color combinations without committing to a large quilt.
Maintenance Tips for Best Results
Keep your quilting machine clean and well-oiled. Appliqué work creates more lint than regular piecing.
Change needles frequently. Dull needles cause thread breaks and poor stitch quality. I found that changing needles every few hours of stitching prevents most problems.
Store your fusible web in a cool, dry place. Heat and humidity can affect how well it bonds to fabric.
Conclusion
Using your quilting machine for appliqué opens up endless creative possibilities. Start with simple shapes and basic stitches to build confidence. Practice on scraps before working on your main project.
Remember that every expert was once a beginner. Your first attempts might not be perfect, and that’s completely normal. Each project teaches you something new about managing fabric, controlling stitches, and creating beautiful designs.
The key is consistent practice and patience with yourself. Soon you’ll be creating stunning appliqué projects that showcase your personal style and creativity.
Can I use regular sewing machine thread for appliqué on my quilting machine?
Yes, regular cotton or polyester sewing thread works perfectly for appliqué. Choose high-quality thread to prevent breaks and ensure smooth stitching. Match the thread weight to your fabric – 40-weight thread works well for most cotton appliqué projects.
What’s the difference between fusible and non-fusible appliqué methods?
Fusible appliqué uses iron-on web to temporarily hold pieces in place before stitching, making positioning easier and preventing shifting. Non-fusible methods rely on pins or basting and create softer, more flexible finished pieces. Both approaches work well on quilting machines.
How do I prevent my background fabric from bunching while machine appliqué stitching?
Use tear-away stabilizer underneath your background fabric and reduce presser foot pressure if your machine allows it. Keep fabric taut but not stretched while stitching, and maintain consistent speed. A walking foot can also help feed layers evenly.
What needle size works best for appliqué on quilting machines?
Size 80/12 universal needles work well for most cotton appliqué projects. Use size 90/14 for heavier fabrics or when stitching through multiple layers. Sharp or microtex needles give the cleanest stitch lines through multiple fabric layers.
Can I do appliqué without using fusible web backing?
Absolutely. Pin or baste your appliqué pieces in place instead of fusing them. This method allows more flexibility in your finished piece and works especially well for raw-edge appliqué techniques. Just be extra careful to keep pieces aligned while stitching.