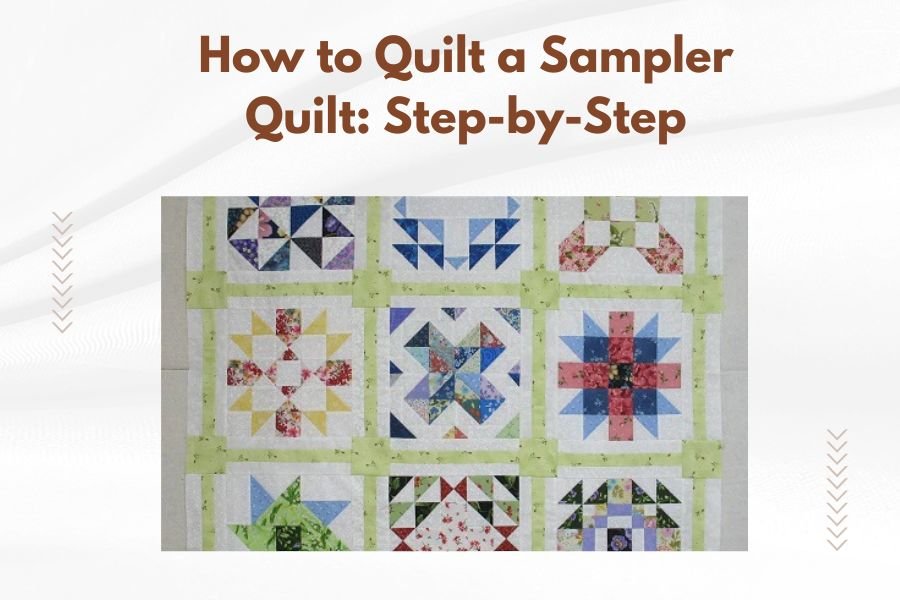
A sampler quilt combines different quilt blocks into one beautiful project, letting you practice various techniques while creating a cohesive design.
To quilt a sampler quilt step-by-step, start by selecting 6-12 different block patterns, cut all fabrics at once, piece each block separately, then arrange and sew them together before adding borders and quilting.
What Makes a Sampler Quilt Special
Think of a sampler quilt as your quilting playground. You get to try different block patterns without committing to an entire quilt of the same design.
Each block teaches you something new. One might focus on precise piecing. Another could introduce you to curves or appliqué work.
The best part? You end up with a stunning quilt that tells the story of your quilting journey.
Planning Your Sampler Quilt Design
Choose Your Block Size
Most sampler quilts work best with 12-inch finished blocks. This size gives you enough space to showcase detailed patterns without making the quilt too large.
Some quilters prefer 10-inch or 6-inch blocks. Smaller blocks mean more variety, but they can look busy. Bigger blocks make each pattern shine.
Select Your Block Patterns
Pick 6 to 12 different block patterns. Mix simple and complex designs so you don’t get overwhelmed.
Here are some great beginner-friendly options:
- Nine Patch – perfect for learning basic piecing
- Flying Geese – teaches triangle techniques
- Log Cabin – builds confidence with strips
- Pinwheel – introduces half-square triangles
- Dresden Plate – adds curved piecing practice
- Ohio Star – combines multiple techniques
Plan Your Color Scheme
Choose 3 to 5 colors that work well together. This keeps your blocks looking related even though they’re different patterns.
Many quilters use one main color, one accent color, and a neutral background. This simple approach almost always works.
Gathering Your Materials
Fabric Requirements
For a 9-block sampler quilt, you’ll typically need:
- 2 yards of background fabric
- 1 yard each of your main colors
- ½ yard each of accent colors
- Extra fabric for borders and binding
Always buy a little extra. Running out of fabric halfway through can be heartbreaking.
Essential Tools
You don’t need fancy equipment, but these tools make the job easier:
- Rotary cutter and mat
- Clear quilting rulers (6×24 inch and square rulers)
- Sharp fabric scissors
- Seam ripper (trust me, you’ll use it)
- Pins or clips
- Iron and ironing board
Cutting All Your Fabrics
Prepare Your Cutting Space
Set up a large, flat surface for cutting. Kitchen tables work great if you don’t have a cutting table.
Good lighting makes a huge difference. You want to see exactly where you’re cutting.
Cut All Pieces at Once
This might seem like a lot of work upfront, but it saves time later. You won’t have to stop and cut pieces while you’re in the flow of sewing.
Label your cut pieces with sticky notes or small bags. Write the block name and piece size on each label.
Cutting Accuracy Tips
Measure twice, cut once. This old saying saves fabric and frustration.
Keep your rotary blade sharp. Dull blades create ragged edges that don’t piece well together.
Press your fabric before cutting. Wrinkles throw off your measurements.
Piecing Your Blocks
Start with Simple Blocks
Begin with your easiest block pattern. This builds confidence and helps you get into a good rhythm.
The Nine Patch or Rail Fence blocks are perfect starting points. They’re forgiving and quick to complete.
Focus on Accurate Seam Allowances
Quilting uses ¼-inch seam allowances. This might feel tiny if you’re used to garment sewing, but it’s the standard.
Test your seam allowance first. Cut three 2½-inch squares, sew two together, then add the third. The strip should measure exactly 6½ inches.
Pressing Techniques
Press seams toward the darker fabric when possible. This prevents show-through on light backgrounds.
Use an up-and-down motion with your iron, not back-and-forth dragging. Dragging can stretch your pieces out of shape.
Work on One Block at a Time
Finish each block completely before starting the next one. This prevents mixing up pieces from different patterns.
Take breaks between blocks. Fresh eyes catch mistakes better than tired ones.
Assembling Your Quilt Top
Arrange Your Blocks
Lay all your finished blocks on a bed or design wall. Move them around until you like the arrangement.
Take a photo with your phone. This helps you remember the layout when you’re sewing.
Balance Color and Pattern
Spread your colors evenly across the quilt. You don’t want all the blue blocks clustered in one corner.
Mix busy patterns with simpler ones. This gives your eye places to rest.
Add Sashing (Optional)
Sashing strips separate your blocks and make them stand out individually. They also help if your blocks ended up slightly different sizes.
Cut sashing strips 2½ to 3½ inches wide. The exact width depends on your block size and personal preference.
Sew Blocks Together
Join blocks in rows first, then sew the rows together. This method is easier than trying to piece randomly.
Pin at every seam intersection. Matching seams makes your quilt look professional.
Adding Borders
Measure for Border Length
Measure through the center of your quilt top, not the edges. Edges can stretch and give you wrong measurements.
Cut your borders to match the center measurement, not the stretched edges.
Attach Borders
Add side borders first, then top and bottom borders. This creates clean, square corners.
Pin borders every 4 to 6 inches to prevent puckering as you sew.
Quilting Your Sampler
Choose Your Quilting Method
You have several options for the actual quilting step:
| Method | Difficulty | Time | Cost |
|---|---|---|---|
| Hand quilting | Medium | High | Low |
| Home machine | Medium | Medium | Low |
| Longarm service | Low | Low | High |
Prepare Your Quilt Sandwich
Layer your quilt top, batting, and backing fabric. The backing should be 2 inches larger than your quilt top on all sides.
Baste the layers together with safety pins, spray basting, or large hand stitches.
Quilting Pattern Ideas
Simple straight lines work beautifully on sampler quilts. Quilt ¼ inch from seam lines or create an overall grid pattern.
You could also outline each block differently to highlight the various patterns you’ve learned.
Binding Your Quilt
Cut and Prepare Binding
Cut binding strips 2½ inches wide. You’ll need enough strips to go around your quilt perimeter plus 10 inches extra.
Join strips with diagonal seams to reduce bulk in the binding.
Attach the Binding
Sew binding to the front of your quilt with a ¼-inch seam allowance. Miter corners for a professional finish.
Fold binding to the back and hand stitch in place. This final step is relaxing and gives you time to admire your work.
Troubleshooting Common Issues
Blocks Don’t Match Size
Don’t panic. Small size differences are normal and fixable.
Trim larger blocks to match your smallest block. Sashing strips can also hide size differences.
Seams Don’t Line Up
This happens to everyone. Pin carefully at intersections and ease in any fullness as you sew.
Sometimes a gentle steam press can coax seams into alignment.
When to Use Your Seam Ripper
If something looks really wrong, it probably is. Taking time to fix mistakes now saves frustration later.
Rip out seams that are more than ⅛ inch off. Smaller errors often disappear in the quilting process.
Tips for Success
Take Your Time
Rushing leads to mistakes. Quilting should be enjoyable, not stressful.
Set realistic goals. Maybe aim to complete one block per week rather than trying to finish everything in a weekend.
Learn as You Go
Each block teaches you something new. Don’t expect perfection on your first try.
Keep notes about what worked well and what you’d do differently next time.
Join a Community
Quilting groups provide encouragement and helpful advice. Many libraries and quilt shops host regular meet-ups.
Online quilting communities can answer questions when you’re stuck at 10 PM with a puzzling seam.
Conclusion
Creating a sampler quilt gives you a fantastic foundation in quilting skills. You’ll practice different techniques while making something beautiful and useful. Remember that every quilter started as a beginner, and each “mistake” teaches you something valuable. Your first sampler quilt might not be perfect, but it will be yours. Take your time, enjoy the process, and celebrate each completed block. Before you know it, you’ll have a gorgeous quilt and the confidence to tackle any pattern that catches your eye.
How long does it take to make a sampler quilt?
A typical 9-block sampler quilt takes 2-4 months if you work on it a few hours each week. Hand quilting adds several more weeks, while machine quilting can be completed in a weekend.
Can I use scraps for a sampler quilt?
Absolutely! Sampler quilts are perfect for using up fabric scraps. Just make sure you have enough coordinating pieces to maintain some visual unity across all your blocks.
What’s the best batting for a beginner’s sampler quilt?
Cotton batting works well for beginners because it’s easy to hand or machine quilt. Polyester batting is also good and tends to be more forgiving of tension issues on home sewing machines.
Should all blocks in a sampler quilt be the same difficulty level?
No, mixing difficulty levels keeps the project interesting and helps you build skills gradually. Start with simpler blocks and work up to more challenging patterns as your confidence grows.
How do I fix blocks that end up different sizes?
Trim all blocks to match your smallest block size, making sure to keep the design centered. Adding consistent sashing strips between blocks can also disguise small size variations effectively.