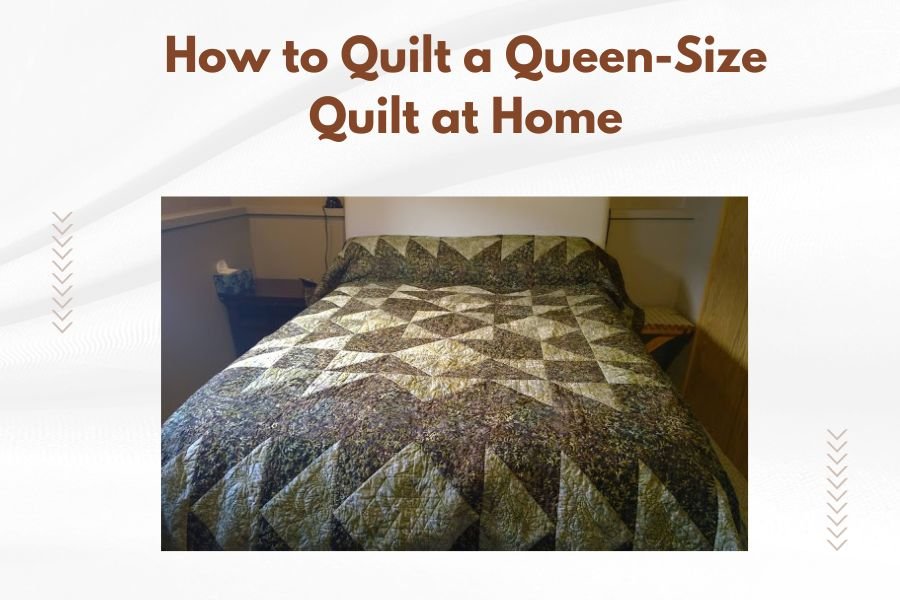
You can quilt a queen-size quilt at home using a domestic sewing machine by rolling and maneuvering the quilt sections through your machine’s throat space.
The key to quilting a queen-size quilt at home is proper planning, strategic quilting patterns, and good workspace setup to handle the bulk fabric smoothly.
What You Need Before Starting Your Queen-Size Quilt
Let’s get your supplies ready first. You don’t need fancy equipment to make a beautiful queen-size quilt at home.
Essential Tools and Materials
Your domestic sewing machine will work perfectly fine. I found that most quilters worry about needing special equipment, but research shows standard home machines handle queen quilts well with the right approach.
- Sewing machine with walking foot attachment
- Queen-size batting (90″ x 108″)
- Backing fabric (8-9 yards of 44″ wide fabric)
- Safety pins or spray basting
- Rotary cutter and cutting mat
- Clear ruler (at least 24″)
- Thread scissors
- Seam ripper
Fabric Requirements for Queen-Size Quilts
A queen-size quilt measures about 90″ x 100″ when finished. You’ll need more fabric than you think for the backing.
Many quilting experts recommend buying 10% extra fabric. This saves you from running short and having to find matching materials later.
Planning Your Queen-Size Quilt Layout
Choosing the Right Quilt Pattern
Simple patterns work best for large quilts. Think of it like learning to drive – you don’t start with a race car on a mountain road.
From what I read in quilting communities, these patterns work great for beginners:
- Simple squares or rectangles
- Strip quilts
- Basic nine-patch blocks
- Log cabin blocks
Calculating Block Sizes and Layout
Here’s where math becomes your friend. A 90″ x 100″ quilt divides nicely into different block sizes.
| Block Size | Blocks Across | Blocks Down | Total Blocks |
|---|---|---|---|
| 10″ blocks | 9 | 10 | 90 |
| 12″ blocks | 7-8 | 8-9 | 56-72 |
| 15″ blocks | 6 | 7 | 42 |
Preparing Your Quilt Top
Cutting Your Fabric Pieces
Accurate cutting makes everything easier later. I found that taking time here prevents headaches during assembly.
Cut all your pieces at once. Lay them out on your bed or large table to see how they’ll look together.
Tips for Efficient Cutting
Stack similar fabrics and cut multiple pieces together. Your rotary cutter can handle 4-6 layers easily.
Keep pieces organized in labeled bags or boxes. You’ll thank yourself later when you’re not hunting for that one blue square.
Piecing Your Quilt Top Together
Work in sections. Don’t try to sew the whole top in one go – that’s like eating an entire pizza in one bite.
Sew blocks into rows first, then join the rows together. Press seams in opposite directions between rows to reduce bulk.
Managing Large Quilt Top While Sewing
Roll up the sections you’re not working on. Use clips to keep rolled sections secure and out of your way.
Many quilting instructors suggest supporting the quilt’s weight with a table or ironing board positioned next to your machine.
Creating Your Quilt Sandwich
Preparing the Backing Fabric
Your backing needs to be about 4-6 inches larger than your quilt top on all sides. This gives you wiggle room during quilting.
For queen-size quilts, you’ll likely need to piece your backing. Cut your fabric into two or three panels and sew them together with 1/2″ seams.
Choosing and Preparing Batting
Batting comes in different weights and fibers. Cotton batting shrinks slightly and gives a flat, traditional look. Polyester holds its loft better and feels puffier.
Research from quilting manufacturers shows cotton-poly blends offer good performance for beginners. They’re forgiving and easy to work with.
Batting Size Guidelines
Buy batting that’s 2-4 inches larger than your finished quilt size. Trim it after quilting, not before.
Basting Your Queen-Size Quilt
This step feels tedious, but good basting prevents shifting and puckering. Think of it as the foundation of a house – skip it and everything falls apart.
Lay your backing face-down on a large, flat surface. Smooth out any wrinkles. Add the batting, then your quilt top face-up.
Pin Basting Method
Start from the center and work outward. Place safety pins every 4-6 inches across the entire quilt.
I found that curved safety pins work better than straight ones. They’re easier on your fingers and create less distortion.
Spray Basting Alternative
Temporary spray adhesive works faster than pins. Spray lightly and work in sections to avoid over-spray.
Machine Quilting Your Queen-Size Quilt
Setting Up Your Workspace
Clear a large area around your sewing machine. You need space to manage all that fabric without fighting it.
Position tables or chairs at the same height as your machine bed. This supports the quilt’s weight and prevents pulling.
Choosing Quilting Patterns for Large Quilts
Simple patterns work best for machine quilting large projects at home. Save fancy designs for smaller quilts or hire a long-arm quilter.
Straight Line Quilting
This is your best friend for queen-size quilts. Quilt in straight lines across the width or length of your quilt.
Many professional quilters start with straight lines because they’re fast, effective, and look great.
Grid Quilting Patterns
Mark a grid with chalk or removable markers. Quilt along these lines to create squares or diamonds across your quilt.
Echo Quilting Around Blocks
Follow the edges of your blocks, quilting parallel lines about 1/4″ to 1/2″ apart. This creates texture without complex patterns.
Managing Quilt Bulk Through Your Machine
Here’s where things get tricky. That big quilt needs to fit through your machine’s throat space somehow.
Rolling and Folding Techniques
Roll the quilt tightly on both sides of where you’re sewing. Use clips or pins to secure the rolls.
Start quilting from the center and work toward the edges. This prevents fabric from shifting and creating puckers.
Working in Sections
Divide your quilt into manageable sections mentally. Quilt one area completely before moving to the next.
Think of it like mowing a lawn – you do it in passes, not all at once.
Quilting Techniques for Home Machines
Using a Walking Foot
Your walking foot is essential for large quilts. It feeds all layers evenly, preventing shifting and puckering.
I found through research that most quilting problems on large projects come from not using a walking foot properly.
Free-Motion Quilting Options
Free-motion quilting gives you more design options but requires practice. Start with simple meandering patterns.
Drop or cover your feed dogs and use a free-motion foot. Move the fabric smoothly under the needle.
Simple Free-Motion Patterns
- Meandering or stippling
- Loose loops and curves
- Simple flower or leaf shapes
- Random wavy lines
Finishing Your Queen-Size Quilt
Trimming and Squaring Up
After quilting, trim excess batting and backing. Leave about 1/4″ beyond your quilt top edge for binding.
Square up your corners with a large ruler. This makes binding easier and gives you clean, professional edges.
Adding Binding to Large Quilts
Cut binding strips 2 1/2″ wide. You’ll need about 400″ of binding for a queen-size quilt.
Join strips with diagonal seams to reduce bulk. Press seams open for the flattest results.
Attaching Binding Step by Step
Start along one side, not at a corner. Leave about 6″ of binding loose at the start.
Miter corners by stopping 1/4″ from each corner, lifting your needle, and folding the binding at a 45-degree angle.
Hand-Finishing the Binding
Fold the binding over to the back and hand-stitch it down. This takes time but gives the best finish.
Use a blind hem stitch that barely shows on the front. Many quilters find this relaxing work to do while watching TV.
Troubleshooting Common Problems
Dealing with Fabric Shifting
If your layers shift during quilting, you probably need more basting. Don’t try to push through – stop and fix it.
Add more safety pins or re-spray areas that have separated.
Managing Thread Tension Issues
Thick quilts can cause tension problems. Test your settings on scraps with the same layers as your actual quilt.
Many machine manuals suggest loosening top tension slightly for thick projects.
When to Take Breaks
Large quilts are marathons, not sprints. Your back, shoulders, and eyes need regular breaks.
Stop every hour to stretch and rest. Tired quilters make more mistakes.
Conclusion
Quilting a queen-size quilt at home is totally doable with your regular sewing machine. The key is good planning, proper setup, and patience with the process. Start with simple patterns and techniques, then build your skills on future projects. Your first large quilt might not be perfect, but it will be yours – made with your hands and filled with your care. That makes it special no matter what. Take your time, enjoy the journey, and don’t forget to celebrate when you’re done. You’ve just accomplished something many people think is impossible at home.
How long does it take to quilt a queen-size quilt at home?
Most quilters spend 40-80 hours total on a queen-size quilt, spread over several weeks or months. This includes cutting, piecing, quilting, and binding. Your speed increases with experience, but don’t rush – enjoying the process matters more than finishing quickly.
Can I quilt a queen-size quilt without a walking foot?
While possible, it’s much harder and more likely to cause problems. A walking foot costs $30-50 and prevents most shifting and puckering issues. It’s one of the best investments you can make for large quilting projects.
What’s the biggest mistake beginners make with large quilts?
Skipping or rushing the basting step causes the most problems. Poor basting leads to shifting layers, puckers, and uneven quilting. Spend extra time on this step – it saves hours of frustration later.
Should I hand quilt or machine quilt my first queen-size project?
Machine quilting is more practical for large quilts. Hand quilting a queen-size quilt can take 200+ hours. Save hand quilting for smaller projects or specific areas where you want that special touch.
How do I store a large quilt while working on it?
Roll it loosely around a tube or pool noodle, never fold it while basted. Store it flat under a bed if possible. Keep it in a clean, dry place away from pets and children. A large plastic bag protects it from dust between work sessions.