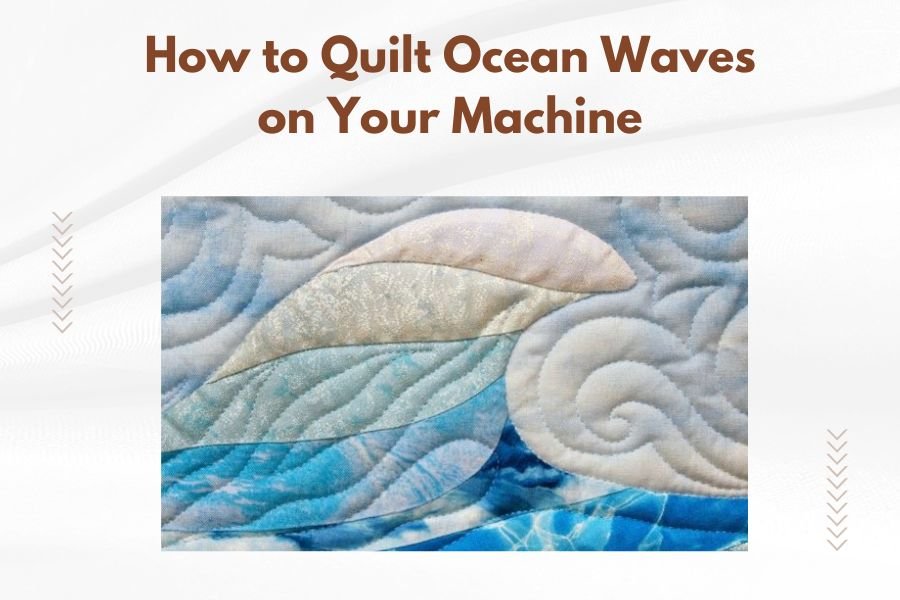
To quilt ocean waves on your machine, use a curved piecing technique with blue and white fabric strips sewn in gentle arcs, then layer and free-motion quilt with flowing wave patterns.
Ocean wave quilts capture the sea’s beauty through strategic fabric placement and specialized quilting techniques that create movement and depth in your finished piece.
What You Need to Get Started
Before you begin quilting ocean waves, gather the right supplies. You’ll need various shades of blue fabric, white or cream for foam, batting, and backing fabric. A walking foot helps with even stitching, while a free-motion quilting foot gives you creative control.
Choose fabrics with subtle texture differences. Cotton works best for beginners. Avoid busy prints that might hide your wave pattern. Solid colors or gentle gradations work beautifully.
Essential Tools for Wave Quilting
Your sewing machine does most of the work, but you need the right attachments. A quarter-inch seaming foot keeps your curves accurate. Sharp rotary cutting tools help create smooth fabric strips.
Template plastic or cardboard helps you create consistent wave shapes. Many quilters make their own wave templates using household items like dinner plates or bowls as guides.
Fabric Selection Tips
Think about real ocean colors when choosing fabric. Deep navy for deep water, medium blues for mid-depth, and lighter blues toward the surface. White or pale yellow suggests sunlight on waves.
I found that gradual color changes work better than sharp contrasts. Your eye should flow smoothly from dark to light, just like looking at real water.
Planning Your Wave Design
Start with simple wave shapes before attempting complex patterns. Draw your design on paper first. This saves fabric and prevents mistakes.
Consider the size of your finished quilt. Larger quilts can handle bigger wave patterns. Smaller projects need proportionally smaller waves to look balanced.
Creating Wave Templates
Make templates from cardboard or template plastic. You can trace around curved household items or draw freehand curves. Keep your templates smooth and flowing.
Most successful wave quilts use 3-5 different wave sizes. This creates visual interest without looking chaotic. Label each template so you don’t mix them up during cutting.
Measuring and Marking
Mark your fabric lightly with washable markers. Too much marking shows through light fabrics. Use the edge of your template as a cutting guide when possible.
Remember that seam allowances matter with curves. Add a quarter-inch beyond your marked line for seaming room.
Cutting Your Wave Pieces
Sharp scissors work better than rotary cutters for curved pieces. Take your time cutting. Smooth curves sew together much easier than choppy ones.
Cut similar pieces together when possible. Stack two or three fabric layers and cut multiple pieces at once. This saves time and ensures consistency.
Organizing Cut Pieces
Lay out your pieces before sewing anything. Take a photo with your phone so you remember the arrangement. It’s easy to lose track of your design during construction.
Keep pieces organized by color or position. Small containers or zip bags work well for storage between sewing sessions.
Grain Line Considerations
Try to keep the straight grain of your fabric running vertically in your finished quilt. This prevents stretching and distortion over time.
Some stretching is unavoidable with curves, but careful attention to grain line minimizes problems later.
Sewing Curved Seams
Curved seams intimidate many quilters, but they’re not as hard as they look. The key is taking your time and using the right technique.
Pin curves carefully before sewing. Use more pins than you would for straight seams. This prevents puckering and ensures smooth curves.
Machine Settings for Curves
Slow down your sewing speed for curves. Use a slightly longer stitch length than normal. This gives you better control and makes adjustments easier if needed.
Stop frequently with your needle down to adjust fabric positioning. Don’t try to sew long curves without stopping to check your work.
Pressing Curved Seams
Press curved seams carefully to avoid distortion. Use steam sparingly and let pieces cool completely before moving them.
Press seam allowances toward the darker fabric when possible. This prevents show-through on light fabrics.
Creating Wave Movement
Real waves have rhythm and flow. Your fabric placement should suggest this movement. Avoid perfectly regular patterns that look stiff or artificial.
Vary your wave heights and spacing slightly. This creates more natural-looking water movement in your finished quilt.
Color Placement Strategy
Place your darkest blues at the bottom of your quilt, gradually lightening toward the top. This mimics how real water looks from above.
Add small touches of green or purple in your darker blues. Real ocean water contains these colors, especially in deeper areas.
Adding Foam and Whitecaps
White fabric suggests foam and wave breaks. Use these sparingly for best effect. Too much white makes your quilt look busy rather than peaceful.
Place white pieces where waves would naturally break or overlap. Study photos of ocean waves if you’re unsure about placement.
Assembling Your Wave Blocks
Work in sections rather than trying to assemble everything at once. This makes the project more manageable and reduces mistakes.
Join wave sections horizontally first, then connect these larger pieces vertically. This approach works better than trying to match curved seams in both directions at once.
Matching Seam Intersections
Perfect seam matching isn’t always necessary with organic designs like waves. Small variations can actually enhance the natural look you’re trying to achieve.
Focus on overall flow rather than precise matching. Your eye will see the wave movement more than minor construction variations.
| Wave Section | Fabric Colors | Assembly Order |
|---|---|---|
| Deep Water | Navy, Dark Blue | First (bottom) |
| Mid Ocean | Medium Blues | Second (middle) |
| Surface Waves | Light Blue, White | Third (top) |
Machine Quilting Wave Patterns
The quilting itself adds another layer of wave movement. Echo quilting follows your pieced wave shapes, strengthening the water illusion.
Free-motion quilting gives you complete creative control. Practice flowing, curved lines that suggest water movement. Avoid sharp angles or geometric patterns that fight your wave theme.
Quilting Design Options
Simple parallel lines can suggest gentle swells. Vary the spacing slightly for more natural movement. Closer lines create more texture and visual weight.
Circular patterns suggest whirlpools or eddies. Use these sparingly as accent areas rather than overall patterns.
Thread Selection for Ocean Themes
Choose thread colors that blend with your fabrics or add subtle contrast. Variegated threads in blue tones work beautifully for ocean themes.
Metallic threads can suggest sunlight on water, but use them carefully. Too much metallic thread overwhelms the fabric colors.
Troubleshooting Common Problems
Puckered seams happen with curved piecing. Usually this means your pieces weren’t pinned well enough or you sewed too fast. Take your time and use plenty of pins.
Stretched fabric causes wavy edges. This often results from pulling fabric while sewing curves. Let the machine feed the fabric naturally without forcing it.
Fixing Curved Seam Issues
Small puckers can sometimes be pressed out with steam and careful manipulation. Larger problems might need to be resewn.
Don’t be afraid to unsew and try again. Getting smooth curves takes practice, and even experienced quilters sometimes need multiple attempts.
Finishing Your Ocean Wave Quilt
Binding choice affects your finished look. Navy or dark blue binding frames your waves nicely. Consider bias binding for curved quilt edges if you choose that design option.
Add a label with your name and completion date. Ocean wave quilts often become family treasures passed down through generations.
Care Instructions
Gentle machine washing works for most cotton ocean wave quilts. Use cool water and mild detergent to preserve your fabric colors.
Air drying prevents shrinkage and fading. Avoid direct sunlight when drying, as this can fade blue fabrics over time.
Conclusion
Quilting ocean waves on your machine combines traditional techniques with creative expression. The curved piecing might seem challenging at first, but taking your time and practicing makes perfect waves possible. Your finished quilt will capture the peaceful beauty of ocean water through thoughtful fabric selection and skilled construction. Remember that slight imperfections add to the natural look you’re creating. Real waves aren’t perfectly uniform, and neither should your quilt be. Enjoy the process and let your creativity flow like the waves you’re making.
How do I prevent fabric from stretching when sewing curves?
Pin curves generously before sewing and let your machine feed the fabric naturally without pulling. Use a walking foot if available, and sew slowly with consistent speed. Stop frequently with needle down to reposition fabric without stretching.
What’s the best way to cut accurate curved pieces?
Use sharp fabric scissors rather than rotary cutters for curves. Make sturdy templates from cardboard or template plastic, and trace carefully with washable markers. Cut slowly and smoothly, keeping your scissors perpendicular to the fabric.
Can I use a regular sewing machine foot for curved piecing?
Yes, your regular presser foot works fine for curved seams. A quarter-inch foot helps maintain consistent seam allowances. Some quilters prefer a slightly shorter foot for better visibility around curves, but any standard foot will work.
How many different blue fabrics do I need for a wave quilt?
Start with 4-6 different blue shades ranging from navy to light blue, plus white or cream for foam effects. You can create beautiful wave quilts with fewer fabrics, but having more options gives you greater flexibility in creating depth and movement.
Should I prewash fabrics before making an ocean wave quilt?
Prewashing prevents surprises later but can make fabrics slightly harder to work with during construction. If you prewash, use the same water temperature and detergent you plan to use for the finished quilt. Press fabrics smooth before cutting.