To quilt a memory quilt, start by gathering meaningful fabric pieces, creating a layout, and using basic quilting techniques to stitch the layers together with batting in between.
Memory quilts transform cherished clothing and fabric pieces into lasting keepsakes that preserve precious memories for years to come.
Creating a memory quilt feels overwhelming at first. You’re holding onto pieces of clothing that mean everything to you. Maybe it’s your grandmother’s aprons or your child’s outgrown pajamas. The good news? You don’t need expert skills to make something beautiful.
I researched quilting techniques and found that memory quilts work best when you focus on the story, not perfection. Let’s walk through this together, step by step.
What Makes Memory Quilts Special
Memory quilts capture stories in fabric. Unlike regular quilts made from new materials, these use clothing and textiles that already hold meaning.
You might use baby clothes, wedding dresses, military uniforms, or favorite shirts. Each piece carries memories that photos can’t quite capture.
The texture and scent often bring back moments in ways that surprise people. That’s why memory quilts make such powerful gifts and family treasures.
Gathering Your Materials
Selecting Memory Fabrics
Choose fabrics that tell your story. You’ll need enough pieces to create your desired quilt size. A lap quilt typically needs 12-20 clothing items.
Mix different textures and weights. Cotton shirts work well with denim jeans. Soft pajamas pair nicely with sturdy work clothes.
Don’t worry if pieces look different. The variety makes memory quilts more interesting than matching store-bought quilts.
Essential Quilting Supplies
You’ll need these basic supplies:
- Sharp fabric scissors
- Rotary cutter and cutting mat
- Quilting ruler (24-inch works well)
- Pins or clips
- Sewing machine with walking foot
- Thread in neutral colors
- Quilt batting
- Backing fabric
Choosing Batting and Backing
Cotton batting works best for memory quilts. It’s easy to handle and washes well. Polyester batting lasts longer but feels different.
Pick backing fabric that complements your memory pieces. Solid colors work better than busy patterns. You want the memory side to be the star.
Preparing Your Memory Fabrics
Washing and Pressing
Wash all clothing items before cutting. This removes sizing and prevents shrinking later. Use gentle detergent and cool water for delicate fabrics.
Press everything flat with an iron. Wrinkled fabric makes cutting and sewing much harder.
Some people skip washing to preserve scents. That’s fine, but expect some shrinking when you wash the finished quilt.
Cutting Memory Pieces
Decide on your block size first. Twelve-inch squares work well for beginners. You can always adjust based on your clothing sizes.
Cut around logos, embroidery, or special details. These become focal points in your quilt. Regular fabric areas can fill in around special pieces.
Save small scraps. They work great for borders or backing details.
Dealing with Different Fabric Weights
Heavy fabrics like denim need extra support. Iron lightweight interfacing to the back before cutting.
Very stretchy fabrics benefit from interfacing too. This prevents distortion during sewing.
Thin fabrics work fine as-is. T-shirts and cotton dresses usually don’t need reinforcement.
Design and Layout Planning
Creating Your Layout
Lay all cut pieces on a large flat surface. Your bed or clean floor works perfectly.
Arrange pieces by color, person, or time period. There’s no wrong way to organize a memory quilt.
Take photos of layouts you like. You’ll move pieces around many times before settling on the final design.
Balancing Colors and Patterns
Spread similar colors throughout the quilt. Don’t cluster all dark pieces in one corner.
Mix busy patterns with solid colors. This prevents the eye from getting overwhelmed.
Place your most special pieces where they’ll get noticed. Center areas draw attention first.
Adding Sashing or Borders
Sashing strips separate blocks and create a unified look. Use coordinating fabric in 2-4 inch strips.
Borders frame the entire quilt. They work well when you need more size or want to highlight the center design.
Both elements are optional. Many memory quilts look great with blocks sewn directly together.
Step-by-Step Assembly Process
Sewing Blocks Together
Start by sewing blocks into rows. Use a quarter-inch seam allowance throughout the project.
Pin blocks right sides together before sewing. This keeps edges aligned and prevents shifting.
Press seams to one side, alternating direction in each row. This reduces bulk when rows connect.
Joining Rows
Sew completed rows together, matching seam intersections carefully. Pins help keep everything aligned.
Take your time with this step. Well-matched seams make the difference between amateur and professional-looking quilts.
Press row seams in one direction. The direction doesn’t matter as much as consistency.
Adding Sashing If Desired
Cut sashing strips to match your block width plus seam allowances.
Sew sashing between blocks in each row first. Then add horizontal sashing strips between completed rows.
This creates a grid effect that works especially well with different fabric types.
Creating the Quilt Sandwich
Preparing Layers
Cut batting and backing fabric 4-6 inches larger than your quilt top on all sides.
Lay backing fabric face-down on a flat surface. Smooth out any wrinkles or folds.
Center batting on top of backing. Add your quilt top face-up as the final layer.
Basting the Layers
Basting holds layers together during quilting. You can pin-baste, spray-baste, or hand-baste with large stitches.
Start from the center and work outward. This prevents bunching and puckering.
Place basting pins or stitches every 4-6 inches across the entire quilt surface.
Safety Pin Method
Safety pins work great for machine quilting. Use curved safety pins designed for quilting if possible.
Pin through all three layers, avoiding areas where you plan to quilt. You’ll remove pins as you sew.
This method works faster than hand-basting and holds securely during machine quilting.
Quilting Your Memory Quilt
Machine Quilting Basics
Use a walking foot for straight-line quilting. This foot feeds all layers evenly and prevents puckering.
Start quilting from the center and work outward. This distributes any excess fabric toward the edges.
Keep quilting lines 4-6 inches apart maximum. Closer spacing creates a more durable quilt.
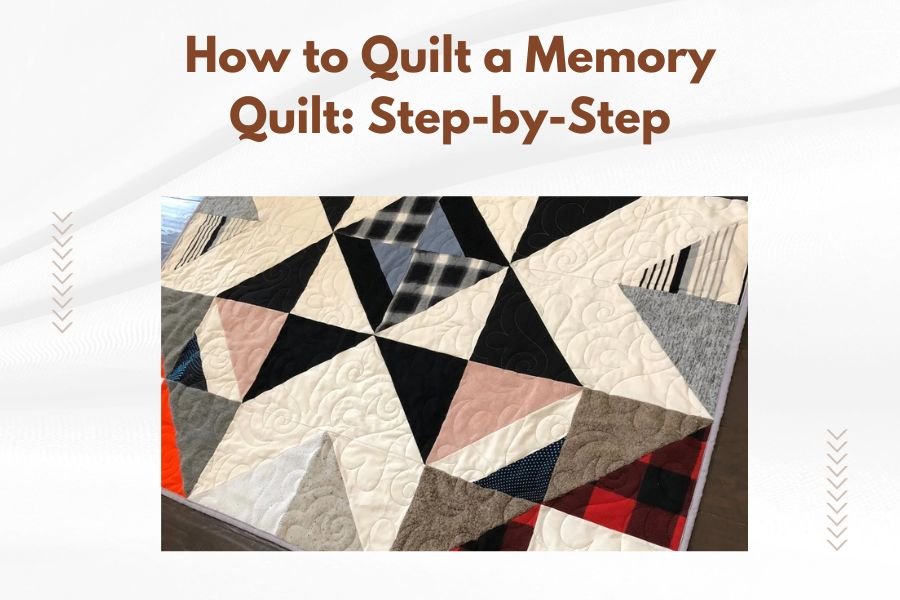
Simple Quilting Patterns
Straight lines work perfectly for memory quilts. Quilt in the seam lines between blocks for an easy, invisible approach.
Echo quilting follows block shapes at regular intervals. This creates texture without competing with memory fabrics.
Free-motion quilting allows curves and designs, but requires practice. Stick with straight lines for your first memory quilt.
Working with Thick Seams
Memory quilts often have thick seam intersections. Slow down when crossing these areas.
Use a strong needle designed for denim or heavy fabrics. Replace needles frequently to prevent skipped stitches.
Hand-turn the wheel instead of using the motor when crossing very thick spots.
Finishing Your Memory Quilt
Trimming and Squaring
Trim excess batting and backing even with the quilt top edges. Use a rotary cutter for clean, straight lines.
Square up corners using a large quilting ruler. Perfectly square corners make binding much easier.
Don’t worry if your quilt isn’t perfectly rectangular. Handmade character adds to the memory quilt appeal.
Binding Application
Cut binding strips 2.5 inches wide from coordinating fabric. You’ll need enough length to go around the perimeter plus 12 inches.
Join binding strips with diagonal seams to reduce bulk. Press seams open for the smoothest finish.
Attach binding to the front first, then fold and stitch to the back by hand for a professional look.
Mitering Corners
Stop sewing 1/4 inch from each corner. Fold binding to create a neat miter at each corner.
This technique takes practice but creates the most professional-looking finish.
Watch online tutorials if you’re unsure. Visual demonstrations help more than written descriptions for this technique.
Adding Personal Touches
Labels and Documentation
Create a label with the quilt’s story, date, and maker. Future generations will treasure this information.
Include names of people whose clothing appears in the quilt. Simple embroidery or fabric markers work well.
Attach labels to the backing in a corner where they won’t show from the front.
Special Embellishments
Consider adding buttons from original clothing pieces. These details make memory quilts extra special.
Embroidered names or dates personalize specific blocks. Keep embellishments secure so they won’t catch during washing.
Photos printed on fabric can supplement clothing pieces when you don’t have enough fabric items.
Care and Preservation
Washing Guidelines
Wash memory quilts gently in cool water with mild detergent. Hot water can cause colors to run or fabrics to shrink differently.
Air-dry when possible. High heat damages batting and can cause fabric puckering.
Expect some changes over time. Memory quilts are meant to be used and loved, not kept pristine.
Storage Tips
Store flat when possible. Folding creates permanent creases that are hard to remove.
If you must fold, refold in different places periodically. This prevents permanent damage along fold lines.
Keep away from direct sunlight and humid areas. These conditions cause fading and fabric deterioration.
Troubleshooting Common Problems
| Problem | Cause | Solution |
|---|---|---|
| Puckering | Uneven basting or tension | Re-baste carefully, adjust machine tension |
| Skipped stitches | Dull needle or wrong needle type | Replace with heavy-duty needle |
| Wavy edges | Stretching during sewing | Use walking foot, don’t pull fabric |
| Bulky seams | Too many layers meeting | Trim seam allowances, grade layers |
Conclusion
Making a memory quilt connects you to people and moments that matter most. The process takes time and patience, but the result becomes a treasured family heirloom.
Remember that perfection isn’t the goal. Each wonky seam and imperfect corner adds character that store-bought quilts can’t match. Your memory quilt tells a unique story that deserves to be preserved and shared.
Start with simple techniques and build confidence with each project. Soon you’ll be creating memory quilts for friends and family who need their own stories preserved in fabric.
How long does it take to make a memory quilt?
A lap-sized memory quilt typically takes 20-40 hours spread over several weeks. The time depends on your experience level, quilt size, and how much hand-work you include. Planning and cutting fabrics usually takes the most time for beginners.
Can I make a memory quilt without a sewing machine?
Yes, you can hand-sew an entire memory quilt using traditional quilting techniques. Hand-sewn quilts take significantly longer but create beautiful, heirloom-quality results. Use small, even stitches and strong quilting thread for durability.
What’s the smallest number of clothing items needed for a memory quilt?
You can create a meaningful memory quilt with as few as 6-8 clothing items by combining them with coordinating fabrics. Use the memory pieces as focal points and fill in with complementary colors and patterns that enhance the overall design.
How do I handle clothing items that are too small to make full blocks?
Small items work perfectly for appliqué designs, borders, or pieced blocks where you combine multiple small pieces. Baby clothes, ties, and pocket details can be incorporated into larger blocks using creative placement and supportive background fabrics.
Should I wash vintage or delicate fabrics before quilting?
Test vintage fabrics carefully before washing. Some old fabrics may be too fragile for regular washing and are better cleaned with gentle spot-cleaning methods. When in doubt, consult a textile preservation specialist before proceeding with valuable vintage pieces.