Quilting hearts on a machine requires three simple steps: choose a heart template, select appropriate thread and fabric, and use a straight or zigzag stitch to outline and fill the design.
You can create beautiful heart quilts using basic machine stitches like straight lines, gentle curves, and simple fill patterns that any beginner can master with practice.
Getting Started with Heart Quilting Basics
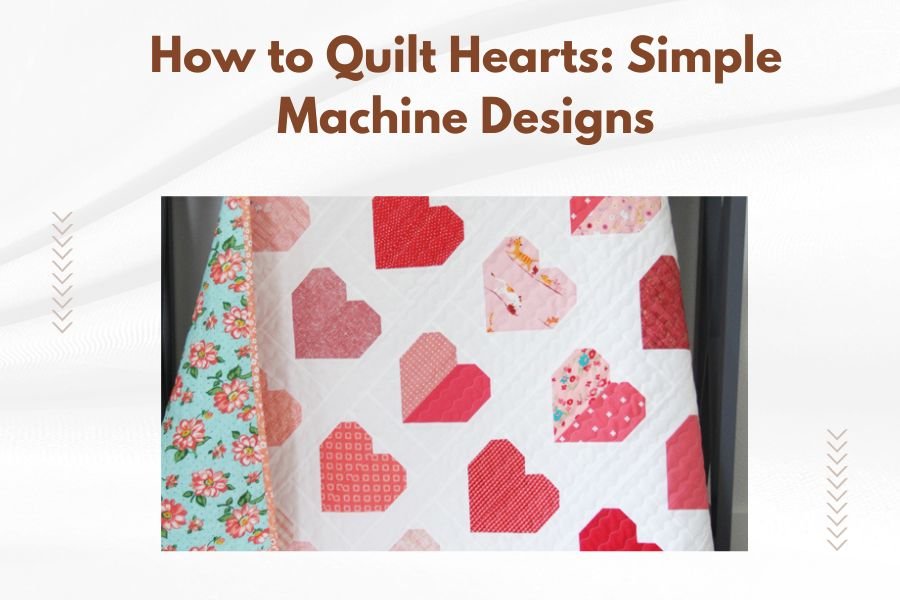
Heart shapes make quilting more personal and meaningful. Whether you’re making a wedding gift or Valentine’s project, machine quilting gives you speed and consistency.
You’ll need a few basic supplies before you start. Your regular sewing machine works perfectly for heart designs. No special attachments required.
Essential Supplies for Heart Quilting
Gather these items before you begin your heart quilting project:
- Quilting cotton fabric in your chosen colors
- Cotton batting for the middle layer
- All-purpose thread or quilting thread
- Heart templates or patterns
- Fabric scissors and rotary cutter
- Quilting ruler and cutting mat
- Safety pins or quilting clips
Choosing the Right Heart Size
Start with medium-sized hearts, about 4 to 6 inches wide. Smaller hearts can be tricky for beginners. Larger hearts need more planning but offer more design space.
I found that most quilters prefer hearts between 3 and 8 inches for their first projects. This size range gives you flexibility without being overwhelming.
Simple Heart Templates and Patterns
Templates make heart quilting much easier. You can draw your own, print free patterns online, or buy plastic templates from craft stores.
Creating Your Own Heart Template
Fold a piece of paper in half. Draw half a heart shape along the fold line. Cut it out and unfold for a perfect symmetrical heart.
Cardboard works better than paper for templates you’ll use multiple times. Trace around it cleanly without the template shifting.
Free Heart Pattern Sources
Many quilting websites offer free heart templates. Look for PDF downloads that you can print at home. Make sure to print at 100% size, not “fit to page.”
Your local library often has quilting books with heart patterns you can photocopy. Check the craft section for template collections.
Preparing Your Fabric Layers
Good preparation makes quilting hearts much smoother. Take time to cut and layer your fabrics properly.
Cutting Heart Shapes
Place your template on the fabric and trace lightly with a pencil or fabric marker. Cut about 1/4 inch outside your traced line for seam allowance.
Stack multiple fabric layers to cut several hearts at once. Just make sure your scissors can handle the thickness cleanly.
Layering Your Quilt Sandwich
Lay your backing fabric face-down on a flat surface. Smooth out any wrinkles. Add the batting layer next, then your top fabric face-up.
Pin or clip the layers together every 4 to 6 inches. Start from the center and work outward. This prevents shifting while you quilt.
Basic Machine Stitching Techniques
Your sewing machine can create beautiful heart quilts using simple stitches. Let’s start with the easiest methods.
Straight Line Heart Quilting
Set your machine to a straight stitch, about 2.5mm length. Start at the top center of your heart and stitch down one side of the curve.
Lift the presser foot at the bottom point, pivot your fabric, then stitch up the other side. This creates a clean heart outline.
Tips for Smooth Curves
Stitch slowly around curves. Stop with your needle down, lift the presser foot, and turn your fabric slightly. Lower the foot and continue.
Practice on scrap fabric first. Heart curves take a little getting used to, but they become natural quickly.
Zigzag Heart Designs
Change your machine to zigzag stitch for a different look. Use a medium width setting, about 3mm. This creates a bolder heart outline.
Zigzag stitches work well for appliqué hearts too. They cover raw edges nicely and add visual interest.
Heart Quilting Design Ideas
Once you master basic heart shapes, try these simple variations to make your quilts more interesting.
Connected Heart Chains
Draw a line of hearts that touch at their points or sides. Quilt the entire chain without stopping. This creates a lovely flowing pattern.
Heart chains work beautifully as borders or as repeating patterns across your quilt top. Plan your spacing first for best results.
Nested Heart Patterns
Place smaller hearts inside larger ones. Start quilting from the center and work outward. This creates depth and visual layers.
Use different thread colors for each heart size. The contrast makes each layer more defined and interesting.
Double Heart Outlines
Quilt around your heart shape twice, spacing the lines about 1/4 inch apart. This gives your hearts more weight and presence.
Heart Fill Patterns
After outlining your heart, fill it with straight lines, crosshatch, or echo quilting. Keep fill patterns simple for your first projects.
Common Heart Quilting Mistakes
Even experienced quilters run into problems with heart shapes. Here’s how to avoid the most common issues.
Uneven Heart Curves
Rushed stitching creates bumpy, uneven curves. Slow down and let the machine do the work. Your hands should guide, not force, the fabric.
If your hearts look lopsided, check your template. Sometimes the problem starts with an uneven pattern.
Fabric Puckering Problems
Puckered fabric usually means your layers shifted during quilting. Use more pins or clips next time, especially around curved areas.
Tension issues can also cause puckering. Test your stitches on fabric scraps first and adjust as needed.
Thread Tension Solutions
Many machines need slightly looser top tension for quilting. Check your manual for recommended settings or test on practice fabric.
| Problem | Likely Cause | Quick Fix |
|---|---|---|
| Puckered fabric | Loose layering | Add more pins |
| Skipped stitches | Wrong needle | Use quilting needle |
| Uneven curves | Too fast | Slow down speed |
Finishing Your Heart Quilt
After quilting all your hearts, you’ll need to finish the edges and add any final touches.
Trimming Excess Fabric
Use a rotary cutter and ruler to trim your quilt edges evenly. Leave about 1/4 inch beyond your outermost quilting lines.
Square up your corners carefully. Crooked corners make binding much harder later.
Adding Binding
Cut binding strips 2.5 inches wide. You’ll need enough length to go around your entire quilt plus about 8 extra inches.
Attach binding with a 1/4 inch seam, mitering corners as you go. Hand-stitch the binding to the back for a professional finish.
Binding Color Choices
Neutral colors like cream or gray let your hearts stand out. Bright binding creates a bold frame effect.
Advanced Heart Quilting Tips
Ready to take your heart quilting further? These techniques add professional polish to your projects.
Free Motion Heart Quilting
Drop your feed dogs and use a darning foot for free motion quilting. This lets you create flowing, organic heart shapes.
Practice drawing hearts in the air with your hands first. This muscle memory helps when you’re guiding fabric under the needle.
Thread Color Strategies
Matching thread makes hearts subtle and textured. Contrasting thread makes them bold and graphic. Both approaches work beautifully.
I found online that many quilters use variegated thread for heart projects. The color changes add interest without being overwhelming.
Metallic Thread Considerations
Metallic threads create stunning heart effects but require slower stitching speeds. Use a metallic needle and loosen your top tension slightly.
Heart Quilt Project Ideas
Put your new skills to work with these beginner-friendly heart quilt projects.
Simple Heart Wall Hanging
Create a small wall quilt with 9 to 16 hearts arranged in a grid. This project uses minimal fabric but maximum impact.
Each heart can be a different color, or use gradual color changes from light to dark. Add a simple border to frame your design.
Heart Table Runner
Arrange hearts in a line down the center of a table runner. This project teaches you spacing and planning skills.
Table runners typically measure 12 to 18 inches wide and 36 to 72 inches long. Plan your heart placement before you start quilting.
Seasonal Heart Variations
Use pink and red hearts for Valentine’s Day, pastels for spring, or autumn colors for fall decorating.
Conclusion
Machine quilting hearts opens up endless creative possibilities for your projects. Start with simple straight-line hearts and gradually try more complex designs as your confidence grows. Remember that practice makes perfect – each heart you quilt will be better than the last. The key is taking your time with curves and keeping your fabric layers well-secured. Whether you’re making a gift or decorating your own home, heart quilts always carry special meaning that makes the effort worthwhile.
Can I quilt hearts without a template?
Yes, you can draw hearts freehand directly on your fabric using a washable fabric marker. Practice on paper first to get consistent shapes, then transfer your favorite heart to fabric.
What’s the best thread weight for heart quilting?
Use 40-weight thread for most heart quilting projects. It’s strong enough for quilting but not so thick that it overwhelms small heart details.
How do I prevent my hearts from looking stretched or distorted?
Keep even tension on your fabric as you guide it through the machine. Avoid pulling or pushing the fabric – let the feed dogs move it naturally while you steer around curves.
Should I use a special presser foot for heart quilting?
A walking foot helps feed all quilt layers evenly, which reduces shifting and puckering. It’s not required but makes heart quilting much easier, especially for beginners.
How far apart should I space hearts in a repeating pattern?
Space hearts about 1 to 2 inches apart for good balance. Closer spacing creates a busy look, while wider spacing can make your design feel disconnected.