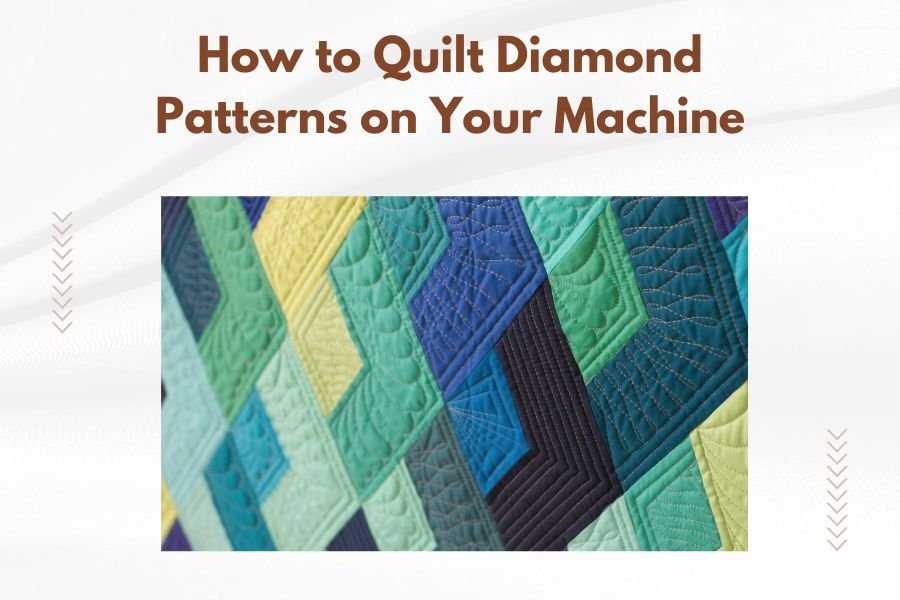
Diamond patterns on quilts create stunning geometric designs that you can easily machine quilt with the right setup and technique.
The key to quilting diamond patterns is using a walking foot with marked guidelines and maintaining consistent spacing throughout your work.
Getting Your Machine Ready for Diamond Quilts
Your sewing machine needs the right setup before you start. A walking foot is your best friend here. It feeds all layers evenly through the machine.
I found that most quilting experts recommend adjusting your stitch length to 2.5-3.0mm. This gives you nice, even stitches that won’t pucker your fabric.
Essential Tools You’ll Need
Here’s what I gathered from research about the must-have tools:
- Walking foot attachment
- Quilting ruler or template
- Water-soluble marking pen
- Safety pins or spray basting
- Quilting thread in your chosen color
Thread Selection Tips
Cotton thread works best for most diamond quilting projects. It blends well and doesn’t create bulk. Polyester thread is stronger but can be trickier to work with.
Planning Your Diamond Layout
Before you touch that needle, you need a plan. Diamond patterns can go wrong fast if you don’t map them out first.
Start by measuring your quilt top. Divide it into equal sections that will accommodate your diamond size. Most beginners find 4-inch diamonds manageable.
Marking Your Guidelines
Use a quilting ruler to draw diagonal lines across your quilt top. These become your diamond framework. Space them evenly – consistency is everything here.
Water-soluble markers disappear after washing, so don’t worry about being perfect with your lines. You just need clear guides to follow.
Creating Perfect Angles
The magic happens at 45-degree angles. Use your ruler’s angle markings to keep everything straight. Crooked lines mean wonky diamonds.
Basic Diamond Quilting Technique
Now comes the fun part. Start quilting from the center of your quilt and work outward. This prevents bunching and keeps everything flat.
Place your hands on either side of the presser foot. Guide the fabric gently – don’t pull or push too hard.
Starting and Stopping Cleanly
Begin each line with a few tiny stitches to lock your thread. End the same way. This prevents your quilting from coming undone later.
I found online that many quilters forget this step and end up with loose threads everywhere. Take the extra few seconds.
Turning Corners Smoothly
Stop with your needle down when you reach a corner. Lift the presser foot, pivot your fabric, lower the foot, and continue. Practice makes this second nature.
Step-by-Step Diamond Quilting Process
Ready to tackle your first diamond? Here’s the process I researched from quilting professionals:
Step One: Stitch the First Diagonal
Start with one diagonal line running from corner to corner. Keep your stitching speed steady – not too fast, not too slow.
Your walking foot will do most of the work. Just guide the fabric and keep that seam allowance consistent.
Maintaining Straight Lines
Follow your marked guidelines closely. If you drift off course, stop and realign. It’s better to pause than to rip out stitches later.
Step Two: Add Parallel Lines
Stitch parallel lines on both sides of your first line. Space them according to your diamond size plan.
Keep the same distance between each line. Measure as you go if you need to.
Working from Center Out
Always return to the center area before moving to the next section. This keeps your quilt balanced and prevents shifting.
Step Three: Create the Cross Lines
Now stitch diagonal lines in the opposite direction. These intersect with your first lines to form the diamond shapes.
Take your time here. These intersections need to be precise for clean diamonds.
Checking Your Intersections
Stop occasionally to check that your lines cross at right angles. Adjust your technique if things look off.
Advanced Diamond Variations
Once you master basic diamonds, you can try fancier versions. Double diamonds, nested diamonds, and varying sizes all create different effects.
Double Diamond Technique
Add a second set of lines inside or outside your original diamonds. This creates a layered, more complex look.
Use contrasting thread colors to make the effect pop. Just remember – more lines mean more chances for mistakes.
Planning Complex Patterns
Draw your design on paper first. Complex diamond patterns can get confusing fast when you’re at the machine.
Troubleshooting Common Problems
Every quilter runs into issues. Here are solutions I found from experienced quilters online:
| Problem | Cause | Solution |
|---|---|---|
| Puckering fabric | Tension too tight | Lower thread tension |
| Uneven stitches | Inconsistent speed | Practice steady rhythm |
| Crooked lines | Poor guidance | Use rulers and guides |
Fixing Mistakes Without Starting Over
Made a wonky line? Don’t panic. Small imperfections often disappear in the overall pattern. Only fix really obvious mistakes.
If you must rip out stitches, use a seam ripper carefully. Go slowly to avoid damaging your fabric.
Prevention Is Easier Than Fixing
Take breaks when you feel tired. Most mistakes happen when you’re rushing or your attention wanders.
Finishing Your Diamond Quilt
You’re almost done! Remove any remaining marking lines according to the manufacturer’s instructions.
Press your finished quilt gently if needed. Use low heat and press from the back to avoid flattening your quilting.
Final Quality Check
Look over your work for any loose threads or missed spots. Trim thread tails close to the fabric.
Check that your binding covers the quilting lines properly. Nothing ruins a beautiful diamond pattern like sloppy edges.
Conclusion
Quilting diamond patterns transforms ordinary fabric into stunning geometric art. With the right tools, careful planning, and steady technique, you can create professional-looking results on your home machine. Remember to start simple, practice your technique, and don’t rush the process. Your patience will pay off with beautiful diamonds that showcase your quilting skills. Each project teaches you something new, so keep experimenting with different sizes and variations as your confidence grows.
What size diamonds work best for beginners?
Start with 4-6 inch diamonds. They’re large enough to be forgiving but small enough to look proportional on most quilts. You can always make them smaller as your skills improve.
Can I quilt diamonds without marking lines first?
While possible, it’s not recommended for beginners. Marked guidelines help you maintain consistent spacing and angles, which are essential for clean diamond shapes.
How do I prevent my quilt from shifting while machine quilting?
Use spray basting or pin basting to secure all three layers before quilting. A walking foot also helps feed all layers evenly through the machine.
What’s the best thread weight for diamond quilting?
Use 40-weight cotton thread for most projects. It’s strong enough to hold well but fine enough not to create bulk at line intersections.
How do I calculate spacing for even diamond patterns?
Measure your quilt dimensions and divide by your desired number of diamonds plus one. This accounts for the spaces at the edges and gives you even spacing throughout.