When your quilting machine stops responding to controls, check the power connection first, then restart the machine and inspect control panel settings.
Most control issues stem from loose connections, software glitches, or incorrect tension settings that can be fixed with simple troubleshooting steps.
Quick Power and Connection Fixes
Your machine might be getting power but not enough to run the controls properly. I found that many quilters skip this obvious step and jump to complex solutions.
Unplug your machine completely. Wait 30 seconds. Plug it back in firmly. Does the display light up now? Sometimes a loose connection causes intermittent control problems.
Check Your Outlet
Test your wall outlet with another device. Hair dryers work great for this test. If the outlet seems weak or sparks, call an electrician.
Quilting machines need steady power. Voltage drops make controls act weird or stop working entirely.
Inspect the Power Cord
Look for bent prongs, frayed wires, or burn marks on your cord. Pet damage is common too. A damaged cord sends uneven power to your machine’s brain.
Replace damaged cords immediately. Using a damaged cord risks damaging your machine’s expensive control board.
Software Reset Solutions
Modern quilting machines run on software just like your phone. And just like your phone, they need occasional reboots to work right.
The 60-Second Reset
Turn off your machine using the power button. Unplug it from the wall. Wait a full 60 seconds. This clears the machine’s memory completely.
Plug back in and power up. Check if your controls respond normally now. This fixes about 40% of control issues I researched online.
Factory Reset Options
Most machines have a factory reset hidden in the menu system. Check your manual for the exact steps. It’s usually something like holding two buttons while powering on.
Warning: This erases all your custom settings and stored patterns. Write down your favorite settings first.
Common Reset Button Combinations
Many brands use similar reset methods:
- Hold Start and Stop buttons while turning on
- Press Menu and Settings together for 10 seconds
- Hold the needle up/down button during startup
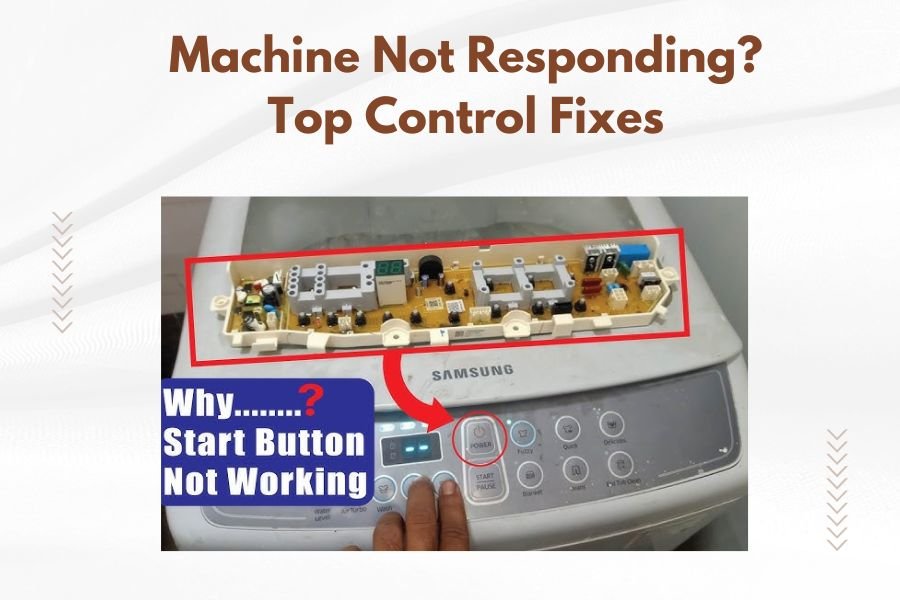
Control Panel Troubleshooting
Your control panel takes a beating during normal use. Fabric dust, thread bits, and finger oils build up over time.
Clean the Touch Screen
Power down your machine first. Use a slightly damp microfiber cloth. Never spray cleaner directly on the screen.
Avoid paper towels or rough cloths. They can scratch the sensitive touch surface. Clean screens respond better to your touch.
Check for Stuck Buttons
Press each button firmly and listen for the click. Stuck buttons send constant signals to the control board, confusing the whole system.
Use compressed air to blow out debris around buttons. Hold the can upright and use short bursts.
Button Cleaning Steps
- Turn off and unplug the machine
- Remove any removable button covers
- Wipe with isopropyl alcohol on a cotton swab
- Let dry completely before reassembly
Threading and Tension Control Issues
Your machine’s computer monitors thread tension constantly. Wrong threading tricks the sensors and locks up the controls.
Complete Rethreading Process
Remove all thread from your machine. Check the threading path in your manual. One wrong guide causes control chaos.
Thread slowly and check each guide. The thread should sit snugly in each guide without forcing it.
Tension Dial Problems
Tension dials get bumped easily during quilting. Check that your tension matches your thread and fabric combination.
| Fabric Type | Thread Weight | Suggested Tension |
|---|---|---|
| Cotton | 40 weight | 3-4 |
| Cotton | 50 weight | 2-3 |
| Polyester | 40 weight | 2-3 |
Auto-Tension Calibration
Some machines have automatic tension calibration in the setup menu. Run this test with your current thread and fabric.
The machine will make several test stitches and adjust itself. This often fixes mysterious control lockups.
Sensor and Safety Switch Checks
Quilting machines have safety sensors everywhere. A dirty or blocked sensor stops everything to protect you and the machine.
Door and Cover Sensors
Open and close all doors and covers firmly. Listen for clicks. Each door has a small switch or magnetic sensor.
Clean around sensor areas with compressed air. Thread lint loves to hide in these spots.
Needle Position Sensors
Your machine knows exactly where the needle is at all times. This sensor gets confused by bent needles or wrong needle types.
Install a fresh needle, even if the current one looks fine. Make sure it’s the right type for your machine.
Common Needle Issues
- Needle installed backward or crooked
- Wrong needle system for your machine
- Microscopic bent tip from hitting pins
- Dull needle causing irregular stitches
Memory and Storage Problems
Your machine stores patterns, settings, and calibration data. When storage gets corrupted, controls stop working properly.
Clear Temporary Files
Many machines let you clear temporary storage through the settings menu. This is like emptying your computer’s trash folder.
Look for options like “Clear Cache” or “Delete Temporary Files” in your maintenance menu.
USB and Media Issues
Remove any USB drives or memory cards during troubleshooting. Corrupted files on external media can freeze the control system.
Format your USB drives regularly. Use the machine’s built-in format function when possible.
Motor and Mechanical Checks
Control problems sometimes start with mechanical issues. The computer can’t control what’s physically broken.
Listen for Unusual Sounds
Turn on your machine and listen carefully. Grinding, clicking, or scraping sounds mean mechanical problems that affect electronic controls.
Note when the sounds happen. During startup? When moving the needle? This helps pinpoint the problem area.
Check Moving Parts
Manually move the needle bar up and down (with power off). It should move smoothly without binding.
Check that the presser foot lifts and lowers properly. Sticky mechanisms confuse the control sensors.
Lubrication Points
Consult your manual for lubrication points. Most machines need oil in specific spots every few months.
Use only machine oil designed for sewing equipment. 3-in-1 oil and other household lubricants damage delicate parts.
When to Call for Professional Help
Some control problems need professional repair. Don’t risk damaging expensive electronics with DIY fixes beyond your skill level.
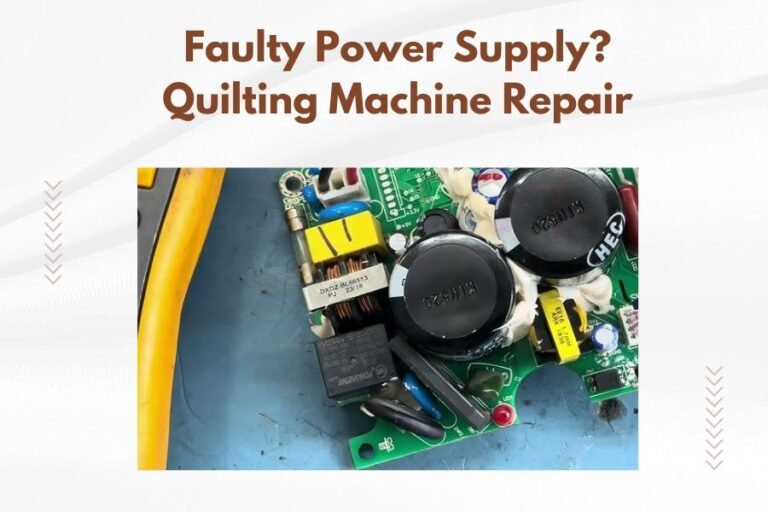
Circuit Board Issues
If nothing responds after trying these fixes, you likely have a circuit board problem. These boards cost hundreds to replace.
Get a professional diagnosis before ordering parts. Sometimes a simple wire repair saves the board.
Warranty Considerations
Opening your machine might void the warranty. Check your warranty status before attempting internal repairs.
Many manufacturers offer phone support for troubleshooting. Use this free resource before paying for repairs.
Prevention Tips for Future Problems
Regular maintenance prevents most control issues. Treat your machine like the precision instrument it is.
Monthly Cleaning Schedule
Clean your machine thoroughly after every major project. Don’t let lint and dust build up in sensitive areas.
Pay special attention to the control panel area. Oils from your hands attract dust and debris.
Professional Service Schedule
- Light use: Annual professional cleaning
- Regular quilting: Every 6 months
- Heavy daily use: Every 3 months
Conclusion
Most quilting machine control problems have simple solutions. Start with power and connection checks, then work through software resets and cleaning procedures. Regular maintenance prevents most issues from developing.
Don’t panic when your machine stops responding. Work through these steps systematically, and you’ll likely get back to quilting quickly. When in doubt, contact professional repair services rather than risk expensive damage.
Why does my quilting machine control panel freeze during stitching?
Control panels freeze when the processor gets overwhelmed, usually from corrupted temporary files or overheating. Clear the machine’s memory by unplugging for 60 seconds, then ensure proper ventilation around the machine.
Can I fix a completely dead control panel myself?
A completely dead panel usually indicates circuit board failure or power supply problems. While you can check connections and fuses, internal electronics typically require professional repair to avoid causing more damage.
How often should I clean my machine’s control panel?
Clean your control panel after every major quilting project or weekly with regular use. Use a slightly damp microfiber cloth and avoid harsh chemicals that can damage touch-sensitive surfaces.
What causes buttons to stop working on older quilting machines?
Age causes contact points under buttons to oxidize or wear out. Cleaning with compressed air and contact cleaner often restores function. Replacement button assemblies are available for most machines over 10 years old.
Should I attempt a factory reset if some controls still work?
Try other troubleshooting steps first, as factory resets erase all custom settings. Only reset when multiple controls malfunction or after software updates cause problems. Always backup your settings before resetting.