A burning smell from your quilting machine usually means lint buildup, overheating, or worn parts that need cleaning or replacement.
The most common fix is cleaning out accumulated lint and thread debris from the motor area, bobbin case, and internal mechanisms.
What Causes That Burning Machine Smell
Your quilting machine works hard. All that stitching creates friction, heat, and debris. When things get too hot or too dirty, you smell it right away.
Think of it like your car engine. Run it too hard without maintenance, and something starts smoking. Your sewing machine follows the same rules.
Lint and Thread Buildup
This tops the list every time. Tiny fabric fibers collect inside your machine. They wrap around moving parts and block air vents.
When lint gets near the motor or heating elements, it burns. That’s your warning signal.
Motor Overheating
Quilting machines run motors constantly. Heavy fabrics, thick batting, or long sewing sessions make motors work harder.
Without proper airflow, temperatures rise fast. Hot motors smell metallic or plasticky.
Worn or Damaged Parts
Old belts start cracking. Bearings wear down. Plastic gears get stressed from use.
These parts create friction when they break down. More friction equals more heat and burning odors.
Quick Safety Check Before You Start
Stop sewing immediately when you smell burning. Unplug your machine and let it cool down completely.
Never ignore burning smells. They signal real problems that can damage your machine or create safety risks.
What to Look For Right Away
- Visible smoke or steam coming from the machine
- Hot spots on the case or motor housing
- Unusual sounds like grinding or squealing
- Scorch marks around vents or openings
Step-by-Step Cleaning Solutions
Most burning smells come from dirt and buildup. A good cleaning fixes 80% of these problems.
Clean the Bobbin Area First
Remove your bobbin and bobbin case. You’ll see lint everywhere – that’s normal.
Use a small brush or compressed air to clean out all debris. Get into every corner and crevice.
Tools You Need
- Small brush (old toothbrush works great)
- Compressed air canister
- Tweezers for stuck threads
- Clean cloth
Check Your Feed Dogs
Lower your feed dogs and clean underneath them. Thread pieces love hiding there.
This area connects directly to your motor. Keep it spotless.
Motor and Fan Cleaning
Look for air vents on your machine case. These need clear airflow to cool the motor.
Blow out dust and lint with compressed air. Work from inside out so debris doesn’t get pushed deeper.
Don’t Take Apart the Motor
Clean around the motor housing only. Internal motor repairs need professional service.
You can damage electrical components or void your warranty by going too deep.
Oiling and Lubrication Fixes
Dry moving parts create friction and heat. Your machine needs regular oiling to run smooth.
Where to Oil Your Machine
Check your manual for oil points. Most machines need oil on:
- Hook race and shuttle area
- Needle bar mechanism
- Take-up lever joints
- Any exposed moving metal parts
Use the Right Oil
Only use sewing machine oil. Other oils are too thick and collect more dirt.
One drop goes a long way. Too much oil attracts lint and makes problems worse.
Signs You Need More Oil
- Machine runs louder than usual
- Stitches skip or look uneven
- Controls feel stiff or jerky
- Slight burning smell during use
Tension and Threading Problems
Wrong tension settings force your machine to work harder. This creates extra heat and stress.
Check Your Thread Path
Follow your thread from spool to needle. Make sure it sits in every guide and tension disk properly.
Skipped guides cause uneven pulling and motor strain.
Test Your Tension Settings
Set tension to your manual’s recommended starting point. Usually around 4 or 5 for most threads.
Sew a test seam on scrap fabric. Adjust gradually until stitches look balanced.
When to Replace Parts
Some burning smells mean parts are wearing out. Cleaning won’t fix everything.
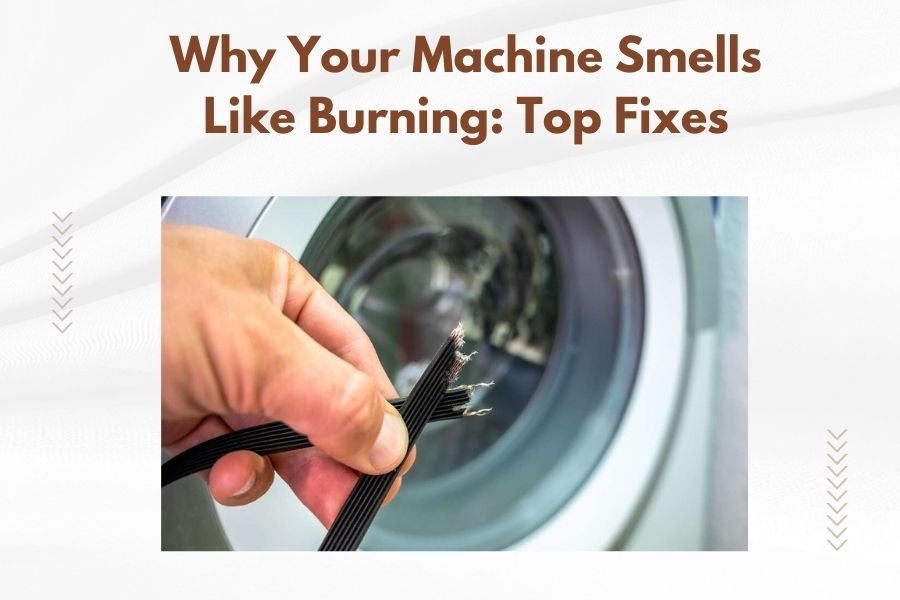
Drive Belt Inspection
Look for your drive belt near the motor. It should look smooth and flexible.
Replace belts that show cracks, fraying, or glazed surfaces. Bad belts slip and overheat.
Motor Brush Replacement
Carbon motor brushes wear down over time. When they get too short, they spark and smell.
This repair usually needs professional service. Don’t attempt it yourself unless you have electrical experience.
Signs of Brush Problems
- Sparking visible through motor vents
- Machine loses power gradually
- Burning electrical smell
- Motor runs rough or stutters
Prevention Tips That Actually Work
Regular maintenance prevents most burning smell problems. Small efforts save big repair bills.
Clean After Every Project
Spend five minutes cleaning lint after each quilting session. It becomes a quick habit.
Heavy quilting projects create more debris than regular sewing. Stay ahead of the buildup.
Use Quality Thread
Cheap thread shreds and leaves more lint. It also breaks more often, creating tangles and jams.
Good thread costs more upfront but saves maintenance time and reduces machine stress.
Take Breaks During Long Sessions
Let your machine rest every hour or two. Motors need cooling time, especially during heavy quilting.
Your hands need breaks too. Win-win situation.
Professional Help vs DIY Repairs
Some fixes you can handle at home. Others need expert attention.
| DIY Safe | Professional Service |
|---|---|
| Basic cleaning and lint removal | Motor repairs or replacement |
| Oiling accessible points | Electrical problems |
| Belt replacement (if accessible) | Internal gear adjustments |
| Tension adjustments | Computer board issues |
When to Call for Service
Don’t wait if you notice persistent burning smells after cleaning. Some problems get worse fast.
Electrical issues can damage other components if left alone. Better safe than sorry.
Conclusion
That burning smell from your quilting machine doesn’t have to ruin your project or your day. Most causes trace back to simple maintenance issues you can fix yourself.
Start with a thorough cleaning and proper oiling. Check your threading and tension settings. These steps solve the majority of burning smell problems.
Remember to clean regularly and take breaks during long quilting sessions. Your machine will run cooler, quieter, and last much longer with consistent care.
When DIY solutions don’t work, don’t hesitate to call for professional service. Sometimes expert help saves money compared to letting small problems become big repairs.
Why does my sewing machine smell like burning plastic?
Burning plastic smells usually come from overheated motor housings or electrical components. This often means blocked air vents or failing motor parts that need professional attention.
Can I still use my machine if it smells like burning?
Stop using your machine immediately when you smell burning. Continuing to sew can cause permanent damage to motors, circuits, or other expensive components.
How often should I deep clean my quilting machine?
Deep clean your machine every 10-15 hours of quilting time, or monthly if you sew regularly. Light cleaning after each project prevents most buildup problems.
What type of oil should I use in my sewing machine?
Only use oil specifically made for sewing machines. These oils are thin enough not to collect lint and won’t gum up moving parts like household oils can.
Is a burning smell always a serious problem?
Not always, but treat it seriously until you find the cause. Simple lint buildup creates burning smells but cleans up easily, while motor problems need immediate professional service.