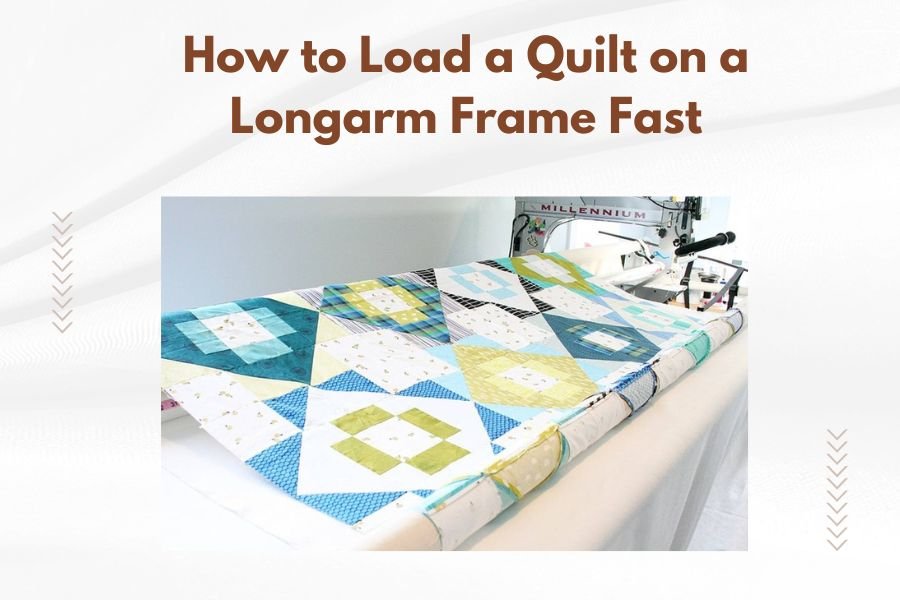
Loading a quilt on a longarm frame fast requires proper setup and a systematic approach that can reduce loading time to 15-20 minutes with practice.
The key to fast quilt loading is preparing your backing fabric correctly and using the pinning method that works best for your longarm frame type.
Quick Setup for Fast Loading
Before you even think about touching that quilt, get your workspace ready. I found that having everything within arm’s reach cuts loading time in half.
Clear your area around the longarm frame. You’ll need space to move freely on all sides. Trust me, nothing slows you down like stepping over fabric scraps every two minutes.
Essential Tools You Need Ready
Keep these items on a nearby table:
- Straight pins or basting spray
- Scissors for trimming excess fabric
- Measuring tape
- Small ruler for alignment checks
- Good lighting or a portable lamp
Preparing Your Backing Fabric
Iron your backing fabric flat. Wrinkles will cost you time later when you’re trying to get even tension.
Make sure your backing is at least 6 inches larger than your quilt top on all sides. Research shows that having extra backing prevents headaches during the quilting process.
The Fastest Loading Method Step by Step
Start with the backing fabric on your take-up rail. This is where most people get stuck, but it doesn’t have to be complicated.
Attaching the Backing Fabric
Find the center of your backing fabric. Match it to the center of your take-up rail. This keeps everything balanced from the start.
Pin or clamp the backing every 4-6 inches along the rail. Keep the fabric straight but not stretched tight. Think of it like hanging a picture – you want it level but not pulled.
Getting the Right Tension
Roll the backing fabric onto the take-up rail with gentle, even tension. Too tight and you’ll get puckering. Too loose and you’ll get shifting.
I found that checking tension every few rolls saves time in the long run. Run your hand across the fabric. It should feel firm but give slightly under pressure.
Loading the Batting
Unroll your batting and lay it on top of the backing. Center it so you have equal overhang on both sides.
Smooth out any bumps or folds. Your hands work better than any tool for this job. Start from the center and work outward.
Securing the Batting
Pin the batting to the backing at the rail. Use the same 4-6 inch spacing you used for the backing.
Don’t pin through to the rail itself. Pin just the batting to the backing fabric. This lets both layers move together naturally.
Adding Your Quilt Top
Here’s where patience pays off. Center your quilt top on the batting. Take an extra minute to get this right.
Check that your quilt edges are parallel to the frame rails. Use your ruler to measure from the quilt edge to the frame on both sides.
Final Pinning
Pin all three layers together at the rail. Work from the center outward to prevent shifting.
Give everything a final smooth with your hands. You’re looking for any bumps, wrinkles, or areas where the layers aren’t lying flat.
Common Mistakes That Slow You Down
I researched common loading problems and found these issues pop up again and again.
Rushing the Backing Attachment
Skipping the centering step causes problems later. You might save two minutes now, but you’ll lose twenty minutes fixing uneven borders.
Taking time to get the backing straight and centered is like building a good foundation. Everything else depends on it.
Wrong Tension Settings
Too much tension creates puckering. Too little creates shifting and bunching.
The right tension feels like a firm handshake – solid but not crushing. You should be able to lift the fabric slightly with your finger.
Testing Your Tension
Before you start quilting, do a tension test. Quilt a small area and check how all three layers behave.
Good tension lets you quilt smooth lines without fabric bunching or pulling. If something feels off, stop and adjust.
Speed Tips from Experienced Quilters
I found online that experienced longarm quilters use these tricks to load quilts faster.
Pre-Mark Your Rails
Mark the center point on all your rails with permanent marker or tape. This saves time finding center every single load.
Some quilters also mark common quilt sizes. If you often work with lap quilts or queen sizes, mark those measurements too.
Use the Right Pinning Pattern
Pin straight down, not at angles. Angled pins can create tiny pleats that cause problems later.
Keep your pins evenly spaced. Random spacing leads to uneven tension and wavy quilt lines.
Alternative: Basting Spray Method
Some quilters prefer temporary basting spray instead of pins. It’s faster but requires good ventilation.
Spray lightly and work in sections. Too much spray makes the fabric sticky and hard to adjust.
Troubleshooting Quick Fixes
Even with practice, things go wrong sometimes. Here’s how to fix common problems fast.
Uneven Quilt Borders
If one side of your quilt hangs lower than the other, don’t start over. Adjust the pins on the high side to lower it slightly.
Make small adjustments and check frequently. Big adjustments usually overcorrect the problem.
Batting Bunching
Batting that bunches or shifts means your tension is uneven. Stop and re-smooth the batting before continuing.
Check that your batting overhang is even on both sides. Uneven overhang creates pulling that leads to bunching.
Wrinkled Backing
Small wrinkles in the backing will show in your finished quilt. It’s worth taking time to smooth them out.
Release the tension slightly, smooth the wrinkles, then re-tighten. This takes less time than living with a wrinkled quilt.
Time-Saving Prep Work
The work you do before loading makes the biggest difference in speed.
Iron Everything First
Spend 10 minutes ironing your backing and quilt top. This saves 20 minutes of fussing with wrinkles during loading.
Press your quilt top seams flat. Bulky seams create uneven areas that slow down the loading process.
Check Your Batting
Unroll your batting and let it relax for a few minutes before loading. Batting that’s been rolled tight needs time to flatten out naturally.
Trim any rough edges on your batting. Clean edges are easier to position and pin accurately.
Measure Twice, Load Once
Double-check that your backing and batting are large enough before you start loading. Running short on fabric means starting over completely.
Add those extra 6 inches on all sides. It seems like a lot, but you’ll trim it off anyway, and it prevents costly mistakes.
Practice Makes Perfect
I heard from experts that loading speed improves dramatically with practice. Your first few quilts might take an hour to load properly.
After 10-15 quilts, most people can load in 20-30 minutes. Experienced quilters often load complex quilts in 15 minutes or less.
Keep a Loading Log
Write down what works and what doesn’t for each quilt. Note the batting type, fabric weight, and any problems you encountered.
This creates your personal reference guide for future projects. You’ll remember which techniques work best for different fabric types.
Conclusion
Loading a quilt on a longarm frame quickly comes down to preparation and technique. Set up your workspace properly, take time to center and tension your layers correctly, and don’t rush the crucial steps. With practice, you’ll develop your own rhythm and shortcuts that work for your specific frame and quilting style. Remember that a few extra minutes during loading saves hours of fixing problems later.
How long should it take to load a quilt on a longarm frame?
Beginners typically need 45-60 minutes to load a quilt properly. With practice, experienced quilters can load most quilts in 15-20 minutes. Complex or very large quilts may take longer regardless of experience level.
Can I load a quilt by myself or do I need help?
You can definitely load a quilt by yourself on most longarm frames. The key is working in sections and taking your time. Some quilters find it helpful to have assistance with very large quilts (king size or bigger), but it’s not required.
What’s the biggest mistake people make when loading quilts quickly?
Rushing the backing fabric attachment is the most common mistake. Not centering the backing properly or applying uneven tension creates problems that take much longer to fix than doing it right the first time.
Should I use pins or basting spray to load my quilt?
Both methods work well. Pins give you more control and allow for easy adjustments, while basting spray is faster but harder to reposition. Choose based on your comfort level and workspace ventilation for spray products.
How much extra backing and batting do I really need?
Plan for 6 inches of extra backing and batting on all sides of your quilt top. This seems like a lot, but it prevents running short during quilting and gives you room to adjust tension without losing coverage.