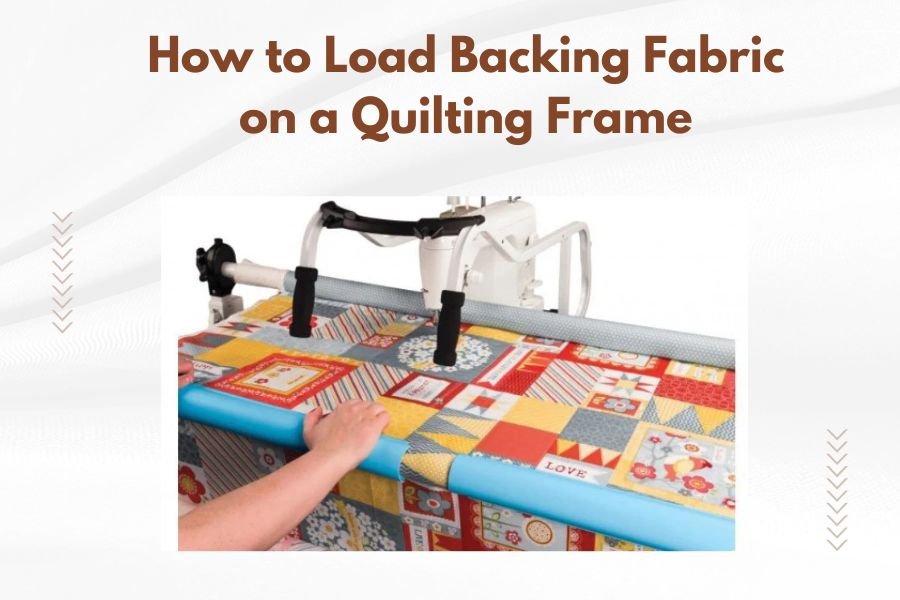
To load backing fabric on a quilting frame, start by centering and clamping the fabric to the back rail, then roll it forward while maintaining even tension across the width.
The key to successful backing fabric loading is working systematically from back to front, keeping the fabric smooth and wrinkle-free throughout the process.
Why Proper Backing Setup Makes All the Difference
You know that sinking feeling when you’re halfway through a quilt and notice puckering or bunching in your backing? I found through quilting forums that this frustration affects nearly every beginner at some point.
Getting your backing fabric loaded correctly from the start saves hours of fixing problems later. Think of it like making your bed – you want those sheets smooth and tight before adding the blanket.
What You Need Before Starting
Let me walk you through gathering your supplies first. You’ll want everything within arm’s reach because stopping mid-process can create tension issues.
Essential Tools and Materials
- Backing fabric (cut 6-8 inches larger than quilt top on all sides)
- Quilting frame with clamps or pins
- Sharp fabric scissors
- Measuring tape
- Safety pins (optional backup)
- Iron for pre-pressing seams
Preparing Your Workspace
Clear a path around your entire quilting frame. You’ll be walking around it several times, and trust me, you don’t want to trip over that box of fabric scraps.
Make sure your frame is level and stable. A wobbly frame leads to uneven tension, which creates those annoying wrinkles nobody wants.
Step-by-Step Loading Process
Here’s where the magic happens. I’ll break this down into manageable chunks so you don’t feel overwhelmed.
Step 1: Position Your Backing Fabric
Lay your backing fabric face-down on a clean surface. The right side should be touching the floor or table.
Find the center of your fabric by folding it in half lengthwise, then mark this spot lightly with a pin. This center point will align with the center of your frame’s back rail.
Step 2: Attach to the Back Rail
Start at the center of your back rail. Line up that center mark on your fabric with the center of the rail.
Clamp or pin the fabric to the rail, working from center outward. Keep about 2-3 inches of fabric extending beyond each end of the rail.
Getting the Right Tension
Pull the fabric snug but not tight. You want it firm enough to stay in place but loose enough that you’re not stretching the weave.
Many quilters I’ve read about online compare this to tuning a guitar – too loose and it won’t hold, too tight and something might snap.
Step 3: Roll Forward and Check
Now comes the satisfying part. Start rolling your fabric forward on the frame, keeping it straight and smooth.
Stop every few rolls to check for wrinkles or uneven edges. It’s much easier to fix issues now than after you’ve loaded the batting and top.
Dealing with Wrinkles
See a wrinkle forming? Stop rolling immediately. Gently smooth it out by lifting the fabric slightly and letting it resettle.
Sometimes you need to loosen the clamps, adjust the fabric, and re-tighten. Don’t rush this part – it’s the foundation of your entire quilt.
Common Mistakes to Avoid
From what I’ve learned through quilting communities, these mistakes show up again and again. Let’s help you skip them entirely.
The Tension Trap
Too much tension is the biggest mistake new quilters make. Your fabric should lie flat without being stretched like a drum.
Think of it like holding a baby bird – firm enough that it won’t fly away, gentle enough that you won’t hurt it.
Ignoring Fabric Grain
Always load your backing with the straight grain running parallel to the frame rails. Loading on the bias can cause stretching and distortion.
If you’re unsure about grain direction, look for the selvedge edges – these should run parallel to your frame’s length.
Skipping the Pre-Press
I found that many quilting experts recommend pressing your backing fabric before loading. This removes packaging creases that can become permanent once quilted over.
Take the extra 10 minutes to press out major wrinkles. Your future self will thank you.
Different Frame Types, Different Approaches
Not all quilting frames work exactly the same way. Let me break down the main differences you might encounter.
Traditional Quilting Frames
These usually have four rails forming a rectangle. You’ll attach your backing to the back rail first, then roll forward as described above.
The side rails help maintain width, so pay attention to keeping your fabric square as you roll.
Quilting Hoops and Lap Frames
Smaller frames require a different approach. You’re working with one section at a time, so smooth attachment becomes even more important.
Load your backing so the section you’re quilting first is easily accessible without strain.
Managing Larger Quilts on Small Frames
Working a king-size quilt on a lap frame? You’ll need to carefully fold and secure the excess fabric so it doesn’t pull or create tension issues.
Use large safety pins or quilting clips to bundle the excess fabric neatly out of your way.
Troubleshooting Common Issues
Even with careful preparation, things can go sideways. Here’s how to fix the most common problems without starting over.
Uneven Edges After Loading
If one side is tighter than the other, don’t panic. Loosen the clamps on the tight side and gently pull the loose side to match.
Sometimes the fabric shifts during rolling. This is normal and fixable with patience.
Diagonal Pulls or Twisted Fabric
This usually means your fabric wasn’t square when you started. You might need to unroll partway and reposition.
Check that your center mark is still aligned with the frame’s center. Small shifts can cause big problems down the line.
Pro Tips for Perfect Results
Here are some techniques I discovered through research that separate good backing jobs from great ones.
The Two-Person Method
Got a quilting buddy? Having someone help hold tension while you adjust clamps makes the job much easier.
One person can watch for wrinkles while the other focuses on rolling and attachment.
Mark Your Progress
Use removable tape or pins to mark your quilting sections on the backing. This helps you plan your quilting path and avoid working yourself into a corner.
Creating Reference Lines
Some quilters I’ve read about draw light pencil lines on their backing to help with alignment. Use a ruler and washable marking pencil for temporary guides.
These lines can help you keep borders straight and blocks properly aligned during quilting.
Maintaining Your Setup
Once your backing is loaded perfectly, you want to keep it that way throughout your quilting process.
Regular Tension Checks
Check your backing tension every time you advance the quilt. Temperature and humidity changes can affect how fabric behaves on the frame.
A quick smoothing with your hands can catch small issues before they become big problems.
Protecting Your Work
Cover your loaded frame when not in use. Dust and pet hair have a way of finding their way onto your beautiful backing fabric.
A clean sheet thrown over the whole frame works perfectly for short breaks.
When to Start Over
Sometimes despite our best efforts, the backing just isn’t cooperating. Here are the signs that starting fresh might be your best option.
Major Wrinkles That Won’t Smooth
If you have persistent wrinkles that keep coming back no matter how you adjust, it might be time to reload.
Fighting with problem fabric rarely leads to good quilting results. Better to spend 20 minutes reloading than hours trying to quilt around issues.
Significant Size Mismatch
Realize your backing is too small after you’ve loaded it? Don’t try to make it work by stretching. Add fabric or cut new backing instead.
Conclusion
Loading backing fabric on your quilting frame doesn’t have to be stressful. Take your time, work from center outward, and maintain gentle but firm tension throughout the process. Remember that getting this step right sets you up for hours of enjoyable quilting ahead. With practice, you’ll develop your own rhythm and shortcuts that work for your specific frame and quilting style. The extra care you put into proper backing preparation will show in every stitch of your finished quilt.
How tight should backing fabric be on a quilting frame?
Your backing should be snug enough to stay flat without wrinkles but loose enough that you’re not stretching the fabric’s weave. It should feel firm when you press on it but give slightly under pressure, similar to a properly made bed sheet.
Can you adjust backing fabric after you’ve started quilting?
Yes, you can make minor adjustments to backing tension even after starting to quilt. Loosen the clamps slightly, smooth out any issues, and re-tighten. Avoid major repositioning once you’ve quilted more than a few inches, as this can affect your stitching alignment.
What happens if my backing fabric is too small for the frame?
If your backing is too small, you’ll need to add fabric strips to increase the size or cut new backing entirely. Never stretch backing fabric to make it fit, as this creates tension problems and can distort your finished quilt. Plan for 6-8 inches of extra fabric on all sides.
Should backing fabric be pressed before loading on the frame?
Yes, always press your backing fabric before loading to remove packaging creases and wrinkles. These creases can become permanent once you quilt over them. Pay special attention to fold lines and any areas where the fabric was bunched during storage.
How do you prevent backing fabric from shifting during quilting?
Secure your backing with enough clamps or pins spaced evenly across the rail, typically every 4-6 inches. Check tension regularly as you work and advance the quilt, and smooth out any developing wrinkles immediately. Keep the quilting area clean and avoid putting excessive pressure on the fabric while stitching.