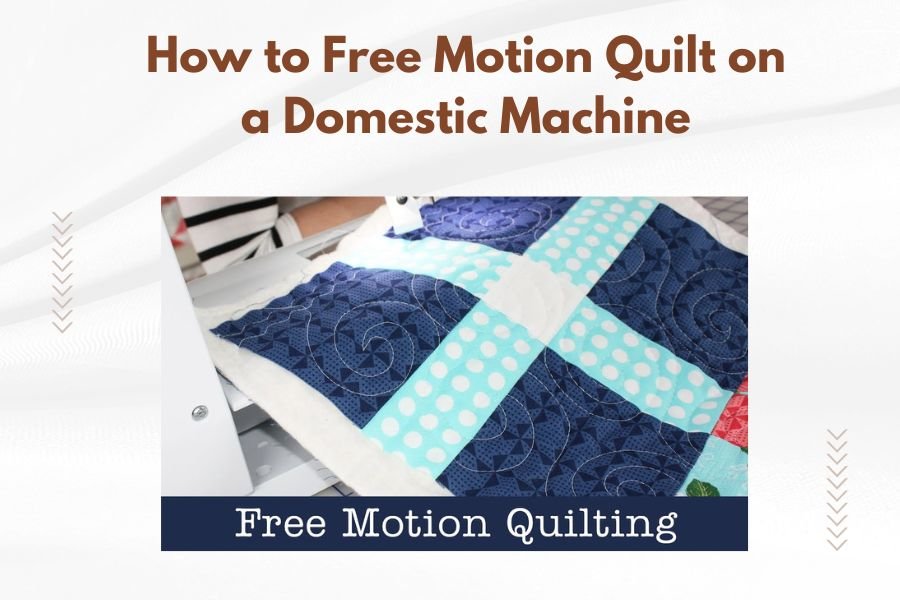
You can free motion quilt on a domestic machine by lowering the feed dogs, using a darning foot, and moving the fabric manually to create flowing stitched patterns.
Free motion quilting transforms your regular sewing machine into a creative tool that lets you draw with thread across your quilt sandwich.
What Is Free Motion Quilting?
Free motion quilting means you control the fabric movement instead of letting the machine feed it automatically. Think of it like drawing with a pencil, except your pencil is the needle and your canvas is fabric.
Your domestic machine becomes incredibly flexible when you drop those feed dogs. You guide the quilt in any direction – forward, backward, sideways, in circles. The possibilities are endless.
Essential Equipment You Need
Getting started requires a few key items. Don’t worry – you probably already own most of them.
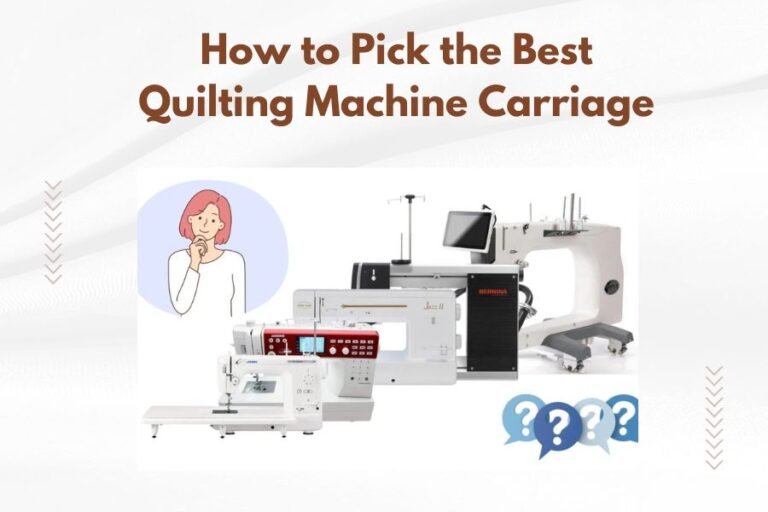
Your Sewing Machine Requirements
Any domestic machine that can drop feed dogs works for free motion quilting. Most modern machines have this feature. Check your manual if you’re not sure where the lever is.
You also need the ability to adjust stitch length to zero. This prevents the machine from trying to move the fabric automatically.
The Right Presser Foot
A darning foot or free motion foot is your best friend here. It hops up and down with the needle, giving you clear visibility while holding the fabric gently.
Some quilters prefer an open-toe darning foot because it shows more of your stitching line. Others like the spring-loaded hopping foot for better fabric control.
Thread and Needle Choices
Cotton thread works beautifully for beginners. It’s forgiving and creates nice texture. Polyester thread adds strength and comes in amazing colors.
Use a size 90/14 needle for cotton batting. Go up to 100/16 for thicker battings. A sharp point cuts through layers cleanly.
Setting Up Your Machine
Proper setup makes all the difference. Take time to get these settings right before you start stitching.
Feed Dog Position
Drop those feed dogs down or cover them completely. They need to be out of the way so they don’t grab your fabric unexpectedly.
Stitch Settings
Set your stitch length to zero. Choose a straight stitch. Your stitch width should also be at zero unless you want decorative zigzag effects.
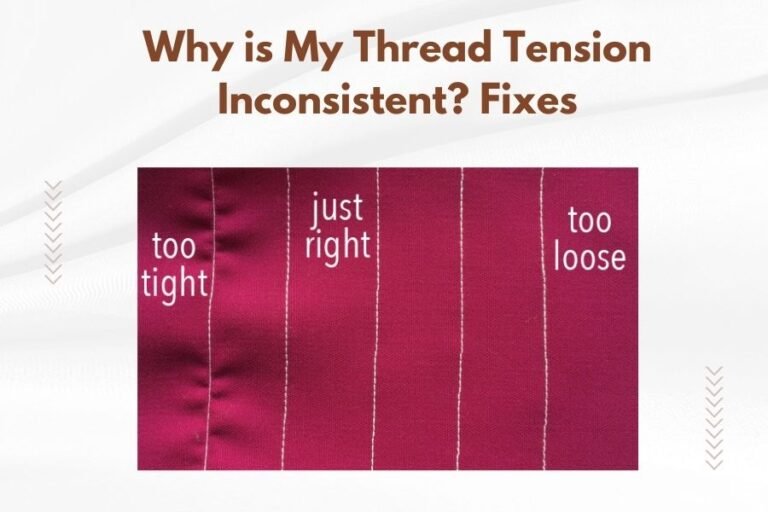
Tension Adjustments
Start with normal tension settings. You can adjust later if you see puckering or loose loops on top or bottom.
Good tension shows the same thread on both sides of your quilt sandwich. If you see bobbin thread on top, loosen the top tension slightly.
Preparing Your Quilt Sandwich
A well-prepared quilt sandwich prevents headaches later. This step sets you up for smooth quilting.
Layering Correctly
Place your backing face-down on a flat surface. Smooth out wrinkles. Add batting next, then your quilt top face-up.
Each layer should be 3-4 inches larger than the one above it. This extra fabric prevents shifting during quilting.
Basting Methods
Pin basting works great for smaller projects. Use curved safety pins every 4-6 inches across your quilt.
Spray basting is faster and creates a smoother surface for free motion work. Just follow the product directions and work in a well-ventilated area.
Your First Free Motion Experience
Ready to try it? Start with a practice sandwich first. Seriously – this saves you from frustration on your real project.
Hand Positioning
Place your hands on either side of the needle, about 4-6 inches away. Make a C-shape or use both hands like you’re holding a steering wheel.
Keep your hands relaxed. Tense hands create jerky movements and uneven stitches.
Movement Coordination
This is where the magic happens – and where beginners struggle most. You need to coordinate needle speed with fabric movement.
Fast needle speed with slow fabric movement creates tiny stitches. Slow needle with fast fabric movement makes long stitches.
Finding Your Rhythm
Start stitching at medium speed. Move the fabric smoothly and steadily. Think of painting broad strokes rather than tiny details.
Don’t stop moving the fabric while the needle is stitching. This creates thread buildup and possible tangles.
Basic Free Motion Patterns
Begin with simple shapes before attempting complex designs. These patterns build your confidence and muscle memory.
Stippling or Meandering
This squiggly, random pattern is perfect for beginners. The rules are simple: don’t cross your lines and keep moving in flowing curves.
Imagine you’re following a river that winds gently across your quilt. No sharp turns or sudden direction changes.
Loops and Swirls
Once stippling feels comfortable, try loops. Make them different sizes for visual interest. Connect them with gentle curves.
Swirls add elegance to quilts. Start small and gradually make larger spirals as your confidence grows.
Echo Quilting
Follow the outline of your quilt blocks, then echo that line again about 1/4 inch away. Keep echoing outward like ripples in a pond.
Straight Line Variations
Try wavy lines, gently curved lines, or lines that follow your fabric patterns. Straight-ish lines are easier than perfect curves.
Common Beginner Problems and Solutions
Every quilter faces these challenges. Knowing what to expect helps you solve problems quickly.
Thread Breaks
Usually caused by moving the fabric too fast or using old thread. Slow down your fabric movement or replace your thread.
Check your needle too. Dull needles create more friction and heat, leading to thread breaks.
Uneven Stitches
This happens when your hand speed doesn’t match your needle speed. Practice on scraps until you find your natural rhythm.
Some variation is normal and adds character to hand-guided quilting. Don’t aim for machine perfection.
Puckering Fabric
Too much tension or inadequate basting usually causes puckering. Re-baste if needed, or loosen your tension settings.
Also check that you’re not pulling or pushing the fabric too forcefully.
Advanced Tips for Better Results
Once you’re comfortable with basics, these tips will improve your quilting quality.
Planning Your Quilting Path
Think about where you’ll start and end each section. Try to minimize stops and starts – they often show in the finished quilt.
Quilt from the center outward when possible. This prevents fabric from bunching up in the middle.
Managing Bulk
Large quilts get heavy and unwieldy. Roll the sides and use clips or bicycle clamps to keep bulk away from your needle area.
Work in sections, moving systematically across your quilt. Some quilters prefer to complete entire areas before moving on.
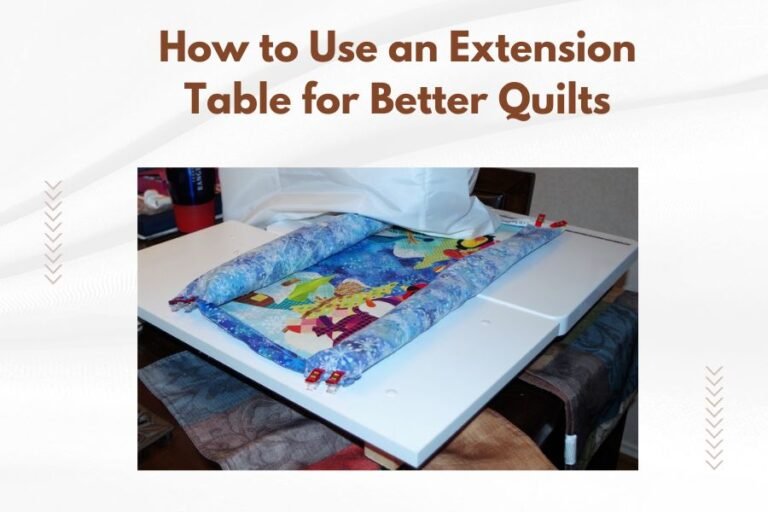
Supporting the Weight
Set up tables on both sides of your machine to support quilt weight. Your shoulders will thank you after long quilting sessions.
Troubleshooting Machine Issues
Sometimes the machine acts up during free motion work. Here’s how to get back on track.
Skipped Stitches
Usually means your needle needs replacing or you’re moving the fabric too fast in one direction.
Try a new needle first – it’s the cheapest fix. If that doesn’t work, slow down your fabric movement.
Bobbin Problems
Free motion quilting uses more bobbin thread than regular sewing. Keep extras wound and ready.
If your bobbin thread keeps breaking, check that it’s not old or that lint isn’t clogging your bobbin case.
Building Your Skills Gradually
Don’t expect perfection immediately. Free motion quilting is a skill that develops over time with practice.
Practice Exercises
Spend 10-15 minutes before each quilting session doing warm-up exercises on practice fabric. This gets your hands and brain coordinated.
Try writing your name in cursive with the needle. It’s great practice for smooth, connected movements.
Keeping a Learning Journal
Note what works and what doesn’t. Which thread combinations do you like? What patterns feel natural to you?
Take photos of your practice pieces. You’ll be amazed at how quickly you improve when you can see the progress.
Conclusion
Free motion quilting on your domestic machine opens up a world of creative possibilities. With the right setup, some practice, and patience with yourself, you’ll soon be creating beautiful quilted designs that add personality and texture to your projects. Remember that every expert quilter started exactly where you are now – with curiosity, a willingness to learn, and probably a few tangled threads along the way. Start with simple patterns, practice regularly, and don’t be afraid to make mistakes. They’re just learning opportunities in disguise. Your unique quilting style will develop naturally as you gain confidence with the technique.
Can I free motion quilt without dropping the feed dogs?
While possible, it’s much harder to control fabric movement with feed dogs up. They’ll fight your hand movements and create uneven stitches. Most quilters find dropping the feed dogs essential for smooth free motion work.
How do I know if my domestic machine can handle thick quilt sandwiches?
Test with a sample sandwich first. If your machine struggles, labors, or makes unusual noises, the sandwich may be too thick. Try thinner batting or fewer fabric layers. Most domestic machines handle cotton batting with two fabric layers just fine.
What’s the difference between free motion quilting and regular quilting?
Regular quilting uses the machine’s feed dogs to move fabric automatically in straight lines. Free motion quilting lets you guide the fabric manually in any direction, creating curves, loops, and custom patterns impossible with feed dogs engaged.
How long should I practice before quilting my first real project?
Most quilters benefit from 3-4 hours of practice spread over several sessions before attempting a real project. Practice until you can maintain consistent stitch length and smooth curves without thinking about hand coordination.
Why does my thread keep breaking during free motion quilting?
Thread breaks often happen from moving fabric too quickly, using old or poor-quality thread, or having a dull needle. Try slowing down your movements, replacing your needle, or switching to fresh thread. Also check that your machine isn’t overheating from extended use.