A broken stitch regulator cable can be fixed by first disconnecting power, then carefully removing the cable housing to inspect for internal wire breaks, corrosion, or loose connections.
Most stitch regulator cable issues stem from worn internal wires or damaged connector pins that you can repair with basic tools and replacement parts from your quilting machine manufacturer.
What Is a Stitch Regulator Cable and Why Does It Break?
Your stitch regulator cable connects the foot pedal or control unit to your quilting machine’s main system. Think of it like the nervous system of your quilting setup.
This cable carries electrical signals that tell your machine exactly how fast to stitch. When it breaks, your machine might stitch erratically, stop working, or ignore your speed commands completely.
I found that most cables break from repeated flexing over time. The constant bending and straightening eventually wears down the tiny copper wires inside.
Common Signs Your Cable Needs Attention
You’ll know something’s wrong when your stitching becomes unpredictable. Maybe your machine suddenly speeds up without warning. Or it might slow down to a crawl when you need it fast.
Sometimes the machine won’t respond to your foot pedal at all. Other times, it works perfectly for a few minutes, then acts up again.
Safety First: Preparing Your Workspace
Before you touch anything, unplug your quilting machine from the wall. I can’t stress this enough. Electricity and repairs don’t mix well.
Find a clean, well-lit workspace where you can spread out your tools. You’ll need room to lay out small parts without losing them.
Essential Tools You’ll Need
Gather these items before you start:
- Small Phillips head screwdriver
- Flathead screwdriver (tiny one)
- Wire strippers
- Electrical tape
- Multimeter (optional but helpful)
- Good lighting or flashlight
Optional But Helpful Items
A magnifying glass makes inspecting tiny wires much easier. Small needle-nose pliers can help you grip delicate components.
Keep a small bowl nearby for screws and small parts. Trust me, they love to roll away and hide.
Step-by-Step Diagnosis Process
Start by examining the cable from end to end. Look for obvious damage like cuts, kinks, or crushed sections.
Pay special attention to areas where the cable bends frequently. These spots take the most abuse and fail first.
Testing the Cable Connections
Check both ends of the cable. The connectors should fit snugly into their sockets. Loose connections cause intermittent problems.
Wiggle the cable gently while it’s connected. If your machine responds erratically during this test, you’ve found your problem area.
Visual Inspection Tips
Look for green or white corrosion on metal parts. This stuff eats away at electrical connections like rust on a car.
Bent or broken pins in the connector are usually easy to spot. They’ll look different from the others or might be missing entirely.
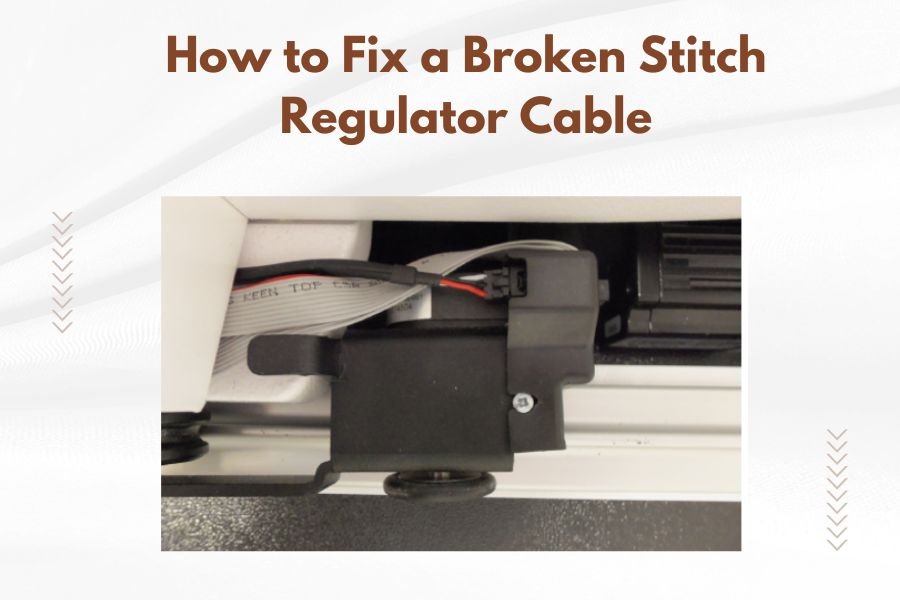
Opening the Cable Housing Safely
Most stitch regulator cables have a plastic housing that protects the internal wires. You’ll need to open this to see what’s inside.
Look for small screws holding the housing together. Some cables use snap-together housings instead. Be gentle here.
What You’ll Find Inside
Inside, you’ll see several thin wires, usually different colors. These carry different signals between your controller and machine.
The wires connect to small metal pins or terminals. This is where most problems happen.
Identifying Problem Areas
Broken wires are usually obvious. You’ll see copper strands that aren’t connected to anything anymore.
Loose connections might be harder to spot. Look for wires that seem barely attached to their terminals.
Common Cable Problems and Quick Fixes
| Problem | Symptoms | Fix Difficulty |
|---|---|---|
| Broken internal wire | Complete loss of function | Medium |
| Loose connection | Intermittent problems | Easy |
| Corroded terminals | Erratic behavior | Easy |
| Damaged connector housing | Won’t stay connected | Hard |
Fixing Broken Internal Wires
If you find a broken wire, you can usually splice it back together. Strip about a quarter inch of insulation from each broken end.
Twist the copper strands together tightly. Wrap the connection with electrical tape to prevent shorts.
Making Solid Wire Connections
A good connection should be mechanically strong before you add electrical tape. If you can pull it apart easily, it’s not ready yet.
Make sure no bare copper wire extends beyond your tape wrap. Exposed metal can cause short circuits.
Cleaning Corroded Terminals
Light corrosion often wipes away with a clean cloth. Stubborn buildup might need gentle scraping with a small screwdriver.
Be careful not to damage the underlying metal. You want to remove corrosion, not the terminal itself.
Preventing Future Corrosion
A tiny dab of petroleum jelly on clean terminals can prevent future corrosion. Don’t use too much, just enough to coat the surface.
Some people prefer electrical contact cleaner, which evaporates and leaves a protective coating behind.
Tightening Loose Connections
Many cables use small screws to hold wires in place. Over time, these screws can work loose from vibration.
Tighten them carefully. Too much force can strip the tiny screw threads or break the terminal.
When to Replace vs. Repair
Sometimes repair isn’t worth the effort. If multiple wires are broken or the connector housing is cracked, replacement might be smarter.
I found that cables with extensive internal damage often develop new problems shortly after repair.
Cost Considerations
New stitch regulator cables typically cost between $50 and $150, depending on your machine model. Repairs usually cost much less.
Factor in your time and frustration level. Sometimes paying for a new cable brings peace of mind.
Testing Your Repair Work
Before reassembling everything, test your repairs carefully. Reconnect the cable and power up your machine.
Try different stitch speeds to make sure everything responds properly. Pay attention to any unusual behavior.
Using a Multimeter for Advanced Testing
If you have a multimeter, you can test cable continuity before powering up. This prevents potential damage from short circuits.
Set the meter to continuity mode and test each wire from end to end. You should hear a beep for good connections.
Interpreting Test Results
No beep means that wire is broken somewhere. Multiple wires beeping together suggests a short circuit between them.
Each wire should only connect to its corresponding terminal on the other end, nothing else.
Reassembly and Final Checks
Put the cable housing back together carefully. Make sure no wires get pinched between the housing pieces.
Double-check that all screws are tight but not over-tightened. The housing should fit together smoothly.
Final Function Test
With everything reassembled, do a complete function test. Try slow stitching, fast stitching, and stopping mid-stitch.
Your machine should respond smoothly to all commands. Any hesitation or erratic behavior means more troubleshooting is needed.
Preventing Future Cable Problems
Proper cable management prevents most failures. Avoid sharp bends, especially near the connectors.
Keep cables away from heat sources and moving parts that might damage them over time.
Regular Maintenance Tips
Check your cables monthly for signs of wear. Catching problems early makes repairs much easier.
Clean the connectors occasionally with a dry cloth. Dust and lint can interfere with electrical connections.
Storage Best Practices
When not in use, coil cables loosely. Tight coils stress the internal wires unnecessarily.
Store cables in a clean, dry place. Moisture promotes corrosion and other electrical problems.
When to Call a Professional
Some repairs are beyond typical DIY skills. If you’re not comfortable working with electrical components, professional repair is smart.
Complex problems involving the machine’s internal wiring definitely need expert attention.
Finding Qualified Repair Services
Look for services that specialize in quilting machine repairs. They understand these systems better than general electronics repair shops.
Many quilting machine dealers offer repair services or can recommend qualified technicians.
Conclusion
Fixing a broken stitch regulator cable is often simpler than it seems. Most problems involve loose connections or broken wires that you can repair with basic tools and patience.
Remember to always work safely with the power disconnected. Take your time during diagnosis to avoid missing subtle problems that could cause issues later.
With proper care and maintenance, your repaired cable should provide years of reliable service. Regular inspections and gentle handling will prevent most future problems.
How long does a typical stitch regulator cable repair take?
Most simple repairs like tightening connections or splicing a single broken wire take 30-60 minutes. More complex issues involving multiple breaks or connector replacement can take 2-3 hours.
Can I use any replacement cable or does it have to be the original brand?
You should use cables specifically designed for your machine model. Generic cables might fit physically but could have different electrical specifications that damage your quilting machine’s control system.
Why does my repaired cable work sometimes but not others?
Intermittent problems usually indicate a loose connection that makes contact only when positioned just right. Double-check all wire connections and make sure they’re mechanically secure before adding electrical tape.
What should I do if I accidentally damage more wires while making repairs?
Stop immediately and reassess the situation. Multiple damaged wires often mean the cable needs replacement rather than repair. Continuing with extensive damage rarely produces reliable long-term results.
How can I tell if my machine’s control unit is damaged instead of just the cable?
Try a known good cable if available, or test your repaired cable on another compatible machine. If the cable works elsewhere but not on your machine, the control unit likely needs professional service.