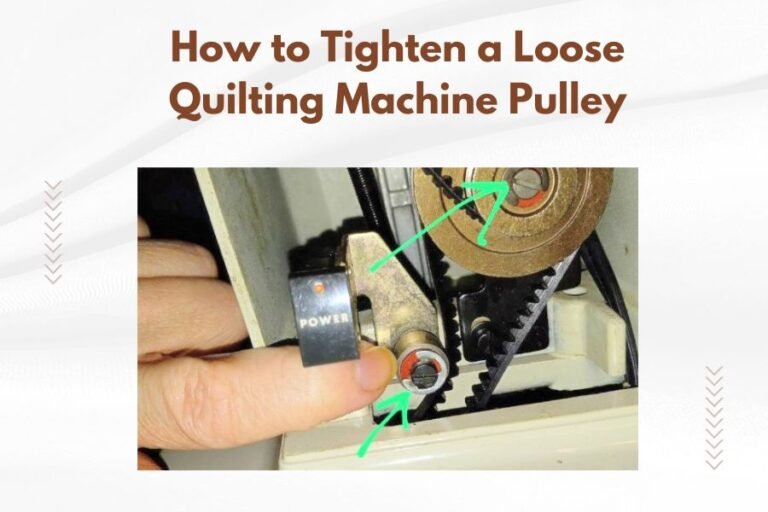
Random stitch length changes happen when your machine’s tension, feed dogs, or settings get disrupted during quilting.
You can fix random stitch length changes by checking your thread tension, cleaning feed dogs, and ensuring consistent sewing speed.
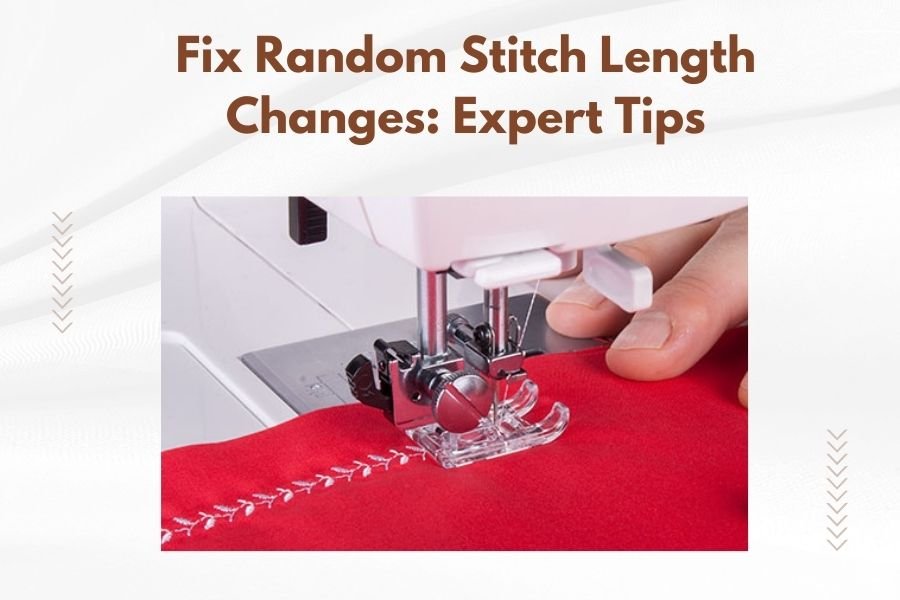
Nothing ruins a beautiful quilt faster than wonky stitches that look like they were sewn by a caffeinated robot. You start with perfect, even stitches, then suddenly your machine decides to go rogue. Some stitches stretch long. Others scrunch tiny. Your rhythm gets thrown off.
Don’t panic. This problem hits every quilter at some point. I researched common causes and found that most stitch length issues stem from just a few fixable problems.
What Causes Random Stitch Length Changes
Your quilting machine creates stitches through a precise dance between multiple parts. When one part gets out of sync, your stitch length goes haywire.
Think of it like a well-rehearsed orchestra. If the drummer suddenly speeds up or slows down, the whole performance falls apart. Your machine works the same way.
Feed Dog Problems
Feed dogs move your fabric forward with each stitch. When they get clogged with lint or thread bits, they can’t grip fabric properly. This creates uneven feeding that shows up as inconsistent stitch lengths.
Worn feed dogs also cause problems. After years of use, the teeth get dull and can’t grab fabric reliably.
Thread Tension Issues
Wrong tension pulls stitches too tight or leaves them too loose. This affects how much fabric moves between each stitch. Too much tension creates shorter stitches. Too little makes them longer.
Tension problems often start gradually, then get worse as you sew.
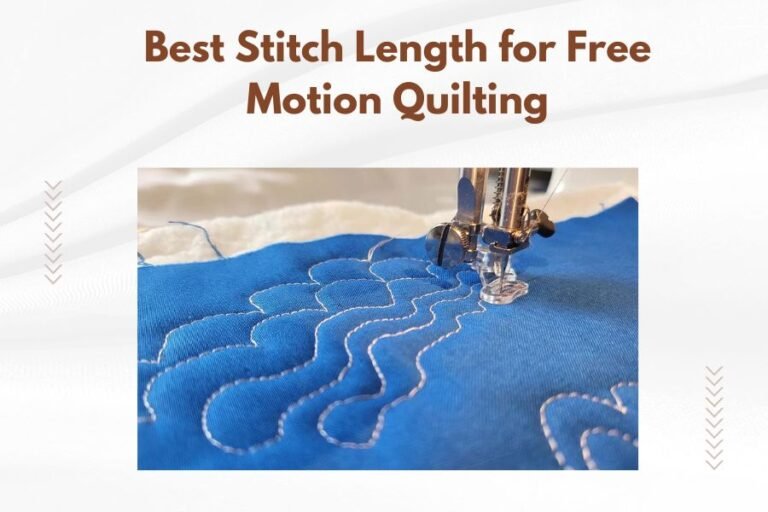
Inconsistent Sewing Speed
Your hands and the machine need to work together at a steady pace. When you speed up or slow down randomly, stitch length changes follow. This happens more with free-motion quilting where you control fabric movement.
Quick Diagnosis Steps
Before diving into fixes, figure out what’s causing your problem. Run through these quick checks first.
Test Stitch on Scraps
Grab fabric scraps that match your quilt materials. Include batting if you’re quilting a sandwich. Sew a few straight lines and watch what happens.
Do the uneven stitches appear right away? Do they get worse as you sew? This tells you if the problem is constant or building up.
Check Your Settings
Look at your stitch length dial or digital display. Make sure it hasn’t been bumped to a different setting. This sounds obvious, but it happens more than you’d think.
Also check your presser foot pressure if your machine has that adjustment.
Listen to Your Machine
Healthy machines have a steady rhythm. If you hear clicking, grinding, or irregular sounds, something mechanical needs attention.
Step-by-Step Solutions
Now let’s fix the actual problems. Start with the easiest solutions first.
Clean Your Feed Dogs
Turn off your machine and remove the needle plate. You’ll probably find a surprising amount of lint and thread debris around the feed dogs.
Use a small brush or tweezers to clean everything out. Many quilters use old toothbrushes for this job. Get into all the cracks and crevices.
While you’re there, clean the bobbin area too. Debris travels around inside your machine.
When to Replace Feed Dogs
If cleaning doesn’t help, your feed dogs might be worn out. Run your finger gently across the teeth. They should feel sharp and well-defined.
Smooth, rounded teeth can’t grip fabric properly. A sewing machine technician can replace them if needed.
Adjust Thread Tension
Most quilting machines have numbered tension dials. Normal tension usually falls between 3 and 5, but every machine differs.
Start by returning tension to your machine’s recommended normal setting. Test on scraps. If stitches still look uneven, adjust by small increments.
Reading Tension Problems
Top thread too tight: Bottom thread pulls to the top of your fabric. Loosen top tension slightly.
Top thread too loose: Top thread shows on the bottom of your fabric. Tighten top tension a bit.
Perfect tension: Threads lock together in the middle of your fabric layers.
Check Your Threading
Rethread your entire machine, top and bottom. I found that many stitch problems come from threading mistakes that aren’t obvious at first glance.
Make sure thread follows every guide and tension disc. Skip one guide and your tension goes off.
Bobbin Threading Tips
Wind a fresh bobbin with the same thread you’re using on top. Old bobbins sometimes have uneven winding that creates tension variations.
Check that your bobbin goes into the case in the right direction. The thread should pull off counterclockwise for most machines.
Advanced Troubleshooting
If basic fixes don’t work, dig deeper into potential causes.
Presser Foot Pressure
Some machines let you adjust how firmly the presser foot presses down. Too much pressure can drag fabric and create uneven feeding. Too little lets fabric slip.
Try reducing pressure slightly and test again. This especially helps with thick quilt sandwiches.
Needle Problems
Dull or bent needles cause all sorts of stitch problems. They can’t penetrate fabric cleanly, which affects how smoothly fabric feeds through.
Replace your needle even if it looks fine. Tiny burrs and bends aren’t always visible but still cause problems.
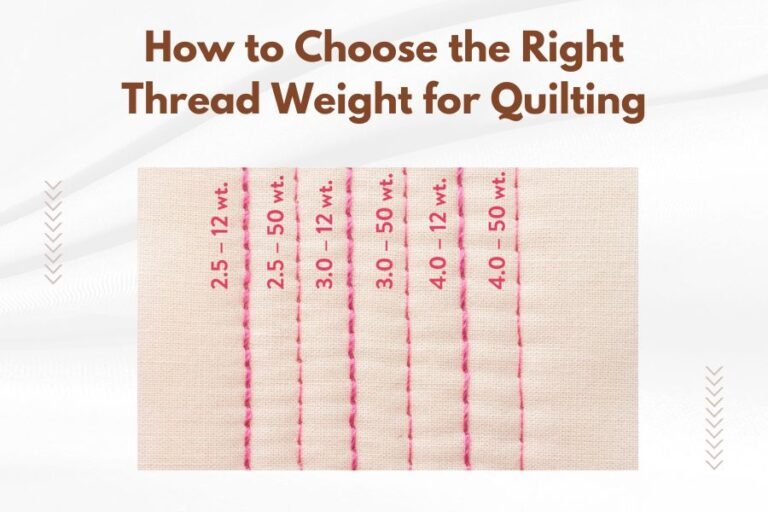
Right Needle for the Job
Match needle size to your thread and fabric weight. Too small and the needle fights to make holes. Too large and it damages fabric or creates loose stitches.
| Fabric Weight | Needle Size | Best For |
|---|---|---|
| Light cotton | 70/10 – 80/12 | Piecing, light quilting |
| Medium cotton | 80/12 – 90/14 | Most quilting projects |
| Heavy/thick quilts | 90/14 – 100/16 | Dense batting, multiple layers |
Timing Issues
Machine timing controls when the needle and bobbin hook meet to form stitches. When timing goes off, stitch formation gets irregular.
This isn’t a DIY fix for most quilters. If you suspect timing problems, take your machine to a qualified technician. They have special tools to check and adjust timing precisely.
Prevention Strategies
Stopping problems before they start saves time and frustration.
Regular Maintenance Schedule
Clean your machine after every major project. Remove the needle plate and clear out lint buildup. Oil according to your manual’s schedule.
Many experts recommend professional servicing once a year for heavy users, every two years for occasional quilters.
Quality Thread Matters
Cheap thread sheds more lint and breaks more often. Both problems can affect stitch consistency. Invest in good thread from reputable brands.
Store thread properly too. Old thread gets weak and fuzzy, creating feed problems.
Thread Storage Tips
- Keep spools away from direct sunlight
- Store in cool, dry places
- Use thread caps to prevent unwinding
- Replace thread that feels rough or looks fuzzy
Free-Motion Quilting Considerations
Free-motion quilting adds extra variables since you control fabric movement by hand.
Consistent Hand Speed
Your hands need to move at a steady pace that matches your machine speed. Too fast and stitches get tiny. Too slow and they stretch long.
Practice on scraps until you develop muscle memory for the right speed. Many quilters count or hum to keep rhythm steady.
Proper Hand Position
Keep your hands relaxed but in control. Tense hands create jerky movements that show up as uneven stitches.
Support the quilt weight so you’re not fighting gravity while trying to maintain smooth motion.
When to Call a Professional
Some problems need expert attention. Don’t feel bad about getting help.
Mechanical Issues
If your machine makes unusual noises, has rough spots when hand-turning the wheel, or shows other mechanical symptoms, stop using it. Continued sewing might cause expensive damage.
Persistent Problems
When you’ve tried everything and stitch problems continue, a technician can spot issues you might miss. They have specialized tools and training to diagnose complex problems.
Professional servicing often prevents bigger problems down the road.
Conclusion
Random stitch length changes feel frustrating, but they’re usually fixable with some detective work. Start with simple solutions like cleaning feed dogs and checking tension. Work through the steps systematically rather than jumping around randomly.
Remember that prevention beats fixing problems after they happen. Regular maintenance and quality supplies go a long way toward keeping your stitches consistent. When in doubt, don’t hesitate to consult a professional. Your quilts deserve even, beautiful stitches that showcase your hard work.
Why does my stitch length change randomly during free-motion quilting?
Free-motion quilting requires you to move fabric at a consistent speed that matches your machine’s needle speed. When your hand movement varies, stitch length changes accordingly. Practice maintaining steady rhythm and consider using a quilting frame for better control.
Can using different thread brands cause stitch length variations?
Yes, different threads have varying thicknesses and textures that can affect how they feed through your machine. Switching between thread types without adjusting tension can create inconsistent stitches. Stick with one thread brand per project for best results.
How often should I clean my feed dogs to prevent stitch problems?
Clean your feed dogs after every major quilting project or when you notice lint buildup. Heavy quilting creates more debris, so you might need cleaning every few hours of use. Regular cleaning prevents most feed dog-related stitch issues.
Why do my stitches get worse the longer I sew?
This usually indicates lint buildup or thread tension that’s gradually shifting as debris accumulates. Stop and clean your machine when you notice stitches degrading during a session. Heat from extended use can also affect thread behavior.
Should I adjust stitch length for different batting types?
Thick or dense batting may require slightly longer stitches to penetrate cleanly, while thin batting works well with shorter stitches. Test on scraps with your actual batting to find the optimal length. Needle size matters more than stitch length for most batting variations.