A loose power cord on your quilting machine can cause intermittent power loss, making your machine stop and start unexpectedly during projects.
You can fix a loose power cord by checking the connection points, tightening loose plugs, and replacing damaged cords to keep your machine running smoothly.
Why Your Quilting Machine Power Cord Becomes Loose
Your power cord gets loose from regular use. Every time you move your machine or unplug it, the connections wear down a little bit. Think of it like a door handle that gets wobbly after years of use.
Heat also plays a role. The electrical current creates warmth, which makes metal parts expand and contract. This constant movement can loosen connections over time.
Common Signs of Power Cord Problems
Your machine will tell you when something’s wrong. Watch for these warning signs:
- Machine stops working suddenly while sewing
- Power comes and goes when you move the cord
- You smell burning plastic near the power connection
- The plug feels hot after using your machine
- Sparks when you plug or unplug the cord
Safety First: Turn Off and Unplug
Before you touch anything, turn off your machine completely. Unplug it from the wall outlet and let it sit for a few minutes. This gives any stored electricity time to discharge.
Never work on electrical connections while power is flowing. It’s like trying to fix a leaky faucet with the water still running – messy and dangerous.
What You’ll Need for the Repair
Gather these basic tools before starting:
- Screwdriver set (both flathead and Phillips)
- Wire strippers
- Electrical tape
- Multimeter (optional but helpful)
- Replacement power cord (if needed)
Step-by-Step Power Cord Inspection
Start your inspection at the wall outlet. Plug something else into the same outlet to make sure it’s working properly. Sometimes the problem isn’t your machine at all.
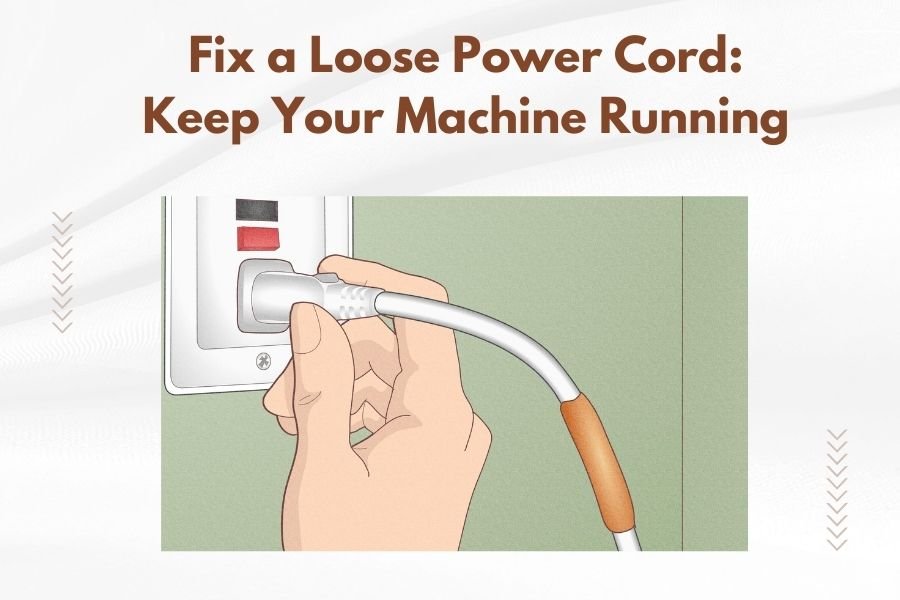
Check the Wall Plug Connection
Look closely at where your power cord plugs into the wall. The plug should fit snugly without wiggling around. If it feels loose in the outlet, you might need an electrician to replace the wall socket.
Examine the plug itself. Look for bent prongs, burn marks, or cracked plastic. These are signs that you need a new power cord.
Testing Plug Tightness
A good plug should stay in place when you gently tug on the cord. If it falls out easily, the plug prongs may be worn down from years of use.
Examine the Cord Along Its Length
Run your hands along the entire power cord from plug to machine. Feel for any soft spots, cracks, or areas where the outer coating seems damaged.
Pay special attention to areas where the cord bends frequently. These spots wear out faster than straight sections.
Look for Internal Wire Damage
Gently flex the cord while looking for changes in thickness. If you feel bumps or thin spots, the internal wires might be broken or frayed.
Checking Your Machine’s Power Connection
Now look at where the power cord connects to your quilting machine. This connection point takes a lot of stress from daily use.
External Connection Points
Most quilting machines have a removable power cord that plugs into the back or side of the machine. Check if this connection feels secure.
Wiggle the cord gently while it’s plugged in. You shouldn’t see any movement at the connection point. If the plug moves around, it’s too loose.
Cleaning Connection Points
Dust and lint can build up in connection points, causing poor contact. Use compressed air to blow out any debris from both the cord plug and machine socket.
Internal Connection Assessment
Some machines have power cords wired directly inside. You’ll need to remove the machine’s cover to check these connections.
Look for loose wire nuts, frayed wires, or burn marks near connection points. Take photos before you disconnect anything so you remember how to put it back together.
Quick Fixes for Common Problems
Many power cord issues have simple solutions. Try these fixes before buying replacement parts.
Tightening Loose Plugs
If your plug feels loose in the wall outlet, you can carefully bend the prongs slightly outward with pliers. This increases the contact pressure.
Be gentle – metal prongs can break if you bend them too far. Make tiny adjustments and test the fit after each one.
Using Outlet Shims
You can buy plastic outlet shims that make loose outlets grip plugs tighter. These cost a few dollars and work well for temporary fixes.
Securing Machine Connections
For loose connections at your machine, try unplugging and reconnecting the power cord several times. This can clean oxidation off the contact points.
If the socket seems loose, check if there are screws holding it in place that need tightening.
When to Replace Your Power Cord
Some problems can’t be fixed with simple adjustments. You’ll need a new power cord if you find any of these issues.
Signs You Need a New Cord
Replace your power cord immediately if you see:
- Exposed copper wires anywhere along the cord
- Melted or burned plastic on the plug or cord
- Cracks in the plug housing
- Bent prongs that won’t straighten properly
- Areas where the cord feels unusually hot during use
Finding the Right Replacement
Check your machine’s manual for the exact power cord specifications. You need to match the voltage, amperage, and connector type.
Many quilting machines use standard computer-style power cords. These are easy to find and relatively inexpensive.
OEM vs. Generic Cords
Original equipment manufacturer (OEM) cords from your machine’s maker will fit perfectly but cost more. Generic cords work fine if they meet the same electrical specifications.
Professional Repair vs. DIY
Most power cord problems are safe to fix yourself. But some situations require professional help.
When to Call a Professional
Get professional help if:
- You smell burning electronics inside your machine
- The machine’s internal wiring looks damaged
- You’re not comfortable working with electrical connections
- Your machine is still under warranty
Professional repair typically costs between $50 and $150, depending on the problem’s complexity.
DIY Repair Limits
Stick to external connections and simple cord replacements. Don’t attempt to rewire internal machine circuits unless you have electrical experience.
Preventing Future Power Cord Problems
Good maintenance habits can help your power cord last longer and work more reliably.
Proper Cord Storage
Don’t wrap your power cord tightly around your machine. This stresses the wires and can cause internal breaks over time.
Instead, coil the cord loosely and store it in a separate bag or box. Keep it away from sharp objects that might nick the outer coating.
Avoiding Cord Stress
Make sure your power cord isn’t stretched tight when you’re sewing. The cord should have some slack so it doesn’t pull on the connections.
Regular Maintenance Schedule
Check your power cord monthly for signs of wear. Look for any changes in flexibility or appearance along the entire length.
Clean the connection points every few months to prevent dust buildup. A quick blast of compressed air does the job well.
| Problem | Quick Fix | Replacement Needed |
|---|---|---|
| Loose wall plug | Bend prongs slightly | If prongs are damaged |
| Loose machine connection | Clean and reconnect | If socket is broken |
| Intermittent power | Check all connections | If internal wires broken |
| Hot plug | None – safety issue | Yes, immediately |
Conclusion
Fixing a loose power cord keeps your quilting machine running smoothly and safely. Most problems are simple to solve with basic tools and careful inspection. Start by checking connections at both ends of the cord, looking for obvious signs of wear or damage. Quick fixes like cleaning contacts or adjusting plug tightness often solve the problem without spending money on parts. Replace your power cord immediately if you find any safety issues like exposed wires or burn marks. With regular maintenance and proper storage, your power cord should give you years of reliable service. Remember that electrical safety comes first – when in doubt, consult a professional rather than risk injury or machine damage.
Can I use any power cord with my quilting machine?
No, you need a cord that matches your machine’s voltage and amperage requirements. Check your manual or the label on your machine for the exact specifications. Using the wrong cord can damage your machine or create safety hazards.
How often should I replace my quilting machine power cord?
Replace your power cord when you notice damage, not based on time alone. A well-maintained cord can last 10-15 years, while a heavily used or poorly stored cord might need replacement in 3-5 years. Regular inspection is more important than scheduled replacement.
Why does my power cord get hot during use?
Some warmth is normal, but excessive heat indicates a problem. Loose connections, damaged internal wires, or using a cord with insufficient amperage rating can cause overheating. Stop using the machine immediately if the cord feels too hot to touch comfortably.
Can I repair a power cord that has exposed wires?
While you can temporarily tape exposed wires for emergency use, it’s safer to replace the entire cord. Electrical tape repairs often fail over time, creating fire or shock hazards. A new power cord costs much less than repairing fire damage to your sewing room.
What’s the difference between a loose connection and a worn-out cord?
A loose connection usually affects one specific point where parts don’t fit together tightly anymore. A worn-out cord has multiple problems like internal wire breaks, cracked insulation, or damaged plugs throughout its length. Loose connections can often be tightened, while worn cords need complete replacement.