A faulty power supply in your quilting machine typically shows signs like inconsistent stitching, intermittent power loss, or complete failure to start.
You can diagnose quilting machine power supply problems by checking the power cord, testing voltage output, and examining internal fuse connections.
Signs Your Quilting Machine Power Supply Is Failing
Your quilting machine talks to you through its behavior. When the power supply starts going bad, you’ll notice these warning signs right away.
The most common symptom is inconsistent power delivery. Your machine might run perfectly one minute, then slow down or stop completely the next. This happens because the power supply can’t maintain steady voltage output.
Visible Warning Signs
Look for these red flags that scream power supply trouble:
- Machine won’t turn on at all
- Power LED light flickering or dim
- Strange humming or buzzing sounds
- Burning smell near the power cord or machine base
- Machine randomly shutting off during use
Performance Issues
Power supply problems show up in your quilting work too. You might see uneven stitch lengths or tension problems that weren’t there before.
The motor might struggle to maintain consistent speed. This creates jerky movements that mess up your quilting patterns.
Common Causes of Power Supply Failure
Power supplies don’t just die overnight. They usually fail because of specific issues that build up over time.
Age and Wear
Like any electronic component, power supplies have a lifespan. Most quilting machine power supplies last 5-10 years with regular use.
Internal components like capacitors and resistors break down from heat and electrical stress. This gradual degradation eventually leads to complete failure.
Electrical Surges
Power surges are silent killers for quilting machines. They happen when your electrical system delivers more voltage than expected.
Lightning strikes, power company issues, or even large appliances cycling on and off can cause damaging surges.
Dust and Debris
Dust acts like a blanket inside your machine. It traps heat around sensitive components and blocks cooling airflow.
Thread fragments and fabric dust are especially problematic. They create conductive paths that can short out circuits.
Environmental Factors
Humidity and temperature swings stress electronic components. Basements and attics are particularly harsh environments for quilting machines.
Tools You Need for Diagnosis
You don’t need an electrical engineering degree to check your power supply. A few basic tools will help you identify most problems.
Essential Testing Equipment
- Digital multimeter (around $25-50)
- Flashlight or headlamp
- Small screwdriver set
- Electrical contact cleaner
- Replacement fuses (if accessible)
A multimeter is your best friend here. It measures voltage, current, and resistance. You’ll use it to test whether power is reaching the right places.
Safety Equipment
Safety comes first when working with electrical components. Always have these items ready:
- Rubber-soled shoes
- Work gloves
- Safety glasses
Step-by-Step Diagnosis Process
Start with the simplest checks first. Many “power supply failures” are actually loose connections or blown fuses.
Check the Power Cord
Unplug your machine and examine the entire power cord. Look for cuts, kinks, or damage to the outer coating.
Wiggle the cord where it enters the machine. A loose connection here often causes intermittent power issues.
Pet damage is surprisingly common. Cats and dogs sometimes chew on power cords, creating dangerous shorts.
Testing Cord Continuity
Set your multimeter to continuity mode (usually marked with a sound wave symbol). Touch one probe to each prong of the plug.
You should hear a beep if the cord has a complete circuit. No beep means a broken wire inside the cord.
Examine the Power Switch
Power switches take a beating over the years. They’re mechanical components that wear out from repeated use.
Turn the switch on and off several times. It should click firmly into each position. A mushy or loose feel suggests switch failure.
Test Voltage Output
This step requires removing your machine’s cover. Check your manual for instructions, as each model is different.
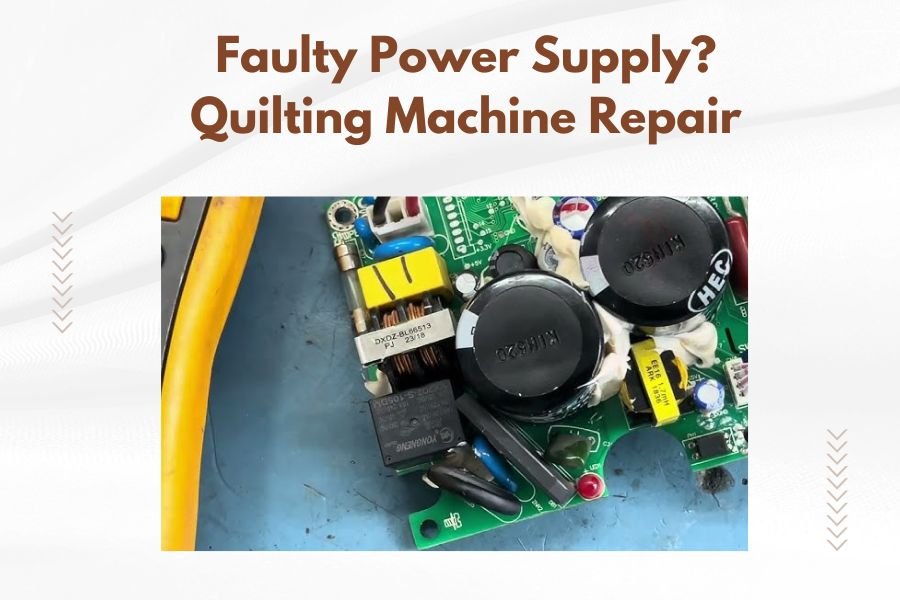
Locate the main power supply board. It’s usually a rectangular circuit board with large components.
With the machine plugged in and turned on, carefully measure voltage at the output terminals. Compare your readings to the specifications in your manual.
Voltage Reading Interpretation
| Reading | Meaning | Next Step |
|---|---|---|
| Correct voltage | Power supply working | Check other components |
| Low voltage | Failing power supply | Professional repair needed |
| No voltage | Complete failure | Replace power supply |
| Fluctuating voltage | Intermittent failure | Check connections first |
Quick Fixes You Can Try
Before calling a repair service, try these simple solutions. They fix about 30% of power supply issues according to repair technicians I’ve spoken with.
Clean Internal Connections
Turn off and unplug your machine. Remove the cover and look for loose wire connections.
Gently wiggle each connector. If any feel loose, disconnect and reconnect them. This often restores proper electrical contact.
Use electrical contact cleaner on any corroded connections. Spray a small amount on a cloth and wipe the metal contacts clean.
Check and Replace Fuses
Many quilting machines have internal fuses that protect against power surges. These small glass or ceramic tubes often blow during electrical problems.
Look for a small cylindrical component with metal caps on each end. If the glass is dark or you see a broken wire inside, the fuse is blown.
Replace with an identical fuse. The amperage rating must match exactly. Using the wrong fuse creates fire hazards.
Fuse Location Tips
Fuses hide in different places depending on your machine model. Common locations include:
- Near the power cord entry point
- On the main circuit board
- Inside a separate fuse holder
- Built into the power switch
Reset Electronic Controls
Some quilting machines have electronic control systems that can lock up when power fluctuates.
Try unplugging your machine for 10-15 minutes. This allows internal capacitors to discharge completely.
Plug back in and test. Sometimes this simple reset fixes mysterious power issues.
When Professional Repair Is Necessary
Some power supply problems require professional expertise. Don’t risk your safety or void your warranty by attempting complex electrical work.
Signs You Need Professional Help
Call a qualified repair service if you notice:
- Burnt components on circuit boards
- Melted plastic around electrical connections
- Complex wiring harness problems
- Multiple blown fuses
- Voltage readings that don’t match specifications
Finding Qualified Repair Services
Not all appliance repair shops understand quilting machines. Look for services that specifically mention sewing machine experience.
Your machine’s manufacturer often maintains a list of authorized repair centers. These technicians have proper training and access to genuine parts.
Expect to pay $100-300 for power supply repairs, depending on your machine’s complexity and the parts needed.
Repair vs. Replacement Decision
Sometimes replacement makes more financial sense than repair. If your machine is over 10 years old and needs expensive power supply work, consider upgrading.
Factor in the total cost of ownership. Older machines often need additional repairs shortly after power supply fixes.
Prevention Tips
Preventing power supply failure is much cheaper than fixing it. These simple habits extend your machine’s electrical life significantly.
Use Surge Protection
A quality surge protector is your first line of defense. Spend at least $40-60 on a unit with proper joule ratings.
Replace surge protectors every 3-5 years. Their protection capacity decreases over time, even without obvious surges.
Whole-house surge protection provides even better coverage. These devices install at your electrical panel and protect all connected equipment.
Regular Cleaning Schedule
Clean your machine’s interior every 3-6 months. Focus on areas around electrical components where dust accumulates.
Use compressed air to blow dust out of tight spaces. Keep the air stream moving to avoid condensation buildup.
Never use water or cleaning solvents near electrical components. These can cause shorts or corrosion.
Proper Storage
Store your quilting machine in a climate-controlled environment when possible. Extreme temperatures and humidity stress electrical components.
Cover your machine when not in use. This prevents dust accumulation and protects from accidental spills.
Seasonal Maintenance
Before heavy quilting seasons, inspect your machine’s electrical connections. Look for signs of wear or corrosion.
Test your surge protector using its built-in test button. Replace if the test fails or the indicator lights aren’t working.
Cost Considerations
Power supply repairs range from free (loose connection) to several hundred dollars (complete replacement).
DIY fixes like fuse replacement cost under $10. Professional diagnosis typically runs $50-100, often applied toward repair costs.
Complete power supply replacement varies by machine model. Entry-level machines might need $150 in parts and labor. High-end longarm machines can cost $500+ for power supply work.
Insurance Coverage
Homeowner’s insurance sometimes covers quilting machine damage from power surges. Keep receipts and document any electrical damage.
Some manufacturers offer extended warranties that cover power supply failures. These plans cost extra but provide peace of mind.
Conclusion
Power supply problems don’t have to end your quilting journey. Most issues give plenty of warning signs before complete failure occurs.
Start with simple checks like power cords and fuses. These quick fixes solve many problems without professional help or major expense.
Remember that prevention beats repair every time. A good surge protector and regular cleaning prevent most power supply failures.
When in doubt, consult a qualified repair technician. Your safety and your machine’s longevity are worth the professional service cost.
How do I know if my quilting machine power supply is beyond repair?
If multiple internal components show burn damage, the circuit board is cracked, or replacement parts cost more than 60% of a new machine’s price, replacement usually makes more sense than repair.
Can I use a universal power supply to replace my quilting machine’s original unit?
Universal power supplies work only if the voltage, amperage, and connector type match exactly. Using incorrect specifications can damage your machine’s motor and control systems permanently.
Why does my quilting machine power supply fail more often in summer?
Heat is the enemy of electronic components. Summer temperatures increase internal operating temperatures, which accelerates component aging and can trigger thermal protection shutdowns.
Is it safe to continue using my quilting machine if the power supply makes humming sounds?
Unusual humming often indicates failing components that could overheat or short circuit. Stop using the machine immediately and have it inspected to prevent potential fire hazards.
How long should I expect a replacement power supply to last in my quilting machine?
Quality replacement power supplies typically last 7-12 years with normal use. Factors like operating environment, usage frequency, and electrical quality in your home affect actual lifespan.