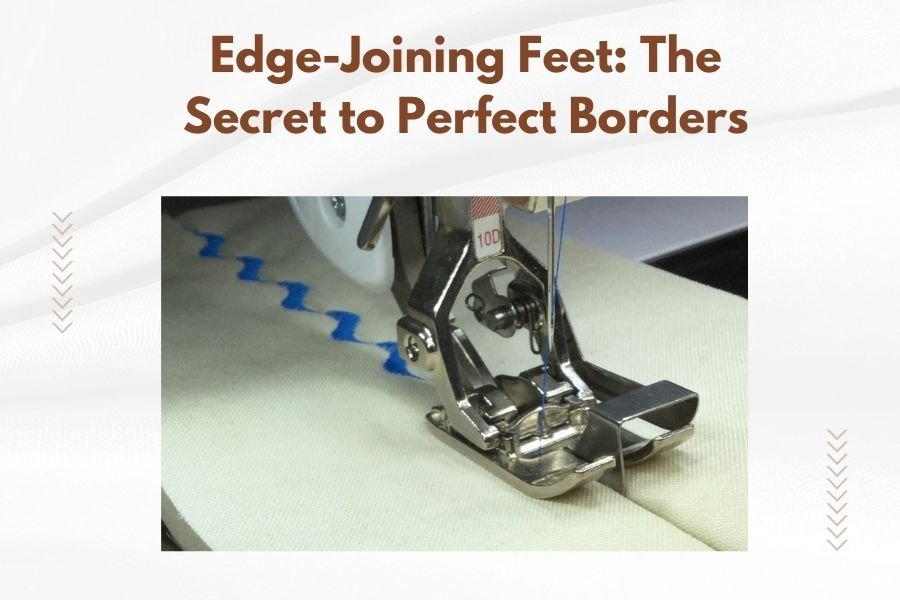
Edge-joining feet are specialized sewing machine attachments that perfectly align and join fabric edges for flawless borders on quilts and sewing projects.
These feet guide fabric pieces together with precise seam allowances, eliminating gaps and puckering that can ruin your quilt borders.
What Makes Edge-Joining Feet Different
Think of edge-joining feet as your sewing machine’s GPS for borders. While regular presser feet can handle basic seams, edge-joining feet have special guides that keep fabric edges perfectly aligned.
The magic happens in the foot’s design. Most edge-joining feet have a center guide or blade that separates two fabric pieces while keeping them aligned. This prevents one piece from shifting ahead of the other.
Key Features That Matter
When I researched different edge-joining feet, I found several features that separate good feet from great ones:
- Center guide blade for fabric separation
- Clear markings for seam allowances
- Wide opening for easy fabric feeding
- Adjustable guides for different fabric weights
Types of Edge-Joining Feet Available
Not all edge-joining feet work the same way. You’ll find different styles designed for specific tasks.
Standard Edge-Joining Feet
These are your basic workhorses. They handle most quilting cottons and medium-weight fabrics without trouble. The center guide keeps fabrics aligned while you sew.
Adjustable Edge-Joining Feet
These feet let you modify the seam allowance width. Perfect when you need consistent borders but work with different fabric weights or styles.
Why Adjustability Helps
Thick batting might need a wider seam allowance than thin fabrics. Adjustable feet handle both without changing your setup.
Clear View Edge-Joining Feet
Made from clear plastic, these feet let you see exactly where your seam is going. Great for precision work or matching patterns across seams.
How Edge-Joining Feet Work
The process is simpler than you might think. The foot does most of the work for you.
Step-by-Step Process
First, you place your two fabric pieces right sides together. The edge-joining foot’s guide separates them while keeping edges aligned.
As you sew, the foot maintains consistent pressure and alignment. This prevents the dreaded fabric shift that creates uneven borders.
The Science Behind Perfect Seams
Even pressure across the fabric prevents stretching. The guide system keeps both layers moving at the same speed. This combination creates professional-looking results.
Best Projects for Edge-Joining Feet
These feet shine in specific situations. Knowing when to use them saves time and improves results.
Quilt Borders
This is where edge-joining feet earned their reputation. Long border strips need consistent seaming, and these feet deliver every time.
Piecing Large Blocks
When you’re joining big pieces, regular feet can let fabric wander. Edge-joining feet keep everything in line.
Avoiding Common Piecing Problems
Large pieces have more room for error. The guide system prevents the small shifts that add up to big problems.
Bag Making and Home Decor
Canvas, denim, and upholstery fabrics can be tricky to align. Edge-joining feet handle these heavier materials with ease.
Choosing the Right Edge-Joining Foot
Your sewing machine brand matters here. Most manufacturers make their own versions optimized for their machines.
Brand Compatibility
From what I researched, staying within your machine’s brand family usually gives the best results. The foot design matches your machine’s feeding system.
| Machine Brand | Popular Edge-Joining Foot | Best Feature |
|---|---|---|
| Brother | Edge Joining Foot J | Clear visibility |
| Singer | Even Feed Foot | Dual feed system |
| Bernina | Edge Stitch Foot #10 | Precision guides |
Universal Options
Some third-party manufacturers make universal edge-joining feet. These can work well but might need minor adjustments for optimal performance.
Setting Up Your Edge-Joining Foot
Proper setup makes the difference between good results and great ones. Take time to get this right.
Thread Tension Considerations
Edge-joining feet can change how your machine handles thread tension. Start with your normal settings, then adjust as needed.
Testing First
Always test on fabric scraps before starting your real project. This prevents disappointing surprises on important pieces.
Seam Allowance Alignment
Most edge-joining feet work with standard quarter-inch seam allowances. Check your foot’s markings against a ruler to confirm accuracy.
Techniques for Perfect Results
Even with the right foot, technique matters. These tips help you get professional results every time.
Fabric Preparation
Press your fabrics before joining them. Wrinkles and folds can throw off the foot’s alignment system.
Speed Control
Slow and steady wins here. Rushing can overwhelm the foot’s guide system and create uneven seams.
Finding Your Rhythm
Each machine and foot combination has an optimal speed. Practice helps you find that sweet spot where everything flows smoothly.
Troubleshooting Common Issues
Even good techniques sometimes hit snags. Here’s how to handle the most common problems.
Fabric Bunching
This usually means your thread tension is too tight or you’re sewing too fast. Adjust tension first, then slow down if needed.
Uneven Seam Allowances
Check that your fabric edges are truly straight before blaming the foot. Wonky cuts create wonky seams regardless of your equipment.
Edge Trimming Solutions
A rotary cutter and ruler can fix most edge problems. Take time to trim properly before sewing.
Maintenance and Care
Edge-joining feet need regular cleaning to work properly. Lint and thread bits can interfere with the guide system.
Cleaning Schedule
Clean your foot after every major project. A soft brush removes most debris from the guides and feeding areas.
Storage Tips
Store edge-joining feet in their original cases when possible. The guides can be delicate and need protection.
Conclusion
Edge-joining feet transform border-making from a frustrating chore into a smooth, predictable process. These specialized attachments guide fabric pieces together with precision that’s hard to achieve with regular feet.
The key is matching the right foot to your machine and projects. Whether you’re making quilt borders, piecing large blocks, or working with challenging fabrics, an edge-joining foot can improve your results dramatically. Take time to practice with scraps first, and you’ll soon wonder how you ever managed without this helpful tool.
Can I use an edge-joining foot on any sewing machine?
Most edge-joining feet are designed for specific machine brands. While universal options exist, you’ll get the best results using a foot designed for your machine’s feeding system and pressure foot mounting style.
What’s the difference between an edge-joining foot and a walking foot?
Walking feet help feed multiple fabric layers evenly, while edge-joining feet focus on aligning fabric edges perfectly. You might use both together on challenging projects with thick layers and critical alignment needs.
Do edge-joining feet work with thick batting?
Most edge-joining feet handle medium-thick batting well. For very thick batting, you might need to adjust your machine’s pressure settings or choose a foot specifically designed for heavy materials.
How do I know if my seam allowance is accurate with an edge-joining foot?
Test on fabric scraps first, measuring the finished seam allowance with a ruler. Many edge-joining feet have alignment marks, but these can vary slightly between brands and models.
Can beginners use edge-joining feet successfully?
Yes, edge-joining feet actually make precise seaming easier for beginners. The built-in guides reduce the chance of alignment errors that often frustrate new quilters. Start with simple projects to build confidence before tackling complex borders.