Channel quilting on your machine creates beautiful parallel lines of stitching that add texture and dimension to your quilts. You need to set up guide bars or use specialized feet to maintain consistent spacing between your quilting lines.
This technique works best with walking foot attachments and requires steady fabric feeding to prevent puckering or uneven stitches.
What Is Channel Quilting?
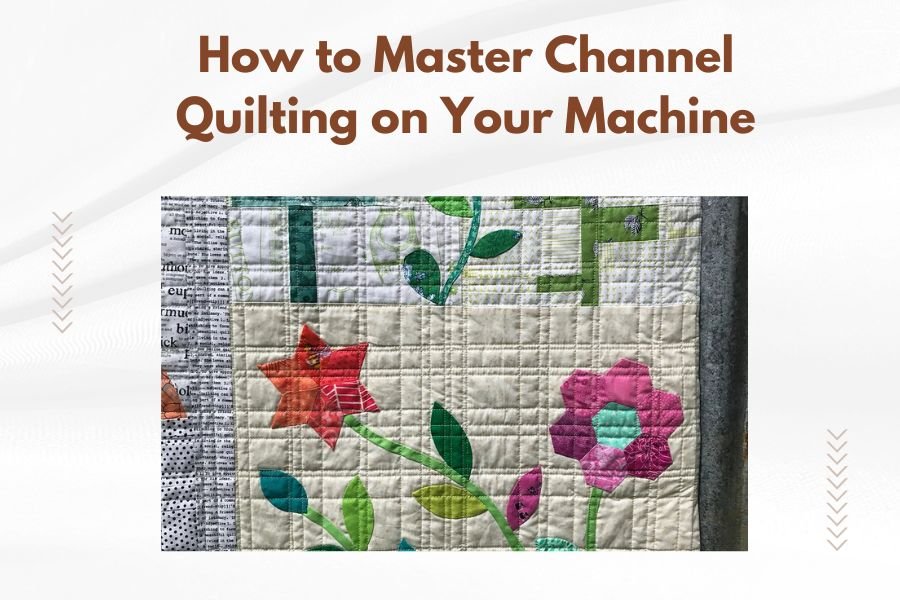
Channel quilting creates straight, parallel lines across your quilt surface. Think of it like plowing a field – you want each row to be perfectly straight and evenly spaced.
The technique gets its name because the raised areas between stitching lines form channels. These channels trap batting and create a puffy, dimensional effect that’s both beautiful and functional.
Why Choose Channel Quilting for Your Projects
Channel quilting works faster than complex free-motion patterns. You can finish large sections quickly while still creating professional-looking results.
This method also provides excellent quilt stability. The straight lines distribute tension evenly across your fabric, preventing sagging or stretching over time.
Essential Equipment for Machine Channel Quilting
You need specific tools to get clean, professional channel quilting results. Let me walk you through what actually makes a difference.
Walking Foot Attachment
A walking foot feeds your top and bottom layers at the same speed. Without it, your fabric layers shift and bunch up as you sew.
Most sewing machines come with a basic walking foot. If yours didn’t, buy one made specifically for your machine brand and model.
Guide Bars and Spacing Tools
Guide bars attach to your walking foot and help maintain consistent spacing. They come in different lengths for various channel widths.
You can also use quilting rulers or tape on your machine bed as guides. Many quilters prefer the bar method because it moves with your work.
Seam Guide Options
Magnetic seam guides work well on machines with metal throat plates. Place them at your desired distance from the needle.
Removable tape creates temporary guidelines on your machine. Use quilter’s tape that won’t leave residue when removed.
Setting Up Your Machine for Success
Proper machine setup prevents most channel quilting problems before they start. Small adjustments make huge differences in your final results.
Thread Tension Adjustments
Start with your machine’s normal tension setting. Test on fabric scraps that match your quilt sandwich thickness.
If your top thread shows on the back, reduce upper tension slightly. If bobbin thread appears on top, increase upper tension.
Stitch Length Settings
Use 8-10 stitches per inch for channel quilting. This equals about 2.5-3mm on most machines.
Longer stitches work fine for thick batting. Shorter stitches suit thin batting better and create more holding power.
Needle Selection Guidelines
Choose quilting needles in size 90/14 for most projects. These needles have slightly rounded points that slip between fabric threads.
Switch to size 100/16 needles if you’re working with thick batting or multiple fabric layers.
Preparing Your Quilt Sandwich
A well-prepared quilt sandwich makes channel quilting much easier. Poor preparation causes puckering and uneven lines.
Basting Techniques That Work
Spray basting works best for channel quilting. It holds layers firmly without pins that get in your way.
If you prefer pin basting, place pins at least 6 inches apart. Keep them away from your planned quilting lines.
Fabric Grain Considerations
Run your channels parallel to either the lengthwise or crosswise grain. Diagonal channels can cause fabric distortion.
I found that quilting parallel to the lengthwise grain often produces the straightest results with less fabric stretch.
Step-by-Step Channel Quilting Process
Follow these steps for consistent, professional channel quilting results every time.
Starting Your First Channel
Begin with a straight line across your quilt. Use your cutting mat lines or a long ruler to mark this first guideline.
Start sewing from the center and work outward. This prevents fabric bunching at the edges.
Securing Your Starting Stitches
Begin with very small stitches for the first half-inch. This locks your thread without backstitching, which can create bumps.
Alternatively, leave long thread tails and tie them off by hand later.
Maintaining Consistent Spacing
Keep your guide bar or edge guide touching the previous quilting line. Don’t push or pull the fabric – let the walking foot do the feeding.
Stop frequently to check your spacing. It’s easier to adjust early than fix crooked lines later.
| Channel Width | Best Use | Batting Type |
|---|---|---|
| 1/2 inch | Fine detail work | Thin cotton |
| 1 inch | General quilting | Medium loft |
| 2 inches | Quick coverage | Any thickness |
| 3+ inches | Modern designs | High loft |
Troubleshooting Common Problems
Even experienced quilters run into issues with channel quilting. Here’s how to fix the most common problems.
Fixing Wavy or Crooked Lines
Wavy lines usually mean you’re pulling or pushing the fabric. Let the machine feed naturally and just guide the direction.
Crooked lines often result from inconsistent seam guide placement. Double-check your guide position before starting each new line.
Preventing Fabric Puckering
Puckering happens when fabric layers move at different speeds. Make sure your walking foot is properly attached and functioning.
Also check that you’re not stretching the fabric as you sew. Support the weight of your quilt with tables on both sides of your machine.
Dealing with Skipped Stitches
Skipped stitches often indicate a dull or wrong needle. Replace your needle after every 8 hours of sewing time.
Thread quality also affects stitch formation. Use good quilting thread designed for machine use.
Advanced Channel Quilting Variations
Once you master basic channels, try these variations to add interest to your quilts.
Curved Channel Quilting
Create gentle curves by gradually adjusting your sewing direction. Keep curves shallow for best results.
Mark curved guidelines with a washable fabric marker before starting. This helps maintain smooth, consistent curves.
Echo Channel Effects
Echo quilting repeats the same line at regular intervals, like ripples in water. Start with your main design element and echo outward.
Keep echo spacing consistent – usually 1/4 to 1/2 inch apart works well for most designs.
Crosshatch Channel Patterns
Crosshatching combines perpendicular channel lines to create grid patterns. Complete all lines in one direction first, then rotate and sew the crossing lines.
Use spray starch before crosshatching to keep fabric stable during the second pass.
Finishing Techniques for Professional Results
How you finish your channel quilting affects the overall appearance and durability.
Securing Thread Ends
Pull all thread tails to one side of your quilt. Thread them through a hand needle and bury the ends in the batting layer.
Cut threads close to the fabric surface after burying them. This creates the cleanest finish.
Pressing Channel Quilted Areas
Use a pressing cloth and low heat when pressing channel quilted sections. High heat can flatten the dimensional effect you worked to create.
Press lightly from the back if you need to reduce bulk in seam areas.
Conclusion
Channel quilting transforms simple straight lines into stunning textural elements for your quilts. With the right equipment setup and steady technique, you can create professional-looking results that add both beauty and stability to your projects.
Start with simple parallel lines to build your confidence, then experiment with spacing and curved variations. Remember that consistent spacing and smooth fabric feeding are the keys to success. Your quilting skills will improve with each project as you develop a feel for guiding fabric and maintaining steady rhythm.
Can I do channel quilting without a walking foot?
You can try channel quilting with a regular presser foot, but results will be much less consistent. The walking foot prevents fabric layers from shifting, which is essential for straight, even channels. I recommend investing in a walking foot for any serious quilting work.
What’s the maximum distance I can space channels apart?
Most batting manufacturers recommend quilting lines no more than 4-6 inches apart to prevent batting from shifting over time. Check your specific batting package for exact recommendations, as some high-quality battings allow wider spacing.
How do I quilt channels on very large quilts?
Roll the excess quilt bulk and secure it with clips or safety pins to keep it manageable. Work from the center outward, and consider using extension tables to support the quilt weight. Some quilters prefer to quilt large projects in sections before joining them together.
Should I mark all my channel lines before quilting?
You only need to mark your first guideline if you’re using a guide bar or seam guide for spacing. Marking every line creates extra work and may leave visible marks on light fabrics. Use your quilting foot guides to maintain consistent spacing instead.
What thread weight works best for channel quilting?
Use 40-weight cotton or polyester thread for most channel quilting projects. This weight provides good visibility without overwhelming fine fabrics. Switch to 50-weight thread for delicate fabrics or 30-weight thread when you want more prominent quilting lines.