Burying threads in quilting means hiding thread tails by pulling them through fabric layers and trimming them close to create invisible, secure finishes.
The key to professional thread burial is using a sharp needle, leaving adequate tail length, and pulling threads through batting rather than just fabric surface.
What Does Burying Threads Really Mean?
Think of thread burial like tucking in a shirt. You want those loose ends hidden completely, not just pushed out of sight.
When you finish quilting, you get thread tails everywhere. These come from starting and stopping your stitching. If you leave them hanging, your quilt looks messy and unprofessional.
Thread burial pulls those tails into the quilt sandwich. The batting acts like a sponge that grabs and holds the threads. This keeps everything secure without visible knots or loose ends.
Essential Tools for Perfect Thread Burial
The Right Needles Make All the Difference
Sharp needles work best for thread burial. I found that quilting needles or sharp embroidery needles give you the most control.
Size matters too. Use a needle that matches your thread weight. Heavy threads need bigger needles. Fine threads work with smaller sizes.
Thread Scissors vs Regular Scissors
Small, sharp thread scissors let you trim close to the fabric without cutting into your quilt top. Those big fabric scissors are too clunky for this delicate work.
Needle Threader for Tiny Spaces
Threading a needle with quilting thread can be tricky. A needle threader saves time and frustration, especially when you have dozens of threads to bury.
Step-by-Step Thread Burial Technique
Step 1: Leave Proper Tail Length
Always leave thread tails at least 4-6 inches long when you start or stop quilting. Short tails are impossible to work with later.
Long tails give you room to grip the thread and maneuver your needle. You can always trim excess later.
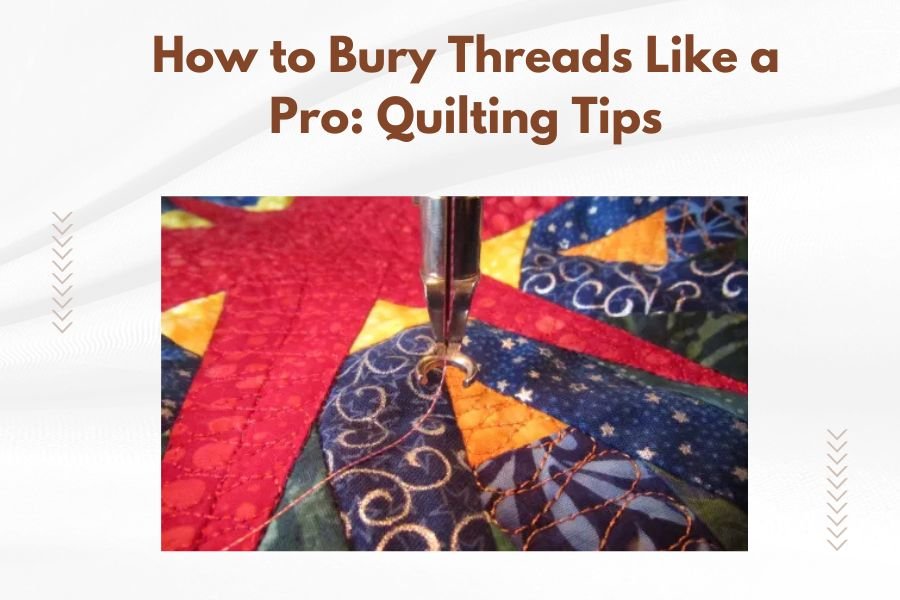
Step 2: Thread Your Needle
Put one thread tail through your needle eye. You only work with one thread at a time, even if you were quilting with doubled thread.
Leave the other threads unthreaded for now. This keeps things simple and prevents tangling.
Step 3: Find Your Entry Point
Look at where your quilting line ends. Insert your needle about 1/4 inch away from that point, going through the quilt top only.
Push the needle through the batting but not through the backing fabric. This creates a tunnel inside your quilt sandwich.
Step 4: Create the Burial Tunnel
Run your needle through the batting for about 1-2 inches. Then bring it back up through the quilt top.
Pull the thread gently until the tail disappears into the quilt. The batting grabs the thread and holds it secure.
Step 5: Trim the Excess
Cut the remaining thread close to the fabric surface. Be careful not to cut the quilt top itself.
A tiny bit of thread might pop back up. That’s normal. Just push it back down with your fingernail.
Different Methods for Different Quilting Styles
Hand Quilting Thread Burial
Hand quilting creates thicker thread lines. You need to be extra careful about bulk when burying these threads.
Make your burial tunnels slightly longer – about 2 inches instead of 1 inch. This spreads out the thread bulk better.
Dealing with Quilting Hoops
If your quilt is still in a hoop, you can bury threads right away. Just work around the hoop edges carefully.
Machine Quilting Considerations
Machine quilting often uses finer threads that bury more easily. But you might have more thread tails to deal with.
Some quilters prefer to bury threads as they go. Others wait until the end. Both approaches work fine.
Free Motion Quilting Challenges
Free motion quilting creates threads in random spots. Keep track of where your tails are so you don’t miss any during burial.
Common Thread Burial Mistakes
Not Leaving Enough Tail
Short thread tails are your enemy. You can’t grip them properly, and they’re hard to thread through needles.
When in doubt, leave tails longer rather than shorter. Extra length helps you work more smoothly.
Going Through All Layers
Many beginners push their needle all the way through to the backing fabric. This can create visible marks or pulls on the quilt back.
Stay in the batting layer. It provides plenty of grip without affecting the quilt’s appearance.
Making Burial Tunnels Too Short
Short tunnels don’t hold threads securely. The threads can work their way back out over time.
Aim for 1-2 inch tunnels minimum. Thicker threads need longer tunnels for security.
Advanced Thread Management Tips
Color Matching Strategy
Match your thread color to the fabric where you’re burying it. This makes any tiny visible bits blend in better.
If you used contrasting thread for quilting, consider switching to matching thread just for the burial process.
Bulk Distribution Technique
When you have multiple thread tails in one area, spread them out. Don’t bury all threads in the same spot.
This prevents lumpy areas and keeps your quilt lying flat. Think of it like planting a garden – you need proper spacing.
Working with Metallic Threads
Metallic threads can be slippery and hard to bury securely. Make your burial tunnels extra long and give an gentle tug to test the hold.
Troubleshooting Thread Burial Problems
When Threads Keep Popping Out
If buried threads work their way back to the surface, your tunnels might be too short or too loose.
Re-bury these threads with longer tunnels. Sometimes batting that’s too loose won’t grip threads well enough.
Handling Thick Thread Bundles
When you have several thick threads together, separate them and bury each one individually. Trying to bury thick bundles creates obvious lumps.
This takes more time but gives much better results. Your finished quilt will lie flatter and look more professional.
Dealing with Frayed Thread Ends
Frayed threads don’t thread through needles easily and can create bulk in your burial tunnels.
Trim frayed ends with sharp scissors before you start the burial process. A clean cut makes everything easier.
| Thread Type | Tunnel Length | Special Notes |
|---|---|---|
| Cotton quilting thread | 1-2 inches | Standard technique works well |
| Polyester thread | 1.5-2 inches | Slightly slippery, needs good grip |
| Metallic thread | 2-2.5 inches | Very slippery, test hold carefully |
| Thick decorative thread | 2-3 inches | Bury individually, avoid bunching |
Time-Saving Thread Burial Strategies
Bury as You Go Method
Some quilters bury threads immediately after finishing each quilting section. This prevents a huge cleanup job at the end.
This method works well if you’re hand quilting or doing controlled machine quilting. It might slow you down during free motion work.
Batch Processing Approach
Other quilters prefer to finish all their quilting first, then bury all threads in one session.
This can be faster overall, but you need to keep track of all your thread tails. Mark areas with lots of tails so you don’t miss any.
Using Thread Clips for Organization
Small clips can help you group thread tails by area or color. This makes the burial process more organized and efficient.
Professional Finishing Touches
Final Inspection Process
After burying all threads, examine your quilt carefully in good light. Look for any missed tails or threads that have popped back out.
Run your hands over the quilt surface. You should feel smooth, even texture without lumps or bumps from buried threads.
Press or Don’t Press?
Some quilters like to press areas where they’ve buried lots of threads. Others worry that heat might affect the buried threads.
Light pressing is usually fine, but test on a sample first if you’re worried. Most modern threads handle pressing well.
Conclusion
Mastering thread burial takes practice, but it’s the difference between amateur and professional-looking quilts. Remember to leave long tails, use sharp needles, and create adequate burial tunnels in the batting layer.
The key is patience and consistency. Every thread you bury properly adds to your quilt’s finished appearance. With these techniques, you’ll handle thread burial like a seasoned quilter.
Start with simple projects to build your skills. Soon, thread burial will become second nature, and your quilts will have that polished, professional finish you’re after.
How long should thread tails be for easy burial?
Leave thread tails 4-6 inches long minimum. This gives you enough length to grip comfortably and thread through your needle without struggling. Longer tails are easier to work with than shorter ones.
Can I bury threads through the backing fabric?
No, avoid going through the backing fabric as this can create visible marks or pulls. Stay within the batting layer where threads get good grip without affecting the quilt’s back appearance.
What’s the best needle size for thread burial?
Use quilting needles or sharp embroidery needles that match your thread weight. Size 8-10 works well for most cotton quilting threads, while heavier decorative threads need larger needles.
Why do my buried threads keep popping back out?
Short burial tunnels or loose batting usually cause this problem. Make your tunnels 1-2 inches long minimum, and ensure you’re pulling threads firmly into the batting before trimming the excess.
Should I bury threads as I quilt or wait until the end?
Both methods work fine and depend on your quilting style. Burying as you go prevents overwhelming cleanup but might slow your quilting rhythm. Batch burial at the end is faster but requires tracking all thread locations.