The best work lights for quilting machines include adjustable LED clamp lights, gooseneck desk lamps, and under-cabinet LED strips that provide bright, even illumination without shadows.
You need at least 1000-2000 lumens of daylight-balanced lighting positioned at multiple angles around your quilting workspace to reduce eye strain and see true fabric colors.
Why Proper Lighting Makes All the Difference
Poor lighting can turn your favorite hobby into a frustrating experience. You squint at your stitches. Your neck hurts from leaning forward. Colors look wrong under yellow bulbs.
Good lighting changes everything. You see every detail clearly. Your posture stays relaxed. Thread colors match perfectly.
What Happens When You Don’t Have Enough Light
Your eyes work overtime in dim conditions. This leads to headaches and fatigue faster than you’d expect.
Shadows hide important details like seam alignment and stitch quality. You might not catch mistakes until it’s too late to fix them easily.
The Science Behind Better Quilting Light
Research shows that proper task lighting reduces eye strain by up to 50% during detailed work (American Optometric Association). Your eyes need consistent, bright light to focus comfortably for long periods.
Color temperature also matters. Daylight-balanced bulbs (5000K-6500K) show fabric colors most accurately compared to warm yellow lights.
Types of Work Lights That Actually Work
Not all lights work well for quilting. You need specific features that regular room lighting can’t provide.
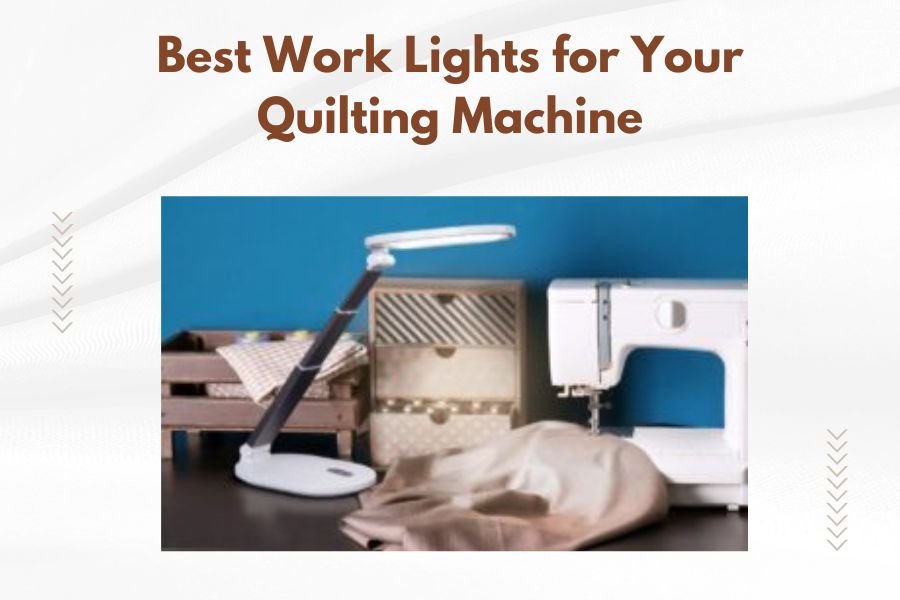
LED Clamp Lights
These attach directly to your quilting machine or table. They stay put when you move fabric around.
Look for models with adjustable necks. You can position them exactly where shadows fall on your work surface.
Best Features to Look For
- Flexible gooseneck that holds its position
- At least 12 watts of LED power
- Clamp opens wide enough for your table edge
- Daylight color temperature (5000K or higher)
Under-Cabinet LED Strips
These mount under shelves or cabinets above your quilting area. They provide broad, even coverage without taking up workspace.
Installation is usually simple with adhesive backing or small screws. Many plug into regular outlets.
Why Strip Lights Work So Well
They eliminate the single bright spot that causes harsh shadows. Instead, you get smooth, even light across your entire work area.
Strip lights also stay out of your way. No adjusting or moving them when you reposition your quilt.
Adjustable Desk Lamps
Traditional desk lamps work if they have the right features. You need more power and flexibility than basic office lamps provide.
Architect-style lamps with long arms work particularly well. They reach across large quilting surfaces without getting in your way.
How Much Light Do You Actually Need
This isn’t about buying the brightest light possible. Too much light creates glare and new problems.
The Lumen Sweet Spot
I found that most quilting experts recommend 1000-2000 lumens total for your workspace. This equals about 2-3 good LED bulbs worth of light.
Spread this light around rather than using one super bright source. Multiple moderate lights work better than one intense beam.
Testing Your Current Setup
Hold your hand 12 inches above your quilting surface. Do you see a sharp, dark shadow? You need more or better-positioned lighting.
Try reading small print on your thread spools. If you have to squint or move closer to the light, you need brighter illumination.
Positioning Your Lights for Best Results
Even the best lights won’t help if you put them in the wrong spots. Light placement matters as much as brightness.
The Triangle Rule
Position lights in a triangle around your workspace. This eliminates most shadows and provides even coverage.
One light from the left, one from the right, and one from above or behind works well for most setups.
Avoid These Common Mistakes
Don’t put lights directly overhead unless you have multiple sources. Single overhead lights create shadows under your hands and the quilting machine itself.
Avoid lights that shine directly in your eyes when you look up. This causes glare and makes everything else look dim by comparison.
Height and Angle Tips
Position clamp lights 18-24 inches above your work surface. This provides good coverage without creating harsh shadows.
Angle lights at about 45 degrees to your work surface. This minimizes glare while maximizing useful illumination.
Features That Matter Most
Shopping for quilting lights means looking past basic brightness specs. Several features make some lights much more useful than others.
Color Temperature Control
Some LED lights let you adjust color temperature from warm to cool. This helps you match different lighting conditions throughout the day.
Daylight settings work best for color matching. Warmer settings feel more comfortable for evening quilting sessions.
Dimming Controls
Adjustable brightness lets you fine-tune lighting for different projects. Dark fabrics need more light than light-colored materials.
Dimming also helps during long quilting sessions. You can reduce intensity to prevent eye fatigue without losing visibility.
Power and Cord Length
Check that power cords reach your outlets without extension cords. Tangled cords create tripping hazards in sewing rooms.
USB-powered lights work well if your quilting machine has USB ports. This reduces cord clutter around your workspace.
Budget-Friendly Options That Still Work
You don’t need expensive specialty quilting lights to get good results. Several affordable options provide excellent illumination.
Hardware Store Solutions
Basic LED work lights from hardware stores often work as well as craft-specific models. Look for daylight-balanced versions with good reviews.
Shop light fixtures designed for garages provide lots of even light at reasonable prices. They mount easily under shelves or cabinets.
What to Spend Your Money On
Invest in adjustability over raw brightness. A moderate light you can position perfectly beats a super bright light in the wrong spot.
Quality clamps and mounting hardware matter more than you might think. Cheap mounts fail when you need them most.
| Light Type | Price Range | Best For | Installation |
|---|---|---|---|
| LED Clamp Light | $25-$60 | Direct task lighting | Clamp to table edge |
| Under-Cabinet Strip | $20-$50 | Even area lighting | Adhesive or screws |
| Adjustable Desk Lamp | $40-$100 | Flexible positioning | Table or floor stand |
| Track Lighting | $60-$150 | Multiple angles | Ceiling mount |
Setting Up Your Lighting System
Start with one good light and add more as needed. This helps you understand what works in your specific space.
Test Before You Commit
Many online retailers accept returns on lighting that doesn’t work out. Buy one light first, test it thoroughly, then add similar models if it works well.
Quilt for at least an hour under new lighting before deciding. Eye comfort becomes apparent during longer work sessions.
Fine-Tuning Your Setup
Take photos of your quilting under different lighting setups. Sometimes problems show up in pictures that you don’t notice while working.
Ask someone else to look at your workspace lighting. Fresh eyes often spot shadows and glare you’ve gotten used to.
Maintenance and Longevity
Good quilting lights should last for years with minimal maintenance. LED bulbs typically run 25,000+ hours before dimming noticeably.
Keeping Your Lights Clean
Dust reduces light output more than you’d expect. Wipe light surfaces monthly with a dry cloth to maintain brightness.
Fabric lint accumulates on lights near cutting and piecing areas. Gentle brushing removes lint without damaging LED arrays.
When to Replace or Upgrade
Replace lights when they dim to less than 80% of original brightness. This usually takes several years with quality LED fixtures.
Flickering or color shifts indicate failing electronics. Don’t try to repair these yourself – replacement is usually more cost-effective.
Conclusion
Great quilting lights transform your crafting experience from squinting and straining to comfortable, accurate work. You need at least 1000-2000 lumens of daylight-balanced light positioned to eliminate shadows around your machine and work surface.
Start with a quality LED clamp light or under-cabinet strip, then add more lighting as your needs become clear. The investment pays off quickly in reduced eye strain, better color matching, and more enjoyable quilting sessions that can last as long as your creativity flows.
What’s the difference between warm and cool LED lights for quilting?
Cool LEDs (5000K-6500K) show fabric colors most accurately and provide better contrast for detailed work. Warm LEDs (2700K-3000K) feel more comfortable for evening quilting but may make colors appear different than they will in daylight.
Can I use regular desk lamps for quilting machine work?
Regular desk lamps often lack sufficient brightness and adjustability for quilting. You need at least 1000 lumens and flexible positioning to eliminate shadows around your machine. Most standard desk lamps provide only 400-800 lumens.
How many lights do I need for a standard quilting setup?
Most quilters find that 2-3 strategically placed lights work better than one bright source. This typically includes one clamp light for direct task lighting and one or two area lights to eliminate shadows from different angles.
Do expensive quilting-specific lights work better than generic LED work lights?
Not necessarily. Many hardware store LED work lights provide excellent illumination at lower prices. Focus on brightness, color temperature, and adjustability rather than craft-specific branding when comparing options.
Will better lighting actually improve my quilting accuracy?
Yes, proper lighting helps you see seam alignment, thread tension issues, and color matching problems that dim lighting obscures. Research shows that adequate task lighting can reduce detail work errors by up to 30% while decreasing eye strain.