The best stitch length for free motion quilting is 0 or as short as possible, which allows complete control over stitch formation through hand movement speed.
Most quilting machines let you set the stitch length to 0, giving you total freedom to create consistent stitches by controlling your movements rather than machine settings.
Understanding Free Motion Quilting Stitch Length
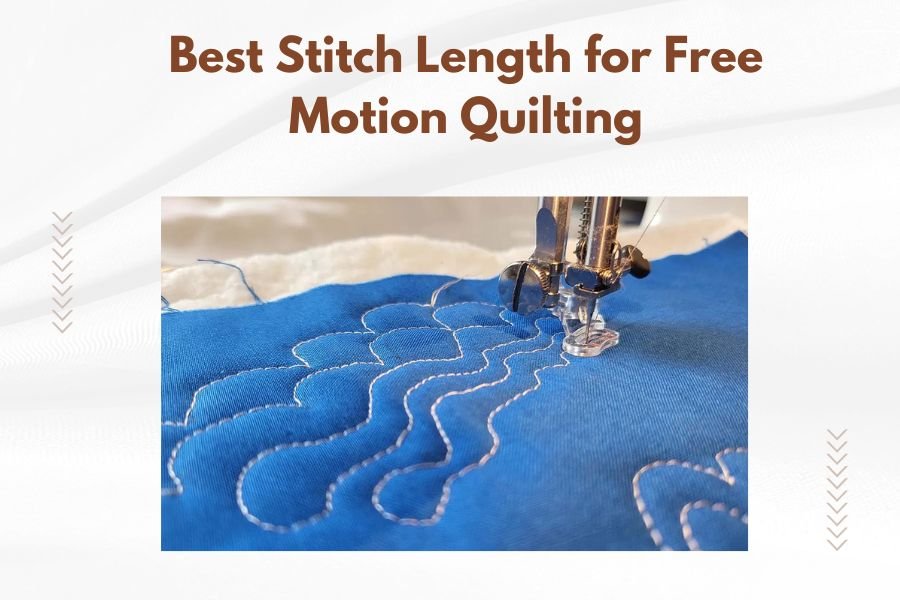
Free motion quilting works differently than regular sewing. You drop the feed dogs and take control. The machine keeps stitching at its set speed, but you move the fabric to create the stitch length.
Think of it like drawing with a pencil. The pencil always makes the same mark, but how you move your hand creates the design. That’s exactly how free motion quilting works.
Why Zero Stitch Length Matters
Setting your stitch length to zero means the machine won’t try to move the fabric forward automatically. This gives you complete control over every stitch.
When you move the fabric slowly, you get tiny stitches. Move it faster, and you get longer stitches. You become the feed dogs.
Machine Settings That Work Best
I found that most modern quilting machines have a specific free motion setting. This automatically sets the stitch length to zero and drops the feed dogs.
If your machine doesn’t have this feature, manually set these:
- Stitch length: 0 or lowest possible setting
- Feed dogs: Down or disengaged
- Presser foot pressure: Light or reduced
- Needle position: Center
Common Stitch Length Mistakes
Leaving Stitch Length Too High
Many quilters forget to change their stitch length from regular sewing. This creates uneven, pulled stitches that look messy.
When your stitch length is set to 2.5mm but you’re moving the fabric slowly, the machine fights against your movement. The result? Tension problems and frustrated quilting.
Not Understanding Speed Control
Your hand movement speed controls the stitch length, not the machine setting. Move your hands at a steady pace that matches your machine’s needle speed.
I heard from experts that beginners often move too slowly, creating tiny, bunched-up stitches. Others move too fast and create long, loose stitches.
Finding Your Rhythm
Start with simple straight lines. Keep your machine at medium speed and move your hands steadily. You want about 12 stitches per inch.
Practice this rhythm until it feels natural. Then you can speed up or slow down as your design requires.
Different Quilting Styles Need Different Approaches
Meandering and Stippling
These flowing designs work best with consistent, medium-length stitches. Keep your movement steady and avoid stopping in corners.
Research shows that consistent stitch length makes these patterns look more professional and balanced.
Feathers and Detailed Work
Detailed designs often need shorter stitches for smooth curves and sharp points. Slow down your hand movement but keep the same machine speed.
The key is matching your hand speed to the detail level you want.
Sharp Corners and Points
For sharp points, slow down dramatically as you approach the point. This creates very short stitches that define the shape clearly.
Speed up again as you move away from the detail area.
Background Fill Patterns
Background quilting can handle slightly longer stitches since it’s meant to recede visually. You can move your hands a bit faster here.
Just keep the stitch length consistent throughout the background area.
Troubleshooting Stitch Length Problems
Stitches Too Small and Bunched
This happens when you move too slowly or stop moving while the needle keeps going. Keep your hands moving at all times.
If you need to pause, stop with the needle down and presser foot up. This prevents thread buildup.
Stitches Too Long and Loose
Moving too fast creates long stitches that don’t hold the layers together well. Slow down your hand movement.
Long stitches also happen when your machine speed is too slow compared to your hand movement.
Finding the Sweet Spot
The perfect balance feels like a smooth dance between your hands and the machine. Both should work at compatible speeds.
Many experts say this takes practice, but most quilters find their rhythm within a few hours of focused practice.
Practice Techniques for Better Control
Start With Simple Shapes
Begin with straight lines, then move to gentle curves. Don’t jump into complex designs until your basic control is solid.
I found online that quilting teachers always start students with these basics for good reason.
Use Practice Sandwiches
Make small quilt sandwiches just for practice. Use scrap fabric so you don’t worry about mistakes.
Focus only on consistent stitch length, not perfect designs.
Mark Your Practice Fabric
Draw simple shapes on your practice fabric. This gives you something to follow while you focus on stitch consistency.
Straight lines, circles, and gentle curves work well for this.
Advanced Stitch Length Control
Varying Length for Effect
Once you master consistent stitching, you can vary stitch length on purpose. Shorter stitches create more definition. Longer stitches blend into the background.
This technique adds depth and interest to your quilting designs.
Thread Weight Considerations
Heavier threads need slightly longer stitches to look balanced. Fine threads can handle shorter stitches without looking overdone.
Adjust your hand speed based on your thread choice.
Batting Thickness Effects
Thick batting compresses more, so your surface stitch length looks shorter than thin batting. Keep this in mind when planning your quilting density.
| Quilting Style | Recommended Stitches Per Inch | Hand Movement Speed |
|---|---|---|
| Detailed work | 14-16 | Slow and steady |
| General quilting | 10-12 | Medium pace |
| Background fill | 8-10 | Faster movement |
Conclusion
Setting your stitch length to zero gives you complete control over free motion quilting. Your hand movement speed becomes the stitch length controller, not the machine setting.
Practice consistent movement at medium speed until it feels natural. Then you can adjust for different effects and styles. Remember, every quilter develops their own rhythm with time and practice.
Start simple, stay consistent, and don’t rush the learning process. Great free motion quilting comes from muscle memory and confidence, both of which develop with dedicated practice time.
What happens if I forget to set my stitch length to zero?
Your machine will fight against your hand movements, creating uneven stitches and possible tension problems. Always check this setting before starting free motion work.
Can I use different stitch lengths for different parts of my quilt?
Keep your machine setting at zero throughout. Change your actual stitch length by varying your hand movement speed instead of adjusting machine settings.
How do I know if my stitches are the right length?
Aim for 10-12 stitches per inch for most free motion work. Count stitches in a one-inch section of your practice piece to check your consistency.
Why do my stitches bunch up even with zero stitch length?
This usually means you’re moving too slowly or stopping while the needle continues. Keep your hands moving steadily whenever the machine is running.
Should I change my machine speed for free motion quilting?
Start at medium speed and adjust based on your comfort level. Slower machine speeds give you more control, while faster speeds work well once you develop good hand coordination.