The best quilting machine vacuum tools for lint include small handheld vacuums, compressed air cans, and specialized quilting brushes that remove debris from feed dogs and bobbin areas.
Quality lint removal tools keep your quilting machine running smoothly and prevent thread breaks, uneven stitches, and mechanical problems caused by fabric buildup.
Why Lint Removal Matters for Your Quilting Machine
Ever wonder why your quilting machine starts acting up after a big project? Lint is usually the culprit. When you quilt, tiny fabric fibers break off and settle into every corner of your machine.
These little troublemakers clog up moving parts. They wrap around your tension discs. They pile up under your feed dogs like dust bunnies under your bed.
I found that most quilting machine problems trace back to poor cleaning habits. Your machine needs regular lint removal just like your car needs oil changes.
What Happens When Lint Builds Up
Lint creates a domino effect of problems. First, your thread starts breaking more often. Then your stitches become uneven.
Next, your machine starts making weird noises. Finally, moving parts can seize up completely.
From what I read, repair shops see this pattern constantly. A simple cleaning routine prevents most expensive repairs.
Top Handheld Vacuum Tools for Quilters
Small handheld vacuums work best for quilting machines. They give you control and reach tight spaces that full-size vacuums can’t access.
Battery-Powered Mini Vacuums
These lightweight tools are perfect for quick cleanups. Look for models with multiple attachments and strong suction power.
The best ones have brush attachments that loosen stubborn lint. Some come with narrow nozzles that fit into bobbin cases perfectly.
Features to Look For
- Rechargeable battery with good runtime
- Multiple nozzle attachments
- Easy-empty dust container
- Lightweight design for comfortable use
- Quiet operation for home use
USB-Powered Keyboard Vacuums
These tiny vacuums plug into your computer or phone charger. They’re super portable and surprisingly effective for lint removal.
Many quilters keep these at their sewing stations. You can clean as you work without stopping for big cleanup sessions.
Best Uses for Mini USB Vacuums
Use these for quick touch-ups between projects. They work great for removing loose threads from your work surface too.
The small size lets you get into bobbin areas easily. Just remember they have less power than battery models.
Compressed Air Solutions
Compressed air blows lint out of places vacuums can’t reach. Think of it as the opposite approach – pushing debris out instead of sucking it in.
Canned Air Products
These are the same products used for cleaning computer keyboards. They work perfectly for quilting machines too.
Hold the can upright and use short bursts. Long sprays can freeze delicate machine parts.
Safety Tips for Compressed Air
Never turn cans upside down during use. The liquid inside can damage your machine’s finish.
Always blow debris away from internal mechanisms. You don’t want to push lint deeper into your machine.
Electric Air Compressors
Small electric compressors give you unlimited air power. They’re more expensive but pay off if you quilt frequently.
Look for models with adjustable pressure settings. Too much pressure can damage sensitive parts.
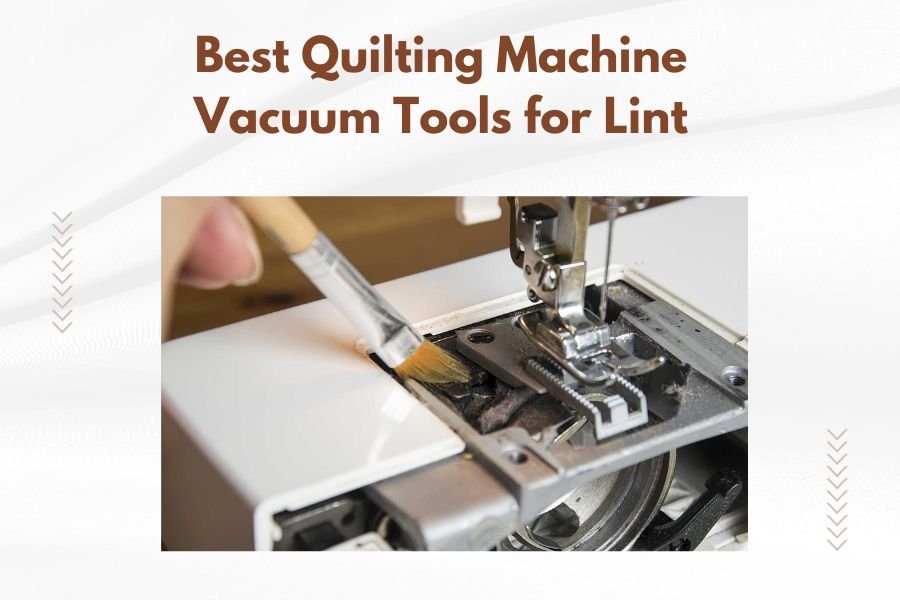
Specialized Quilting Brushes and Tools
Sometimes you need to physically scrub lint away. Brushes work where vacuums and air can’t reach.
Lint Brushes
These small brushes have stiff bristles that grab onto lint. Many quilting supply companies make them specifically for sewing machines.
The best ones have angled heads that fit around feed dogs. Some have telescoping handles for hard-to-reach spots.
Brush Materials That Work Best
Natural bristles work better than synthetic ones. They create static that attracts lint naturally.
Metal bristles cut through stubborn buildup but can scratch delicate parts. Use them carefully on painted surfaces.
Cleaning Swabs and Picks
Cotton swabs dipped in sewing machine oil remove sticky lint buildup. Plastic picks scrape hardened debris from corners.
I came across quilters who make their own tools from toothpicks and cotton balls. Sometimes simple solutions work best.
Professional-Grade Vacuum Systems
Serious quilters invest in dedicated vacuum systems. These mount near your machine and run continuously while you work.
Inline Vacuum Attachments
These attach directly to your quilting machine. They pull lint away as it forms, preventing buildup completely.
Installation requires some mechanical skill. Most quilters hire technicians to set them up properly.
Benefits of Inline Systems
- Continuous lint removal while quilting
- Reduced cleaning time between projects
- Better air quality in your sewing room
- Extended machine life
- Fewer thread breaks and tension problems
Shop Vacuum Adaptations
Some quilters modify small shop vacuums for lint removal. They add flexible hoses and custom attachments.
This DIY approach costs less than professional systems. You get powerful suction with standard vacuum attachments.
Cleaning Frequency and Techniques
How often should you clean depends on your quilting habits. Heavy users need daily maintenance. Weekend quilters can clean weekly.
Daily Cleaning Routine
Spend two minutes cleaning your machine after each quilting session. Remove the bobbin case and vacuum out loose lint.
Wipe down the feed dogs with a lint brush. Check the tension discs for thread buildup.
Quick Daily Steps
- Turn off and unplug your machine
- Remove the bobbin case
- Vacuum the bobbin area
- Brush the feed dogs clean
- Wipe the needle area
Weekly Deep Cleaning
Once a week, do a thorough cleaning of all accessible areas. Remove the throat plate and clean underneath.
Use compressed air to blow out internal passages. Oil moving parts according to your manual.
Cost Comparison of Lint Removal Tools
| Tool Type | Price Range | Best For | Maintenance |
|---|---|---|---|
| USB Mini Vacuum | $15-30 | Light use quilters | Empty container |
| Handheld Battery Vacuum | $40-80 | Regular quilters | Charge battery, empty container |
| Compressed Air Cans | $5-10 each | Occasional deep cleaning | Replace when empty |
| Electric Air Compressor | $60-150 | Heavy quilters | Drain tank, check filters |
| Professional Inline System | $200-500 | Production quilters | Replace filters, check hoses |
Common Mistakes to Avoid
Many quilters make cleaning mistakes that damage their machines. Learn from their errors to protect your investment.
Using Too Much Force
Aggressive scrubbing can scratch delicate surfaces. Gentle pressure with the right tools works better than brute force.
I found online that most cleaning damage comes from impatience. Take your time and let the tools do the work.
Gentle Cleaning Approach
Start with the least aggressive method first. Try vacuuming before using brushes. Use brushes before picks or scrapers.
Work in good light so you can see what you’re doing. Rushed cleaning in poor light causes accidents.
Forgetting to Unplug
Always turn off and unplug your machine before cleaning. Accidentally hitting the foot pedal while cleaning can cause injury.
Some machines have electrical sensors that activate when you touch certain parts. Unplugging prevents surprise startups.
Building Your Lint Removal Kit
Start with basic tools and add specialized equipment as needed. You don’t need everything at once.
Beginner’s Essential Kit
- Small handheld vacuum with attachments
- Can of compressed air
- Lint brush designed for sewing machines
- Cotton swabs
- Small flashlight
Advanced Quilter Additions
Add these tools as your quilting grows more serious:
- Electric air compressor with pressure control
- Professional-grade lint brushes
- Magnetic parts tray for screws
- Specialized cleaning solutions
- Inline vacuum system
Conclusion
Keeping your quilting machine free of lint doesn’t require expensive tools or complicated procedures. A simple handheld vacuum, some compressed air, and a good lint brush handle most cleaning needs.
The key is consistency. Daily touch-ups prevent major buildups that require deep cleaning. Your machine will thank you with smoother operation, fewer problems, and longer life.
Start with basic tools and develop a routine that fits your quilting schedule. Clean equipment makes quilting more enjoyable and your finished projects look better too.
What’s the best budget option for quilting machine lint removal?
A USB-powered mini vacuum ($15-25) combined with canned compressed air ($5-8) gives you effective cleaning for under $35. This combination handles both suction and blowing methods.
How often should I deep clean my quilting machine’s lint buildup?
Deep clean weekly if you quilt daily, monthly for weekend quilters. Watch for thread breaks or unusual noises – these signal when cleaning is overdue regardless of your schedule.
Can regular household vacuums damage quilting machines?
Full-size vacuums create too much suction and can pull delicate parts out of alignment. Stick to small handheld units designed for electronics or buy quilting-specific vacuum tools.
Which areas collect the most lint in quilting machines?
The bobbin case area, feed dogs, and tension discs trap the most lint. Focus your cleaning efforts on these spots first, then work outward to less critical areas.
Do different fabric types create more lint than others?
Cotton and flannel produce the most lint, especially when new. Synthetic fabrics create less debris but can leave sticky residue. Adjust your cleaning frequency based on your fabric choices.