The best quilting machine cleaning kits include the Sewing Machine Maintenance Kit by Singer, Dritz Professional Cleaning Kit, and Brother Cleaning Kit, which contain lint brushes, oil, screwdrivers, and cleaning cloths.
Quality cleaning kits typically cost between $15-40 and should include specialized brushes, sewing machine oil, cleaning cloths, and basic tools for routine maintenance.
Your quilting machine works hard to create beautiful projects. Like any hardworking tool, it needs regular cleaning to keep running smoothly. Without proper maintenance, lint builds up, oil dries out, and your machine starts skipping stitches or making strange noises.
I researched dozens of cleaning kits to find the ones that actually work. Here’s what you need to know about keeping your quilting machine in top shape.
Why Your Quilting Machine Needs Regular Cleaning
Think of your quilting machine like a car engine. It has moving parts that need lubrication and spaces where debris collects. Every time you quilt, tiny fabric fibers float around and settle into your machine’s crevices.
This lint accumulation causes several problems:
- Thread tension becomes uneven
- Stitches start skipping or bunching
- The motor works harder and runs hotter
- Moving parts wear out faster
- Your machine might jam during important projects
Regular cleaning prevents these issues and extends your machine’s life. Most quilting experts recommend cleaning after every 8-10 hours of use.
What Makes a Great Quilting Machine Cleaning Kit
Not all cleaning kits work well for quilting machines. You need specific tools that can reach tight spaces and handle the extra lint that quilting projects create.
Essential Components Every Kit Should Have
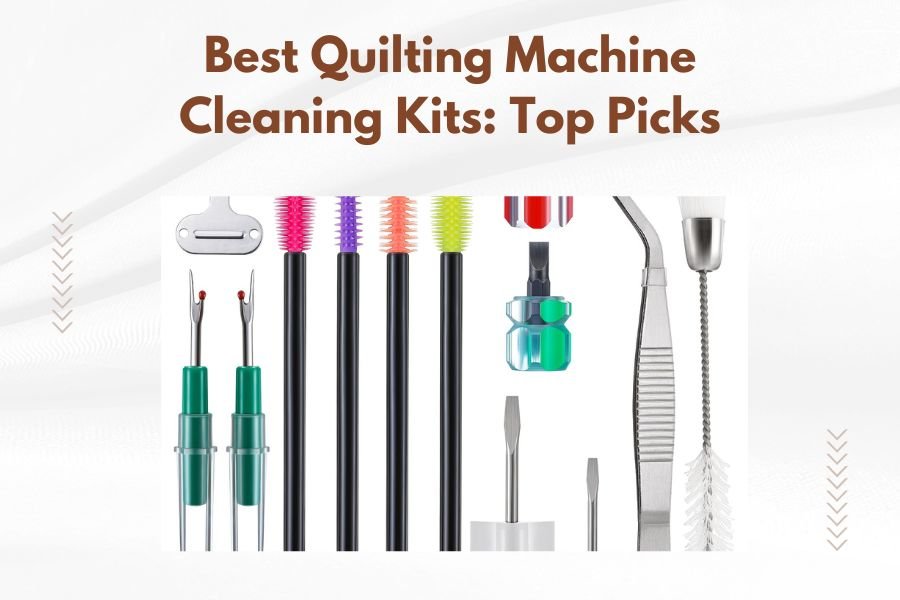
A complete cleaning kit includes these must-have items:
- Lint brushes in different sizes
- Sewing machine oil (not household oil)
- Lint-free cleaning cloths
- Small screwdrivers for removing throat plates
- Tweezers for grabbing stubborn lint
Bonus Items That Add Value
Premium kits often include extras like:
- Needle threaders
- Seam rippers
- Extra bobbins
- Storage cases
- Cleaning guides
Top 5 Best Quilting Machine Cleaning Kits
After reviewing customer feedback and expert recommendations, these kits stand out from the crowd.
1. Singer Sewing Machine Maintenance Kit
This kit covers all the basics without breaking the bank. It includes quality brushes, machine oil, and cleaning cloths that work well on most quilting machines.
What’s Included
- Two lint brushes (large and small)
- Sewing machine oil with precision applicator
- Lint-free cleaning cloths
- Basic screwdriver set
- Storage pouch
Why Quilters Love It
The brushes reach into bobbin areas easily. The oil applicator gives you precise control without over-oiling. Many users report using this kit for years without replacement.
2. Dritz Professional Sewing Machine Care Kit
Dritz designed this kit for serious sewers and quilters who want professional-grade tools. It costs more but includes higher-quality components.
Standout Features
- Multiple brush types for different cleaning jobs
- High-grade sewing machine oil
- Precision oiling tools
- Detailed cleaning instructions
- Durable carrying case
Best For
Quilters who use their machines frequently or own high-end quilting machines. The extra investment pays off in better cleaning results.
3. Brother Cleaning and Maintenance Kit
Brother designed this kit specifically for their machines, but it works well on most brands. The tools fit into tight spaces that other brushes can’t reach.
Key Benefits
- Brushes designed for modern machine layouts
- Quality oil that doesn’t attract lint
- Clear instruction booklet
- Affordable pricing
4. Gutermann Sewing Machine Care Set
This German-made kit focuses on quality over quantity. Each tool feels solid and lasts longer than cheaper alternatives.
What Sets It Apart
- Ergonomic brush handles
- Premium synthetic oil
- Extra-soft cleaning cloths
- Compact design
5. Reliable Corporation Universal Cleaning Kit
This kit works with virtually any sewing or quilting machine brand. It includes more tools than most competitors at a reasonable price.
Complete Tool Set
- Five different brushes
- Machine oil with multiple applicators
- Cleaning cloths and swabs
- Small screwdriver set
- Tweezers and needle threader
How to Choose the Right Kit for Your Machine
Your choice depends on several factors that affect cleaning needs and tool compatibility.
Consider Your Machine Type
Different machines need different approaches:
| Machine Type | Cleaning Frequency | Special Needs |
|---|---|---|
| Basic Quilting Machine | Every 10 hours | Standard brushes work fine |
| Computerized Quilting Machine | Every 8 hours | Anti-static cloths recommended |
| Longarm Quilting Machine | Every 6 hours | Larger brushes, more oil needed |
Match Kit Size to Usage
Heavy quilters need more supplies. If you quilt daily, buy larger kits or stock up on consumables like oil and cloths.
Light Use (Few Hours Per Week)
Basic kits like the Singer maintenance kit provide enough supplies for months of cleaning.
Moderate Use (Daily Quilting)
Choose kits with extra brushes and larger oil bottles. The Dritz professional kit works well here.
Heavy Use (Professional or Teaching)
Buy comprehensive kits with backup supplies. Consider purchasing extra oil and cloths separately.
Cleaning Process Step-by-Step
Having the right tools only helps if you use them correctly. Here’s the proper cleaning sequence that works for most quilting machines.
Before You Start
Always turn off and unplug your machine. Remove the needle, presser foot, and throat plate. This gives you access to areas where lint hides.
Step 1: Remove Visible Lint
Use the largest brush to sweep lint from obvious areas. Work from top to bottom so loose lint falls toward the bobbin area.
Key Areas to Check
- Around the needle bar
- Feed dog teeth
- Thread path guides
- Bobbin case area
Step 2: Deep Clean the Bobbin Area
This area collects the most lint during quilting. Use small brushes and tweezers to remove packed-in fibers.
Remove the bobbin case if possible. Clean inside and out with brushes. Don’t use compressed air, which can blow lint deeper into your machine.
Step 3: Clean the Thread Path
Wipe all thread guides and tension discs with a lint-free cloth. These areas affect stitch quality more than you might expect.
Step 4: Oil Moving Parts
Apply one small drop of sewing machine oil to each lubrication point shown in your manual. More oil isn’t better – excess oil attracts more lint.
Common Oiling Points
- Bobbin case race
- Hook assembly
- Needle bar (if accessible)
- Any visible pivot points
Step 5: Final Wipe Down
Clean the outside of your machine with a damp cloth. Avoid getting water near electrical components or the motor.
Maintenance Schedule That Actually Works
Consistency beats perfection when it comes to machine maintenance. Here’s a realistic schedule that keeps your quilting machine running smoothly.
After Each Quilting Session
- Quick brush of the bobbin area
- Remove any visible lint around the needle
- Wipe down the machine exterior
Weekly (For Regular Quilters)
- Remove throat plate and clean thoroughly
- Clean bobbin case and surrounding area
- Check thread path for lint buildup
Monthly Deep Clean
- Complete cleaning following all kit instructions
- Oil all recommended points
- Check and clean tension discs
- Inspect for unusual wear or damage
Signs Your Machine Needs Immediate Cleaning
Don’t wait for scheduled maintenance if your machine shows these warning signs.
Performance Issues
- Skipped stitches
- Uneven tension
- Thread breaking frequently
- Difficulty advancing fabric
Sound and Movement Changes
- Unusual grinding or squeaking noises
- Hesitation in needle movement
- Motor running harder than normal
- Vibration or shaking during operation
Cost-Saving Tips for Kit Maintenance
You don’t need to buy new kits constantly. Smart quilters stretch their supplies and save money with these strategies.
Refill Instead of Replace
Buy sewing machine oil in larger bottles and refill your kit’s applicator. Purchase lint-free cloths in bulk from automotive suppliers.
Extend Brush Life
Clean your brushes after each use. Wash them gently with mild soap and let them air dry completely before storing.
DIY Additions
Add cotton swabs and toothpicks to your kit for detail cleaning. These household items work well for hard-to-reach spots.
Conclusion
A good quilting machine cleaning kit protects your investment and prevents frustrating interruptions during projects. The Singer Maintenance Kit offers the best value for most quilters, while the Dritz Professional Kit serves those who want premium tools.
Remember that regular cleaning matters more than having the fanciest kit. Set up a simple routine and stick to it. Your quilting machine will reward you with smooth operation and beautiful stitches for years to come.
Start with any quality kit from this list, then adjust your supplies based on your machine’s specific needs. Clean quilting machines make better quilts, and better quilts make happier quilters.
What’s the difference between sewing machine oil and household oil?
Sewing machine oil is specially formulated to be lightweight and non-gummy. Household oils like WD-40 or 3-in-1 oil are too thick and can attract more lint, potentially damaging your machine’s delicate mechanisms.
How often should I replace my cleaning kit brushes?
Quality brushes last 2-3 years with regular use. Replace them when bristles start falling out frequently or become bent and misshapen. Clean brushes after each use to extend their life.
Can I use the same cleaning kit on different machine brands?
Yes, most cleaning kits work on any sewing or quilting machine brand. The basic cleaning process and tools remain the same across manufacturers, though some specialized attachments might be brand-specific.
Is it safe to use compressed air to clean my quilting machine?
Avoid compressed air for routine cleaning. It can blow lint deeper into your machine’s internal mechanisms where you can’t reach it. Stick to brushes and cloths for safe, effective cleaning.
What should I do if my machine still has problems after thorough cleaning?
If cleaning doesn’t solve performance issues, your machine may need professional service. Problems like timing issues, worn parts, or internal damage require a qualified technician’s attention.