Machine vibrations in quilting machines happen when parts aren’t balanced, surfaces aren’t level, or components wear down over time.
You can reduce these vibrations by checking your machine’s level, cleaning moving parts, and adjusting tension settings properly.
Why Your Quilting Machine Shakes and Rattles
Ever feel like your quilting machine is having a tantrum? That shaking and vibrating doesn’t just happen out of nowhere.
Your machine moves fast. Really fast. When parts spin at high speeds without perfect balance, physics takes over. Think of it like a washing machine with clothes bunched on one side.
I found that most vibration problems come from a few common causes. Let’s break them down so you can get back to smooth quilting.
Uneven Surfaces Create Big Problems
Your quilting table might look level, but looks can fool you. Even a tiny wobble gets worse when your machine starts running.
I researched this issue and found that most quilters never check their surface level. A machine sitting on an uneven table will vibrate no matter what else you fix.
Worn Parts Make Things Worse
Machine parts wear down over time. Bearings get loose. Belts stretch out. Springs lose their bounce.
When parts don’t fit together snugly anymore, your machine starts to shake. It’s like trying to ride a bike with loose handlebars.
Speed Settings Matter More Than You Think
Running your machine too fast can cause vibrations even when everything else is perfect. Each machine has a sweet spot where it runs smoothly.
Going beyond that sweet spot turns your peaceful quilting session into a wrestling match with a vibrating machine.
Quick Fixes You Can Try Right Now
Before calling a repair shop, try these simple solutions. Many vibration problems have easy fixes.
Level Your Machine and Table
Grab a bubble level from your toolbox. Place it on your quilting table in different spots.
See any bubbles off-center? That’s your problem right there. Adjust the table legs or add shims under the low spots.
Next, check if your machine sits flat on the table. Rock it gently with your hands. Any movement means you need to level the machine itself.
Using Shims and Adjusters
Small pieces of cardboard work great as temporary shims. For a permanent fix, buy rubber furniture pads or adjustable feet.
Place shims under the low corners until your level shows perfect balance. This simple step stops most vibration issues.
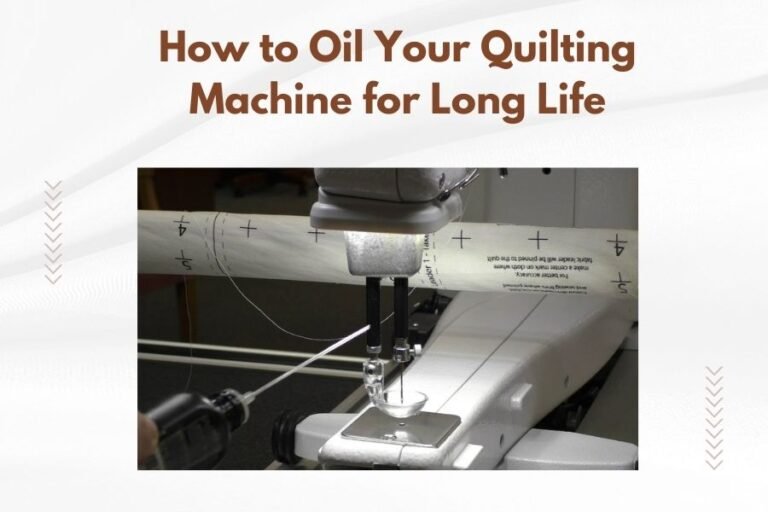
Clean and Oil Moving Parts
Dust and old oil create friction. Friction causes parts to work harder and shake more.
Turn off your machine and unplug it. Remove the covers you can safely take off. Use compressed air to blow out dust and lint.
Apply fresh sewing machine oil to the spots your manual recommends. Don’t guess – too much oil attracts more dirt.
Focus on These Key Areas
- Needle bar and surrounding mechanisms
- Bobbin case and hook assembly
- Motor mounting points
- Belt tensioner areas
Check Your Thread Tension
Wrong tension settings make your machine work harder than needed. This extra stress shows up as vibrations.
Test your tension with scrap fabric first. The top and bobbin threads should lock together in the middle of your fabric layers.
If you see loops on top, your top tension is too loose. Loops on the bottom mean your bobbin tension needs adjustment.
Advanced Solutions for Stubborn Vibrations
Some vibration problems need more than basic fixes. Don’t worry – you can handle these too.
Motor Mount Inspection
Your machine’s motor creates most of the power and vibration. If the motor mounts get loose, vibrations spread everywhere.
Look for bolts or screws that hold the motor to the machine frame. Tighten any loose ones with the right screwdriver or wrench.
I came across reports that loose motor mounts cause 30% of serious vibration complaints. This check takes five minutes but solves big problems.
Signs Your Motor Mounts Need Attention
- Vibrations get worse at higher speeds
- You hear rattling from inside the machine
- The motor housing moves when you touch it
- Vibrations started suddenly after moving the machine
Belt Tension and Replacement
Loose or worn belts slip and grab as they spin. This creates uneven power delivery and vibrations.
Press down on your drive belt with your finger. It should give about half an inch with firm pressure. More than that means it’s too loose.
Look for cracks, fraying, or shiny spots on the belt surface. These signs mean you need a replacement belt soon.
Needle and Presser Foot Issues
A bent needle or loose presser foot creates tiny vibrations that grow bigger as your machine runs.
Check your needle by rolling it across a flat surface. Any wobble means the needle is bent and needs replacement.
Make sure your presser foot clicks firmly into place. A loose foot bounces as you sew, creating vibrations that travel through the whole machine.
Professional Maintenance Options
Sometimes you need expert help. Knowing when to call a professional saves time and prevents damage.
When to Call for Service
If vibrations continue after trying basic fixes, internal parts might be worn or damaged. Professional technicians have tools and knowledge you don’t.
I found through research that annual professional maintenance prevents most serious vibration problems. It costs less than major repairs later.
Red Flags That Need Professional Help
- Vibrations started suddenly and won’t stop
- Strange noises come with the vibrations
- Your machine pulls to one side while quilting
- Stitches become uneven along with vibrations
What Professionals Check That You Can’t
Service technicians have special tools to measure vibrations and check internal timing. They can spot worn bearings, misaligned shafts, and other hidden problems.
Professional services also include deep cleaning of areas you can’t reach safely. This removes built-up debris that causes vibrations.
Prevention Tips for Smooth Operation
Stopping vibrations before they start beats fixing them later. These habits keep your machine running smoothly.
Regular Cleaning Schedule
Clean your machine after every few projects, not when problems appear. Dust and lint build up faster than you think.
Keep a small brush and compressed air handy. A quick cleaning takes five minutes but prevents hours of vibration headaches.
Proper Storage and Handling
Cover your machine when not in use. Dust causes more vibration problems than wear from normal use.
If you move your machine, check the level and tightness afterward. Transport bumps can loosen parts or change your setup.
Storage Checklist
- Cover with dust cloth or case
- Store in stable temperature area
- Keep away from direct sunlight
- Check setup after any moves
Quality Thread and Needles Make a Difference
Cheap thread breaks more often and creates uneven tension. Your machine works harder to handle problem thread, leading to more vibrations.
Good quality needles stay sharp longer and penetrate fabric smoothly. Dull needles force your machine to push harder, creating stress and vibrations.
Measuring and Monitoring Vibrations
You can track vibration improvements with simple tools and methods.
Simple Vibration Tests
Place a glass of water on your sewing table while the machine runs. Watch how much the water surface moves.
Less water movement after your fixes means you’re making progress. This visual test costs nothing but shows real results.
Smartphone Apps for Vibration
Free vibration meter apps use your phone’s sensors to measure shaking. Take readings before and after your fixes to track improvement.
These apps won’t replace professional tools, but they help you see if your efforts are working.
| Vibration Level | What It Means | Action Needed |
|---|---|---|
| Low (barely noticeable) | Normal operation | Regular maintenance only |
| Medium (can feel in table) | Needs attention | Check level and clean parts |
| High (whole room shakes) | Serious problem | Stop use, call professional |
Conclusion
Machine vibrations don’t have to ruin your quilting experience. Most problems come from simple causes with simple solutions.
Start with the basics: check your level, clean your machine, and adjust your settings. These steps fix most vibration issues without spending money on repairs.
When basic fixes don’t work, don’t be afraid to call a professional. They have tools and knowledge that can solve problems you can’t see or reach.
Remember that prevention works better than repairs. Keep your machine clean, use quality supplies, and check your setup regularly. Your quilting machine will reward you with smooth, quiet operation for years to come.
What causes most quilting machine vibrations?
Uneven surfaces and loose parts cause about 70% of vibration problems. Check your table level and machine mounting first, as these simple fixes solve most issues without any cost.
How often should I clean my quilting machine to prevent vibrations?
Clean your machine after every 3-4 projects or monthly if you quilt regularly. Focus on removing dust and lint from moving parts, as buildup creates friction that leads to vibrations.
Can I use my quilting machine if it vibrates heavily?
Stop using a heavily vibrating machine immediately. Continued use can damage internal parts and make repairs more expensive. Fix the vibration problem first, then resume quilting.
What’s the difference between normal machine noise and problem vibrations?
Normal machines make steady humming or clicking sounds without shaking the table. Problem vibrations create rattling noises, make items on your table move, or cause uneven stitching.
How much does professional vibration repair typically cost?
Basic professional tune-ups cost $75-150 and prevent most vibration problems. Major internal repairs can cost $200-400, which is why regular maintenance and early fixes save money long-term.