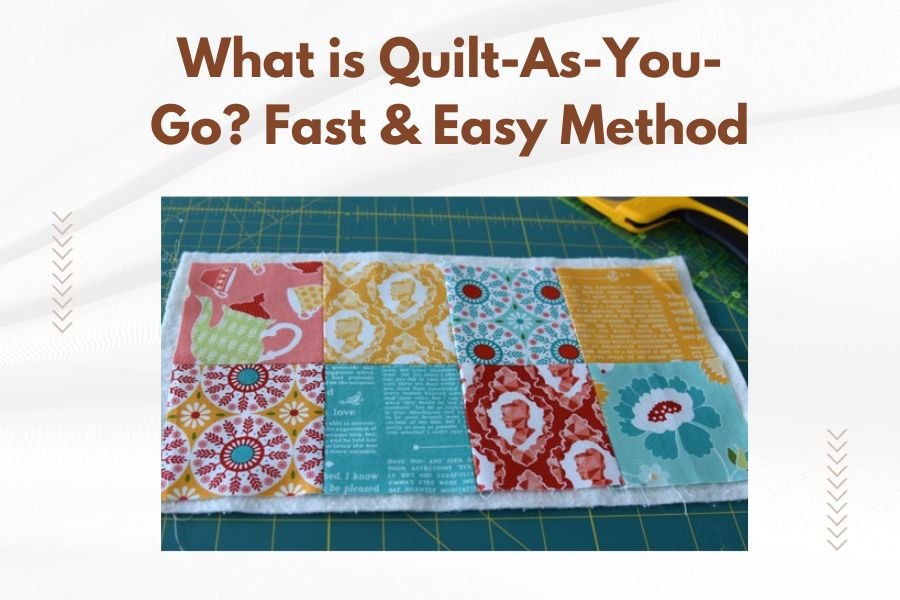
Quilt-as-you-go is a technique where you layer, baste, and quilt individual blocks or sections before joining them together into a finished quilt.
This method lets you work on smaller, manageable pieces instead of wrestling with a large quilt sandwich on your machine.
Why Quilt-As-You-Go Changes Everything
Ever tried quilting a king-size quilt on your home sewing machine? It’s like trying to fold a fitted sheet while wearing oven mitts. The quilt bunches up. Your machine groans. You end up with sore shoulders and uneven stitches.
That’s where quilt-as-you-go saves the day. Instead of quilting one massive piece, you work on bite-sized blocks. Each block gets its own batting and backing. You quilt them separately, then connect them later.
What Makes This Method So Popular
I found that quilters love this technique for good reason. You can finish projects faster. Your workspace stays tidy. Plus, you avoid the wrestling match that comes with large quilts.
The blocks are portable too. Toss a few in your bag for quilting on the go. Work on them during lunch breaks or while watching TV.
Perfect for Beginners
New to quilting? This method feels less overwhelming. You practice your quilting skills on small sections. Make a mistake? You only need to fix one block, not an entire quilt.
Each finished block gives you a sense of progress. That keeps you motivated to continue.
Machine-Friendly Approach
Your sewing machine will thank you. Small blocks move through the machine smoothly. No more fighting with bulk or running out of throat space.
Even basic machines handle quilt-as-you-go blocks well. You don’t need expensive long-arm equipment.
Essential Supplies You’ll Need
Gather these basics before you start:
- Fabric for quilt tops (cut into blocks)
- Batting pieces (slightly larger than each block)
- Backing fabric pieces (also slightly larger)
- Safety pins or spray basting adhesive
- Rotary cutter and cutting mat
- Quilting ruler
- Walking foot for your machine
You probably have most of these already. The walking foot helps feed layers evenly through your machine. It prevents puckering and shifting.
Choosing the Right Batting
Low-loft batting works best for this method. High-loft creates too much bulk when you join blocks together. Cotton or cotton-poly blends give good results.
Cut batting pieces about one inch larger than your blocks on all sides. This gives you wiggle room for adjustments.
Batting Thickness Guidelines
| Batting Type | Best Use | Thickness |
|---|---|---|
| Cotton | Traditional look | Low-loft |
| Poly-blend | Easy care | Low to medium |
| Wool | Warm quilts | Medium-loft |
Step-by-Step Process
Ready to try it? Here’s how to make your first quilt-as-you-go block.
Step 1: Prepare Your Sandwich
Lay your backing fabric face-down on a flat surface. Place batting on top. Add your quilt block face-up on the batting.
The backing and batting should extend beyond your block edges. This extra fabric gets trimmed later.
Basting Options
Pin-baste with safety pins every 4-6 inches. Or use spray basting adhesive for a quicker setup. Some quilters prefer hand-basting with large stitches around the edges.
Avoid placing pins where you plan to quilt. They’ll get in your way.
Step 2: Quilt the Block
Attach your walking foot. Start quilting from the center and work outward. This prevents fabric from shifting and bunching.
Keep quilting designs simple at first. Straight lines or gentle curves work well. Save complex patterns for when you’re more comfortable.
Quilting Pattern Ideas
Try these beginner-friendly patterns:
- Straight lines spaced 1-2 inches apart
- Echo quilting around applique shapes
- Simple crosshatch grids
- Gentle wavy lines
- Follow-the-seam quilting
Step 3: Square Up Your Block
Trim excess batting and backing to match your quilt top. Use a square ruler to ensure accurate measurements.
All blocks should measure exactly the same size. This makes joining them much easier later.
Measuring Tips
Check block size after quilting. Quilting sometimes shrinks blocks slightly. Trim all blocks to the smallest finished size for consistency.
Mark measurements lightly with a fabric pencil. Double-check before cutting.
Joining Methods That Work
Once your blocks are quilted, you need to connect them. Several methods work well.
Sashing Strip Method
This popular approach uses fabric strips between blocks. Cut sashing strips the same width as your finished blocks.
Layer batting between sashing strips. Sew blocks to sashing, then quilt the sashing areas. This creates a uniform look across your quilt.
Sashing Benefits
Sashing hides minor size differences between blocks. It also adds design interest and can make small blocks appear larger.
Choose sashing colors that complement your blocks. Neutral colors work with most fabric combinations.
Joining Strip Technique
For this method, you sew blocks directly together with special joining strips. The strips have batting sandwiched inside.
This creates continuous quilting across block seams. The finished quilt looks like traditional quilting methods.
Creating Joining Strips
Cut fabric strips 2.5 inches wide. Layer with thin batting. These strips connect your finished blocks edge-to-edge.
The joining strips get quilted as you attach blocks. Plan your quilting design to flow across seams.
Common Mistakes to Avoid
Learn from others’ experiences. These mistakes happen often with quilt-as-you-go projects.
Inconsistent Block Sizes
Measure twice, cut once. Blocks that vary in size create headaches during assembly. Use the same ruler and cutting mat for all blocks.
Check your seam allowances too. Inconsistent seams lead to different-sized finished blocks.
Size-Checking Strategy
Make a template from cardboard or template plastic. Use it to check each block before and after quilting. This catches problems early.
Over-Quilting Small Blocks
Dense quilting can distort small blocks. Keep quilting balanced across the entire block. Avoid heavy quilting in just one area.
Test quilting density on sample blocks first. This shows how much quilting your fabric and batting can handle.
Quilting Density Guidelines
Space quilting lines 1-3 inches apart for most projects. Closer spacing works for wall hangings. Wider spacing suits bed quilts that need drape.
Forgetting Seam Allowances
Plan for seam allowances when cutting backing and batting. They need extra fabric beyond the finished block size.
Add at least 1 inch to each side for trimming and adjustments. It’s easier to trim excess than add fabric later.
Design Ideas That Shine
Certain quilt patterns work better with quilt-as-you-go methods. Choose designs that suit the technique.
Block-Based Patterns
Nine-patch blocks work perfectly. So do log cabin and star blocks. Each unit quilts independently, then connects beautifully.
Sampler quilts also excel with this method. Try different quilting patterns on each block. This creates visual interest and skill-building practice.
Size Considerations
Blocks between 8-12 inches work well for beginners. Smaller blocks finish quickly but require more joining. Larger blocks take longer but need fewer connections.
Modern Quilt Designs
Bold, geometric patterns suit quilt-as-you-go perfectly. Think large squares, rectangles, or simple shapes with striking fabrics.
Negative space designs work well too. Quilt heavily in some areas and lightly in others for texture contrast.
Color Planning
Plan your color layout before cutting blocks. Take photos of fabric arrangements to test different combinations.
Remember that quilting thread adds another design element. Choose thread colors that enhance your overall plan.
Troubleshooting Common Issues
Problems happen. Here’s how to fix the most common ones.
Blocks Won’t Lay Flat
This usually means uneven tension or inconsistent quilting. Check that your machine tension settings match your thread and fabric.
Sometimes backing fabric pulls tighter than the top. Use gentler quilting patterns or adjust your machine’s pressure foot settings.
Quick Fixes
Steam-press blocks lightly after quilting. Use a pressing cloth to protect fabrics. Don’t press too hard or you’ll flatten the batting.
Visible Joining Lines
If seams show obviously between blocks, try different joining methods. Sashing strips can camouflage uneven connections.
Match thread colors to your fabrics. Use slightly darker thread rather than lighter for less obvious stitching lines.
Blending Techniques
Quilt over joining seams with decorative stitching. This integrates separate blocks into a cohesive design.
Time-Saving Tips
Speed up your process with these practical shortcuts.
Assembly Line Approach
Cut all blocks at once. Prepare all sandwiches together. Then quilt all blocks in sequence. This reduces setup time between steps.
Keep your machine set up with the same thread and settings. Switching back and forth wastes time.
Batch Processing Benefits
You get into a rhythm with repetitive tasks. Muscle memory develops, making each step faster and more accurate.
Smart Storage Solutions
Use clear storage boxes for cut pieces. Label boxes by color or block type. This prevents mix-ups and saves hunting time.
Keep finished blocks flat in a dedicated container. Avoid folding them before assembly.
Organization Systems
Take photos of your planned layout. Print copies to reference during assembly. This prevents confusion about block placement.
Advanced Techniques
Ready to try more challenging approaches? These methods add sophistication to your quilts.
Curved Seam Connections
Connect blocks with gentle curves instead of straight lines. This creates flowing, organic-looking quilts.
Cut gentle S-curves or wave patterns for joining edges. Pin carefully and sew slowly for smooth results.
Curve Cutting Tips
Make cardboard templates for consistent curves. Trace templates onto fabric with removable markers. Cut just outside marked lines for seam allowances.
Dimensional Elements
Add prairie points, piping, or folded elements at block intersections. These create texture and visual interest.
Insert dimensional elements during the joining process. Plan their placement before you start assembly.
Texture Considerations
Balance dimensional elements across your quilt. Too many in one area creates visual weight imbalances.
Finishing Your Quilt
Your quilt top is assembled and quilted. Now add finishing touches.
Binding Considerations
Quilt-as-you-go edges can be thicker than traditional quilts. Cut binding strips slightly wider to accommodate extra layers.
Use a walking foot when attaching binding. This feeds multiple layers evenly and prevents puckering.
Binding Width Guidelines
Cut binding strips 2.5-3 inches wide for quilt-as-you-go projects. Traditional quilts often use 2.25-inch strips.
Edge Finishing Options
Traditional binding works well. Or try pillowcase finishing where you sew front and back together, then turn right-side out.
Faced edges create a modern look. The facing fabric shows on the back but creates clean front edges.
Conclusion
Quilt-as-you-go opens up new possibilities for your quilting projects. You can tackle larger quilts with confidence. Your sewing machine handles the workload better. Plus, you’ll finish projects faster than traditional methods.
Start with simple blocks and basic quilting patterns. Build your skills gradually. Soon you’ll wonder why you ever struggled with massive quilt sandwiches.
This technique works especially well for busy quilters. You can pick up a block and quilt for 20 minutes, then set it aside. No need to clear huge workspace or set up complicated quilting frames.
Give quilt-as-you-go a try on your next project. Your back will thank you, and your quilts will turn out beautifully.
What’s the main disadvantage of quilt-as-you-go?
The main disadvantage is that quilting designs can’t flow continuously across the entire quilt surface. You’re limited to individual block designs, and some quilters find the joining seams visible despite careful construction.
Can I use quilt-as-you-go for curved pieced blocks?
Yes, curved blocks work well with this method. Drunkard’s path, wedding ring, and other curved designs actually become easier to quilt when worked in sections. The smaller size gives you better control over curved seams.
How do I prevent batting from showing through light fabrics?
Choose white or natural batting for light-colored quilts. Avoid dark batting under light fabrics. Also, ensure your batting doesn’t extend beyond seam allowances where it might peek through joining areas.
What’s the best way to store partially completed quilt-as-you-go blocks?
Store finished blocks flat in boxes or on spare bed surfaces. Avoid folding quilted blocks, as this can create permanent creases in the batting. Stack blocks with tissue paper or cotton fabric between layers to prevent snagging.
Can I combine different batting types in one quilt-as-you-go project?
It’s better to stick with one batting type throughout your project. Different battings have different shrinkage rates, loft, and drape characteristics. Mixing types can cause blocks to pucker or lay unevenly when joined together.